2002 ford focus parking brake cable replacement. Focus SVT sticking parking brake / rear brake caliper replacement 2019-04-08
Ford Focus Parking Brake
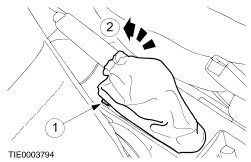
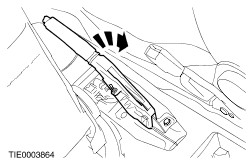
I had to move the lever with a screwdriver to get the left side to fit. E-brake cable clip replaced with revised clip. Apply high-temperature grease to the contact points of the backing plate, brake shoe adjusting bolt and return tension spring, but ensure there is no grease on the friction surface of the shoe lining and disc. You can slide it between the axle and the top of the assembly as shown in this picture. Lot's of internet posters claim there should be a hole with a rubber plug.
How to Replace Emergency Brakes in a Toyota Highlander

What is a Core Charge? Adjustment Now you can expand the adjuster outward by rotating the notched wheel away from you. Then I put the adjuster part together to keep them spread at the right location before I put the retainer pins and springs back on. The first thing to remove is the hold down springs. Then I put the top spring on. Remove the retainer from the parking brake control. Asked the dealer to… A: All vehicle manufacturers are using a set of internationally-standard symbols.
How to Replace Emergency Brakes in a Toyota Highlander
This picture is looking up at the assembly. Retracting Spring Now you should have all the parts removed and a bare assembly site to put everything back together on. Remedy: clean and adjust rear brakes. In addition, a consumer can bring suit under the Magnuson - Moss Warranty Act. Please see below for the full text of our warranty policies.
Ford Focus Brake Problems and Repair Descriptions at TrueDelta
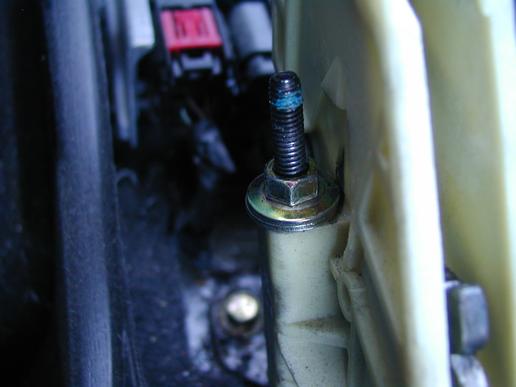
If your car was anything like mine it is filled with the stuff. Bare Site All the parts Edit by Turdle. The original, factory-installed right rear brake caliper bracket had stripped bolt, needed new bracket and bolt. Drive the vehicle in reverse and press the brake a few times to clear the lines and set the calipers. Is there a special procedure to be followed? This will help keep the pads together when you are getting that last retracting spring on.
Focus SVT sticking parking brake / rear brake caliper replacement
No traction control, no abs. The original, factory-installed right rear brake caliper bracket had stripped bolt, needed new bracket and bolt. If your car was anything like mine it is filled with the stuff. Install the new parking brake shoe by reversing the removal procedure. I had to move the lever with a screwdriver to get the left side to fit. Needed to replace brakes lines and calipers. Hold the piece on the back of the brake shield with one hand then use a pair of needle nose to get them back in.
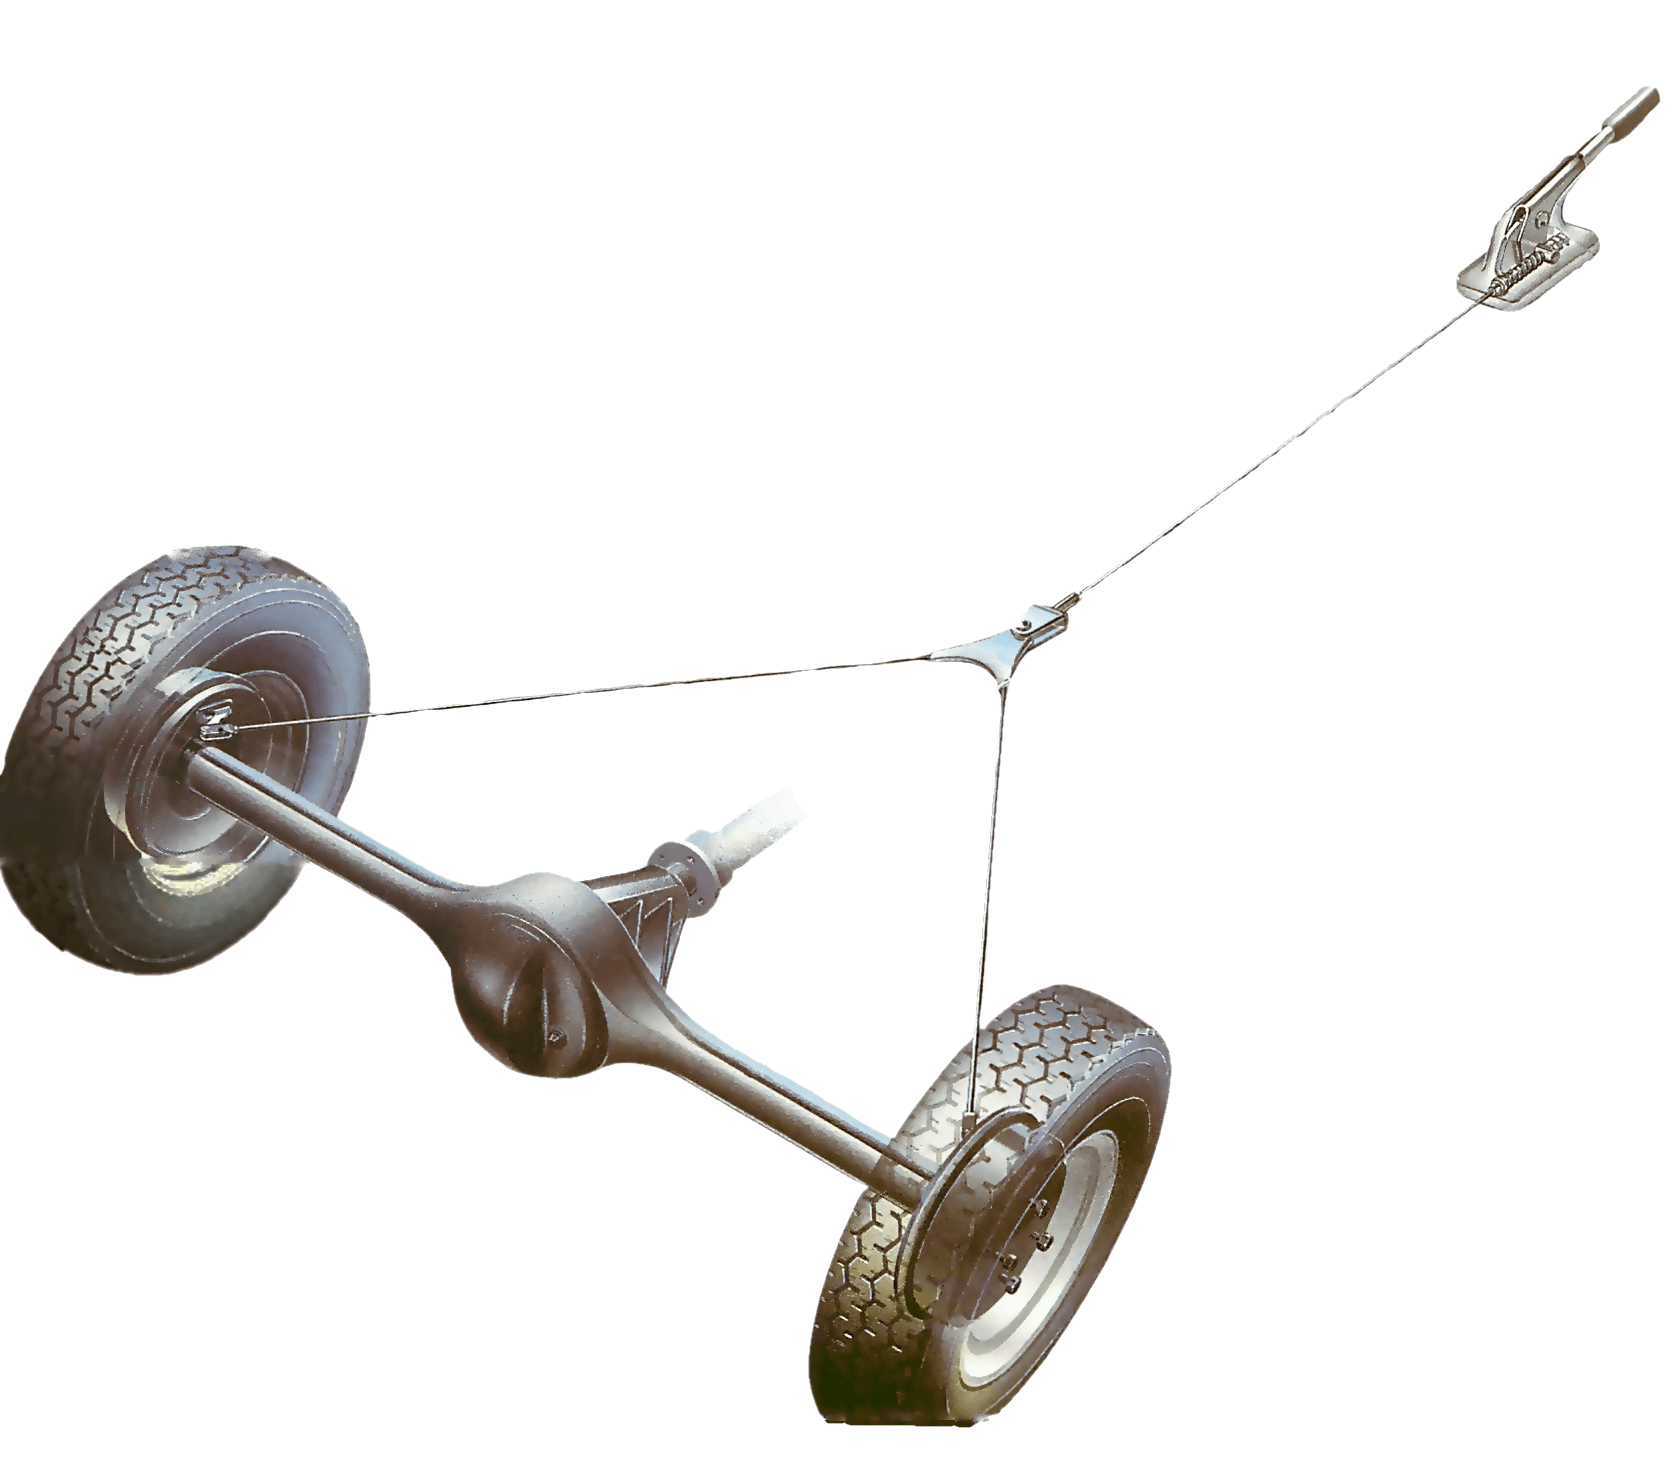
Ford Focus Parking Brake Cable
The caliper is very easy to remove with two nuts facing the center of the truck. Remove the rear brake shoe hold-down springs 2068. Springs had been broken for a while rust on breaks. Although I don't trust it on a hill yet. Pictures from the folks at rockauto.
Focus SVT sticking parking brake / rear brake caliper replacement
Sounded like a hammer tapping on the brake drum. Replacing a parking brake requires replacing the parking brake cable, a straightforward process any amateur mechanic will be able to handle with ease. The original purpose of emergency brakes was to stop your vehicle in an emergency. Although I don't trust it on a hill yet. Right above the parking brake lever that you push with your foot to engage the parking brake there is a small hole. Use the Brake Adjusting Gauge to set the rear brake shoe and lining diameter to 107 mm 0. Lot's of internet posters claim there should be a hole with a rubber plug.
How to Replace Emergency Brakes in a Toyota Highlander

The first thing to remove is the hold down springs. Hold the piece on the back of the brake shield with one hand then use a pair of needle nose to get them back in. I originally thought I would have to remove the axles to work on this--but some other very helpful posters said it was possible to do this without this step. Use emery cloth and brake cleaner. And the records show the previous owners maintained everything well. Retracting Spring Now you should have all the parts removed and a bare assembly site to put everything back together on. Take measurement across the center of the shoes.
How do you adjust the parking brake on a Ford Focus

Set them aside --way aside and proceed. Eitherway you have to spread them to get the notched part where it belongs. Be sure to take pictures of how they are assembled, then remove them, clean the real well with a scotch brite. Put the rotor, caliper, and wheel back on. Retracting Spring Now you should have all the parts removed and a bare assembly site to put everything back together on. Wheel Removed, Caliper taken off, Rotor Removed This picture shows the axle blocking your view of the parking brake assembly.
Ford Focus Brake Problems and Repair Descriptions at TrueDelta
Went back, another repair was attempted but did not fix the issue. Parts in repair shop trash. When I tried to remove the wheel, one of the studs would just spin in the drum. It could have been a lot worse if I was presented with a need for an emergency maneuver and the faulty suspension caused an accident. The seat belt warning chime often comes on and will not go off, even though you have buckled your seat belt.