Mac os x create bootable usb from iso ubuntu. How to Boot a Linux Live USB Drive on Your Mac 2019-03-19
Create Windows 10 Bootable
. This appears to show 3 physical discs but it does not. We are now going to remove this partition in the next step. Canonical recommend a command-line method to The instructions are concise though the process is involved. When all is set to go, just hit the Apply button.
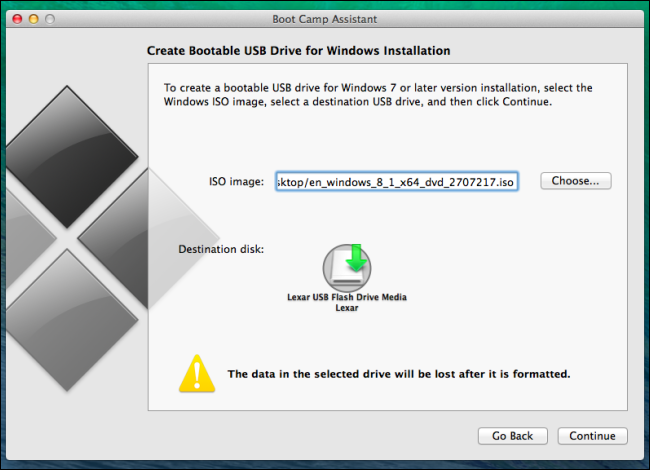
How to Create Mac OS X Bootable USB Pen Drive on Windows 10
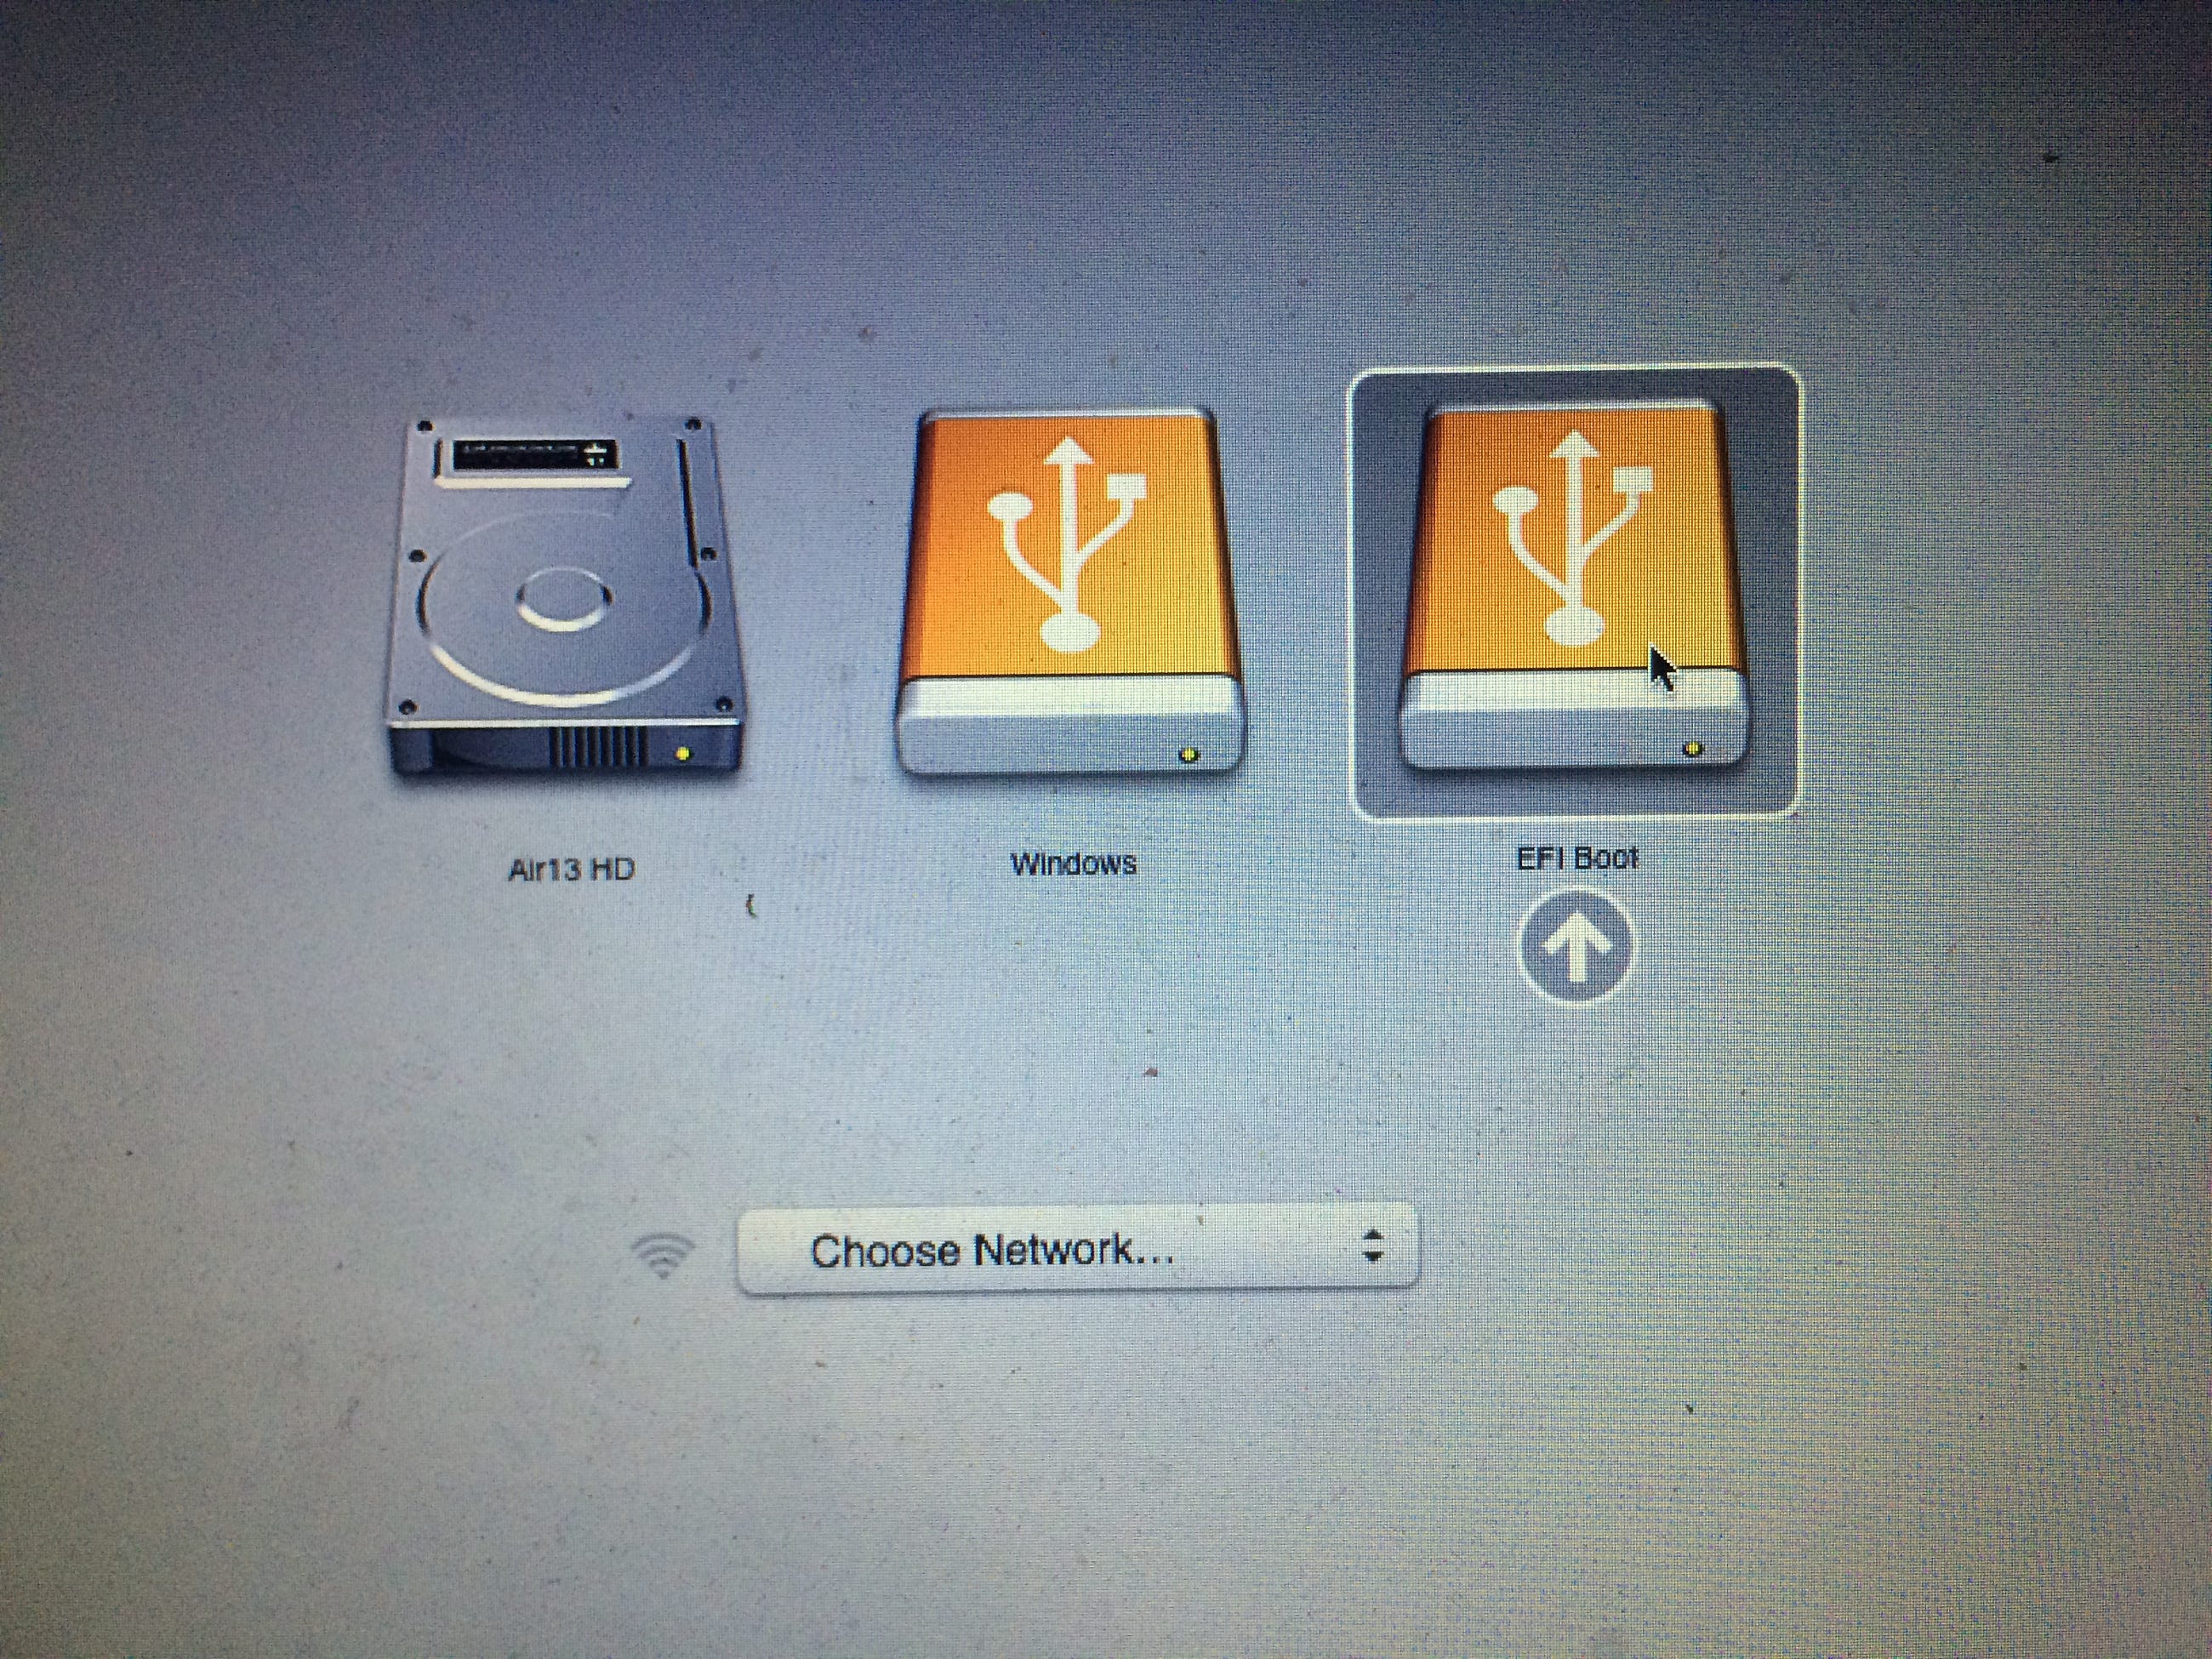
Go back to the terminal. The way to access the the Boot Devices menu varies between manufacturers, but it can usually be accessed by pressing one of the F keys right after powering on your computer. If you have an idea for our site that you would like to see, please feel free to and for more info checkout our page. It is specifically characterized by the extension it uses, that is. This can be easily done using command tool.
How To Make a Bootable Ubuntu USB on Windows, Mac and Linux

For me it was: 1109+1 records in 1109+1 records out 1162936320 bytes transferred in 77. Canonical recommend a command-line method to The instructions are concise though the process is involved. You can use it install Windows 10 on any desired system. However, most of time it's working and your data will be copied. However, it will not boot on my MacBook Pro. When it asks for you admin password, make sure to enter it and continue on. That will take a while and do the actual write and wiping of the device.
How To Make a Bootable Ubuntu USB on Windows, Mac and Linux
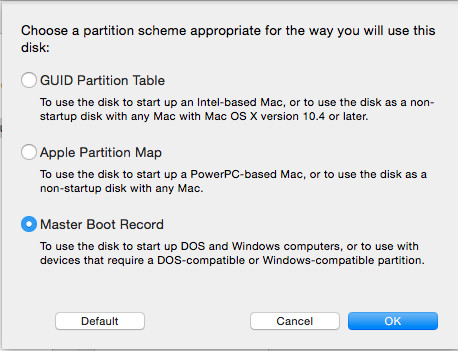
It completed successfully, but I cannot get my mac to recognize it as a bootable device. This will take several minutes to complete but your data should be copied and the flash drive will be bootable. Let us know in the comments! How do I get mac to see it as a bootable device? To get started, you'll need to convert the Ubuntu. Go to Disk Utility program from Launchpad A rocket symboled icon in the bottom plank. Thanks again to John for pointing this out! But you still have a choice to do that by using Terminal command although it's very complicated. We specialize in writing in-depth and easy to understand guides. Also, the converted file may have an additional.
Make A Bootable Usb Ubuntu For Mac
So, go ahead and mount the. Let us know in the comments! Launch it admin privileges so that you can exercise all the admin rights. I used the start up disk tool and I first clicked erase, to clear the contents of the usb, and then create disk. So please be patient until the dd command has finished. Please enable JavaScript to watch this video. This is done via the command. It will take a few minutes for the process to complete.
How to Boot a Linux Live USB Drive on Your Mac

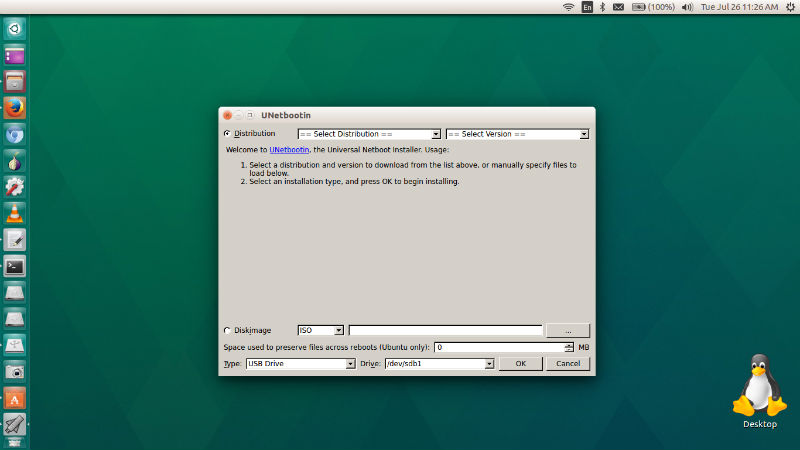
If you've ever wiped your computer without having a proper backup of your operating system, or just wanted to , chances are you've had to rely on Linux to help you out, specifically the distro. Like LiLi above, Unetbootin can even automatically download a Linux distro. Let me know in the comments! Live images are a useful way to test hardware compatibility things like Wi-Fi drivers, touch-screens, etc before committing to a full install. Assuming you have downloaded the Windows 10. Once done your device should be ready for action. To do that, you will have to hold down the Option key on your keyboard right after you press the Power button to turn it on.
How To Make a Bootable Ubuntu USB on Windows, Mac and Linux
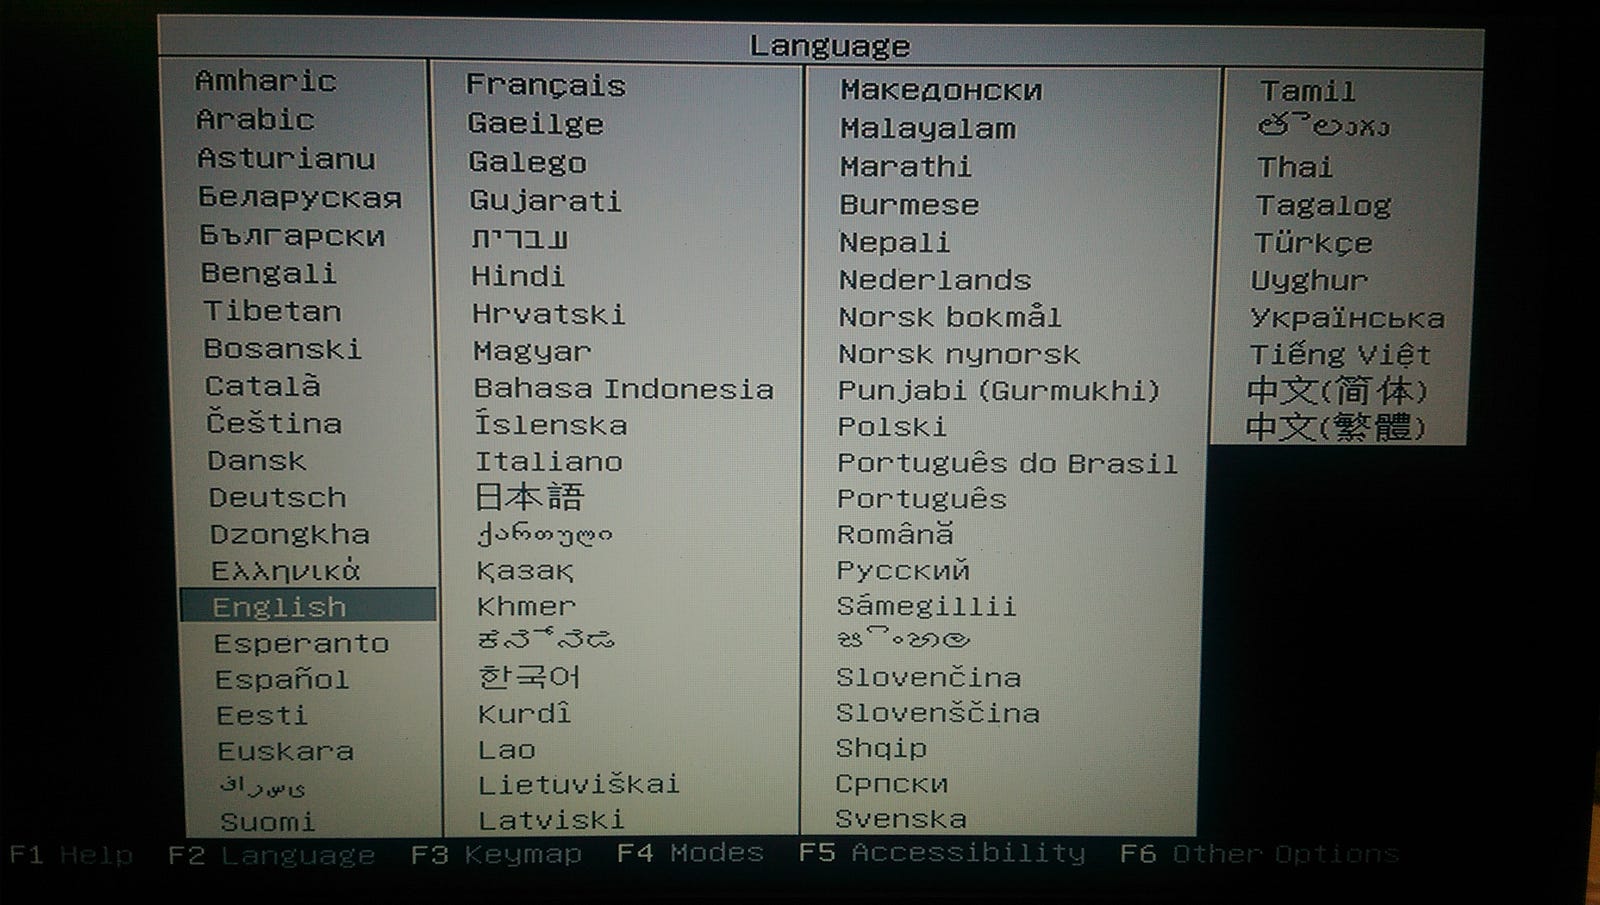
You can it combines five functions including Burn, Extract, Cretae, Edit and Copy Disc. It is currently the most popular Linux distribution and has a dedicated community that's actively working to make it smoother, faster, and more secure. We shall be using which is a very powerful and must be used with caution. Ubuntu doesn't get a lot of love compared to powerhouses like and , but those who do use it are often fans for life. Be sure to replace the symbols with your node number and run each command separately. When using sudo as shown below, you will be asked for your password to proceed.
How To Make a Bootable Ubuntu USB on Windows, Mac and Linux

Form the article above, you can clearly deduce that iSeePassword is the only reliable burning image tool with no demerits or limitations at all. Live images are a useful way to test hardware compatibility things like Wi-Fi drivers, touch-screens, etc before committing to a full install. Just follow each step in turn. Provide details and share your research! In our case this would be the latest Ubuntu release I grabbed. I cannot get it see the device using 'option' or 'c' while rebooting. Just to be thorough let's eject the device before removing it to save our precious data! I presume you know what to do next. To do this run: diskutil list The easiest is to run the command, then remove your device and run it again.