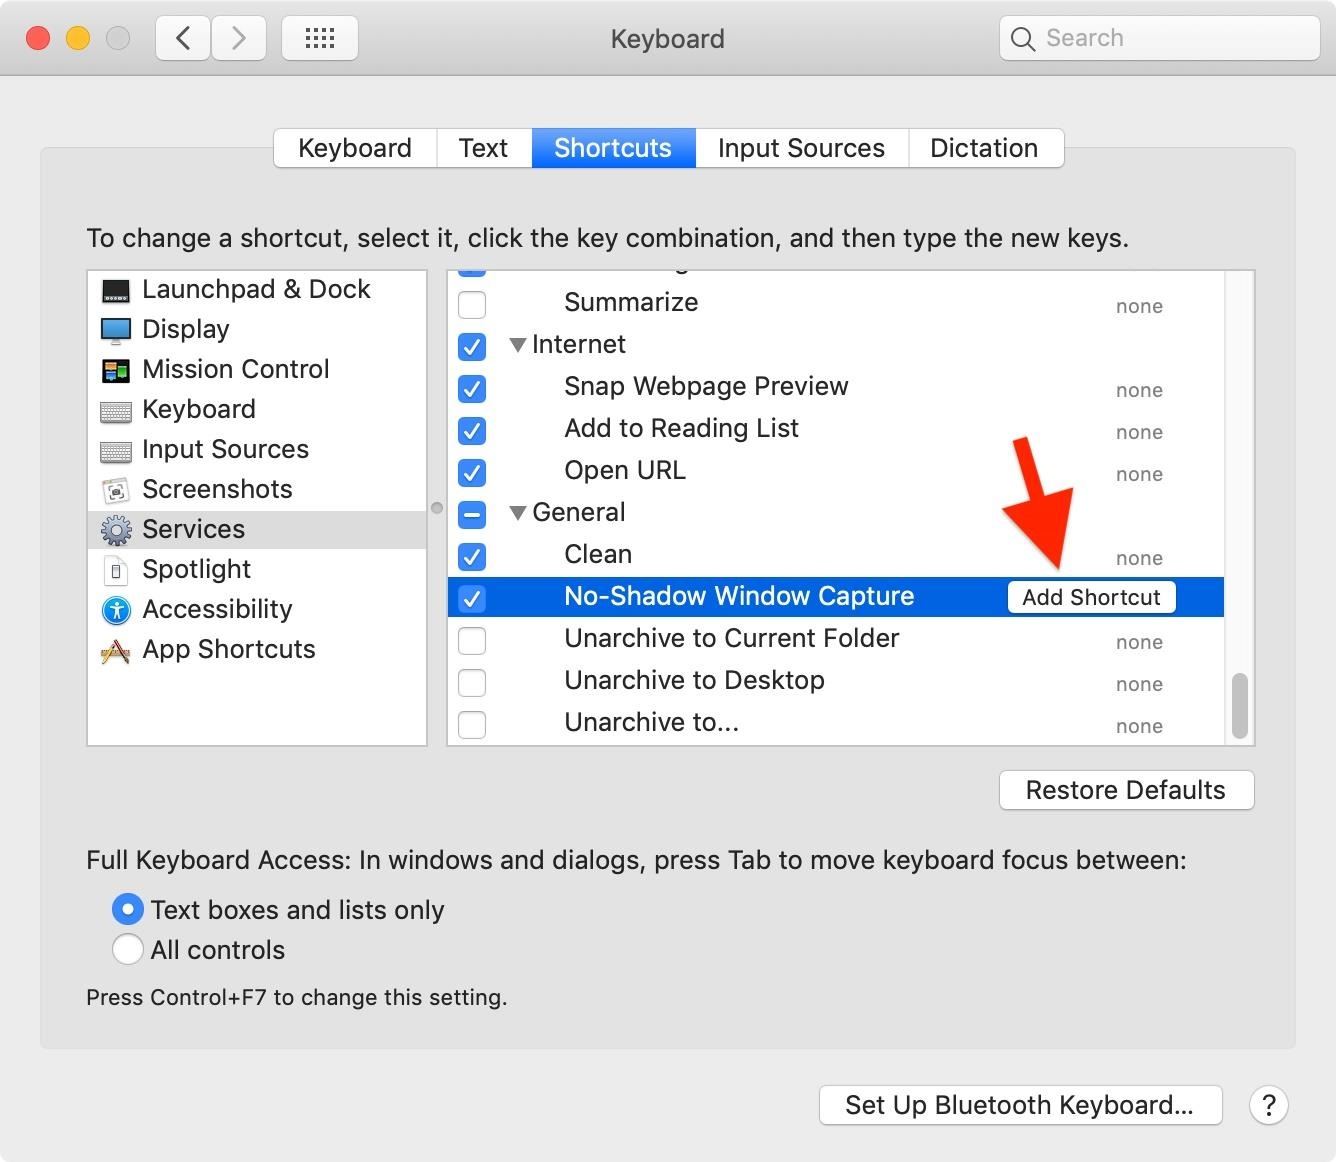
Mac keyboard on windows screenshot. Keyboard Shortcuts to Capture a Screen Shot with Mac OS X Mavericks and Yosemite 2019-04-11
How to take a screenshot in Windows with a Mac keyboard
It will be saved as a. I am using an external Mac keyboard and I want to take a screenshot but I have not had any success. This tool was first included in Windows Vista, and never got any new features apart from few bug fixes. Click the Arrow button next to the Mode button to change the Snip shape:. You should see the section of the screen that you selected appear in your program.
How do I take screenshots in Windows 8 wi…
Step 2: Select Timed Screenshot from the Grab menu, or press its shortcut: Command + Shift + Z. You can take short videos if you want, annotate screenshots, draw arrows and shapes, and pretty much anything you can imagine a screenshot tool should be able to do. A window will pop up instructing you to drag your mouse over the portion of your screen you'd like to capture. Step 2: With your mouse pointer turned into a crosshair, use it to select the region you wish to capture. Open any program which supports pasting in photos e. But if we take the case of the hardware, then it is a Mac computer. A screenshot of your currently active window will be copied to the clipboard, just as in the last section.
How To Take Screenshots Using the Mac Keyboard
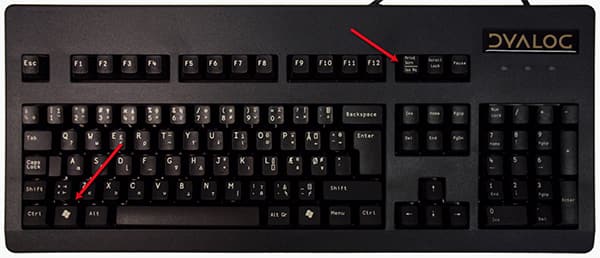
The Macintosh operating system has always made it easy to capture a screen shot. Select an area to screenshot. You can use this time to open that pop-up menu or tooltip you want to capture. Also, there is no visual confirmation or sound to tell that a screenshot is captured. The only versions of Windows that it is not included in are Windows 7 Starter and Windows 7 Home Basic. Press Command + Control + Shift + 3.
how do I make a screenshot on 10.6.8 with…
This method works exactly like the one above, except the screenshot does not immediately create a file. Let us review your screenshot options on a Mac. Instead, the image is saved to the clipboard, the same temporary storage area where your computer remembers the text that you have copied. Others use the F14 key as Print Screen. This is not the best method and fills your desktop if not managed. When you release the mouse button, you can paste the screen shot to another application.
How to Take a Screenshot in Windows 10 With an Apple Keyboard

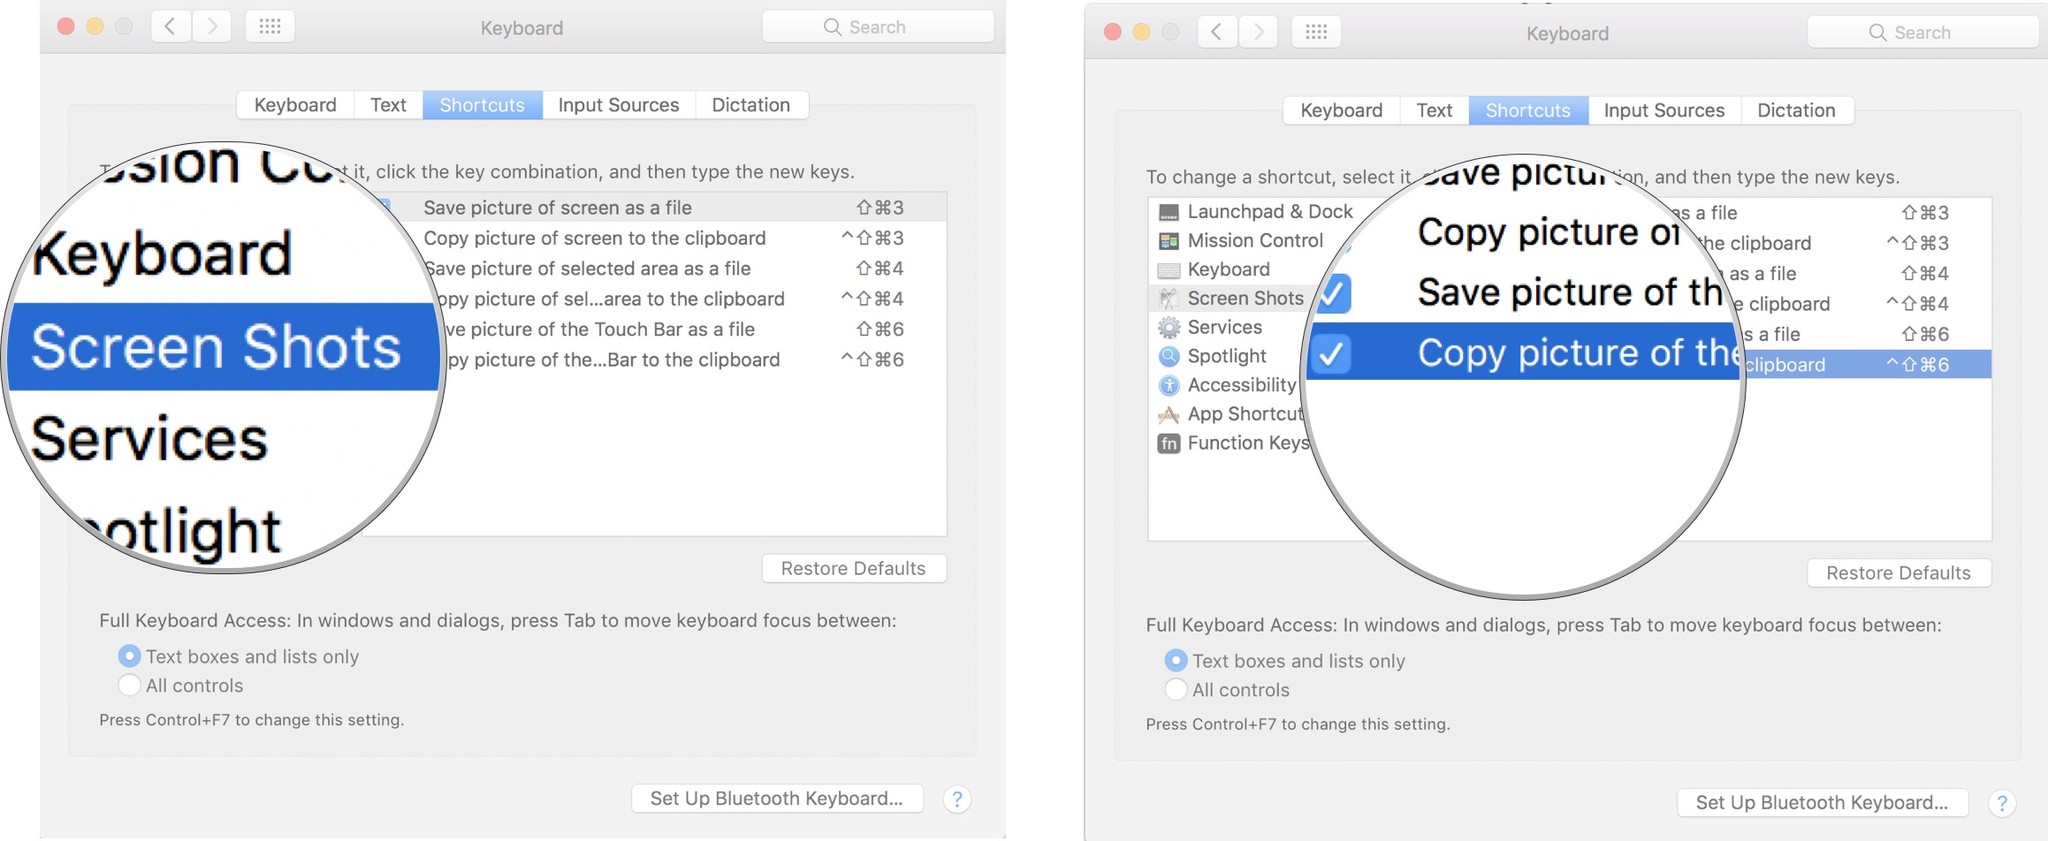
Method Two: Take More Flexible Screenshots with Snipping Tool The Snipping tool has been a part of the Windows for long time. Step 1: Launch Grab by opening it from the Utilities folder, which is housed within the Applications folder. Doing so will take a screenshot of the current screen; in most cases, you'll see the screen dim briefly. Easy annotation If you embrace the Floating Thumbnail, then you'll gain quick access to Markup tools to annotate your screenshot. Click the floppy disk icon to open the save dialog.
▷ How to take a screenshot on a Mac
:max_bytes(150000):strip_icc()/ScreenShot2019-02-28at1.17.56PM-5c7851dec9e77c00011c8334.jpg)
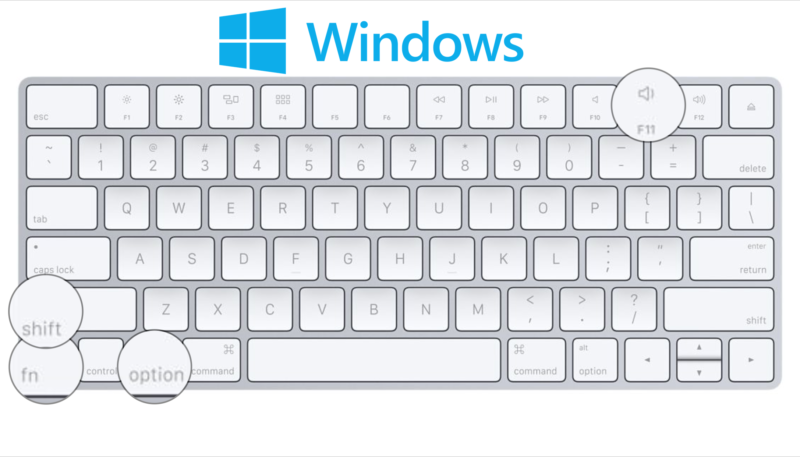
Press and hold the space bar after dragging to highlight an area but before releasing the mouse button or trackpad : This locks in the shape and size of the selection area but lets you reposition it on the screen. Then slide it mostly out of the way while you can still click the print screen key with your mouse pointer. Using Snipping Tool — A Windows Built-in Tool Snipping Tool is one more way to take screenshots in Windows on Mac by using BootCamp. Command-Shift-3 It captures a screenshot of your entire screen. The program also lets you take time-delayed screenshots, just in case you need to set the stage before capturing an image on your display. When you press the key, it will look like nothing happened, but the screenshot has been saved to your clipboard. Fn + Shift + F11 for fullscreen Fn + Option Alt + F11 for active window above hotkeys indeed solve the problem, thanks to Sergiy.
How To Use Windows Print Screen Key On Your Mac In Boot Camp

To do so, just right click on your desktop and all of them will be quickly grouped together. You should see it appear in the Paint window. Your cursor will turn into a small cross-hair reticle. It provides several screenshot ways including Free-form Snip, Rectangular Snip, Window Snip and Full-screen Snip. Computers running Windows 8 and 10 can to automatically take and save a full-screen screenshot, and all Windows versions support taking a full-screen screenshot by. This is most common on old computers on which you upgraded to Windows 10.
▷ How to take a screenshot on a Mac

Like Davo says, use the on screen keyboard when you can not use or remember the key combo. All I want is just make a screenshot of the entire screen without using bootcamp or whatever. Step 3: You can fine-tune your selection by pressing the spacebar, which will let you take a full-screen capture or to select an open menu. If at all possbile, I don't want to resort to installing additional programs. Then in Preview, do File - New from Clipboard, and the image will open, which can then be exported as a jpg or png file to a folder of your choice.