M54 cylinder head removal. Removing and installing or replacing all pistons engine BMW M52, S52, M52TU, M54, M56 2019-02-13
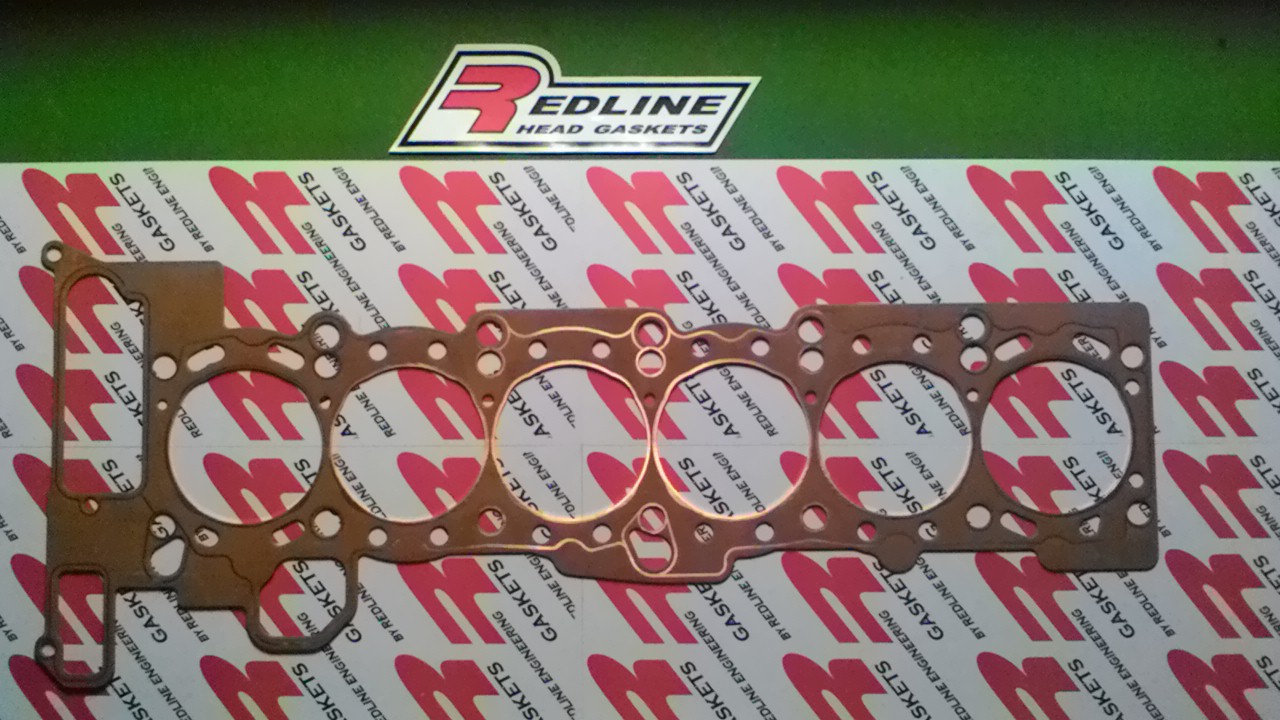
BMW E46 Head Gasket Replacement
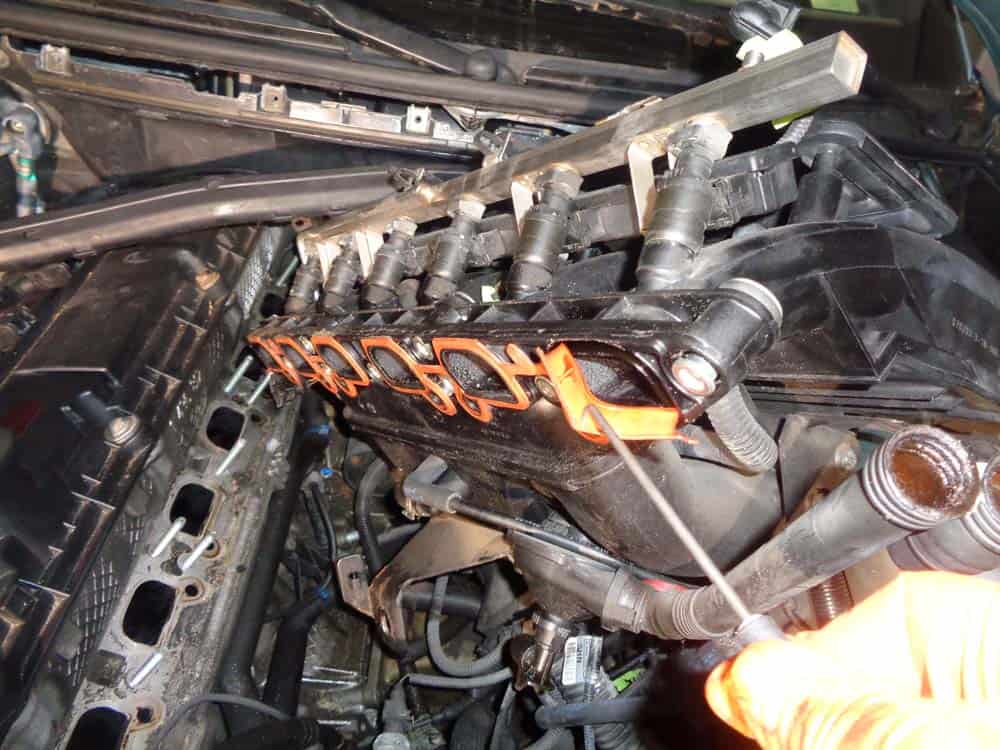
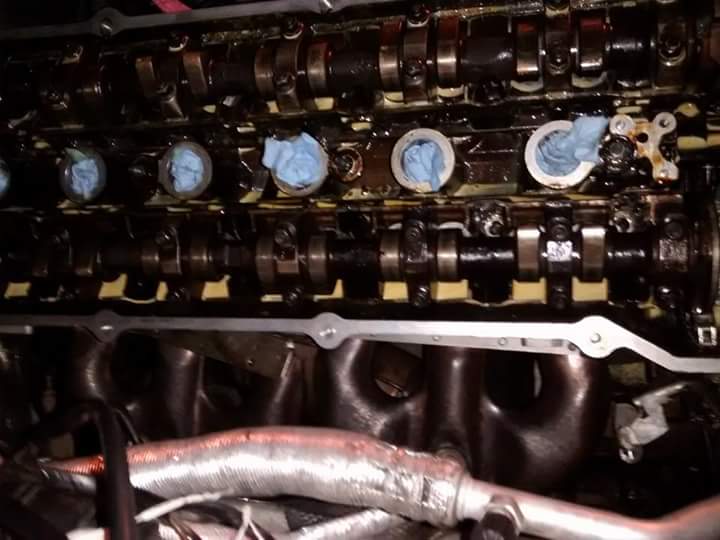
With strong oil carbon: Carefully remove oil carbon deposits from cylinder walls. If it a machined surface, the gasket will suffice. However, most times, if the cylinder head bolt threads are faulty, it is better to go with a used lower mileage engine. Piston diameter 80 mm: Press together piston rings with special tool 11 2 260. Figure 5 Remove the exhaust manifold fasteners green arrows.
Cylinder Head and VANOS Tools
See our tech article on valve cover gasket replacing. Do you have any questions or want to add to the article? Disconnect the negative - battery cable. Once the tool is installed, confirm that the crankshaft can no longer be rotated. To repair this symptom correctly, you must do one of two things: replace the valve cover, or the valve cover gasket. Be sure to replace engine oil and engine coolant when done.
Cylinder Head and VANOS Tools
See our tech article on valve cover gasket replacing. You may need the help of a flat blade screwdriver to get it loose. July 7, 2015 Followup from the Pelican Staff: I don't know the 3M part number. The expansion tank will crack with age and cause the engine to overheat, the cylinder head warps and the head studs pull out the aluminum threads in the block. As you will see in the following article, marking and identifying wire harnesses and connections is important in this repair…there are a lot of them, and marking them during disassembly makes putting the car back together extremely easier.
Cylinder Head and VANOS Tools
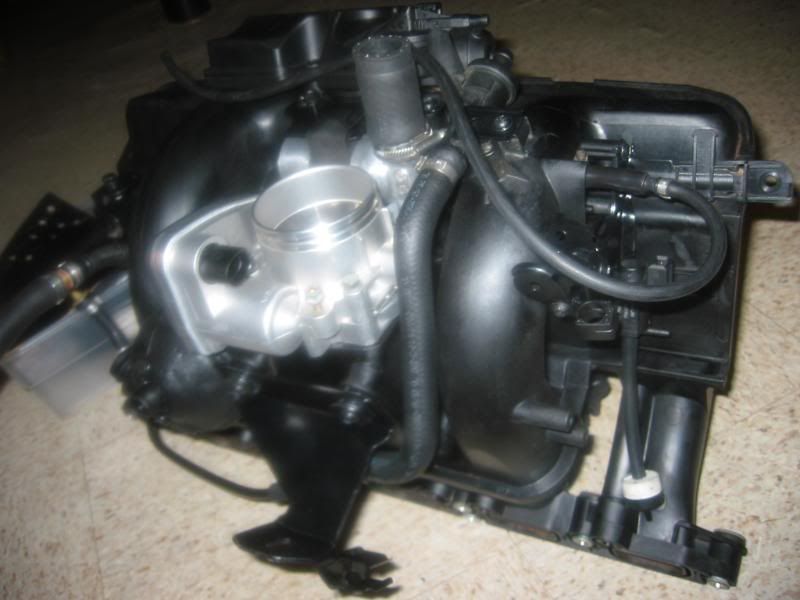
The bent handle design allows use where space is limited, and provides extra prying force. Follow the instructions that came along with your special tool kit to ensure proper use. To find out how to do that, go ahead and take a look at my previous videos: M54 Common Repair Steps: M54 Intake Manifold: M54 Valve Cover Replacement: X3 Project Intro: And that will get you caught up to where I am beginning the teardown of the engine on this X3. Be careful when moving the manifold so as to avoid breaking any vacuum pipes. The camshaft-locking tool should be flush or almost flush with the intake side of the cylinder head sealing surface.
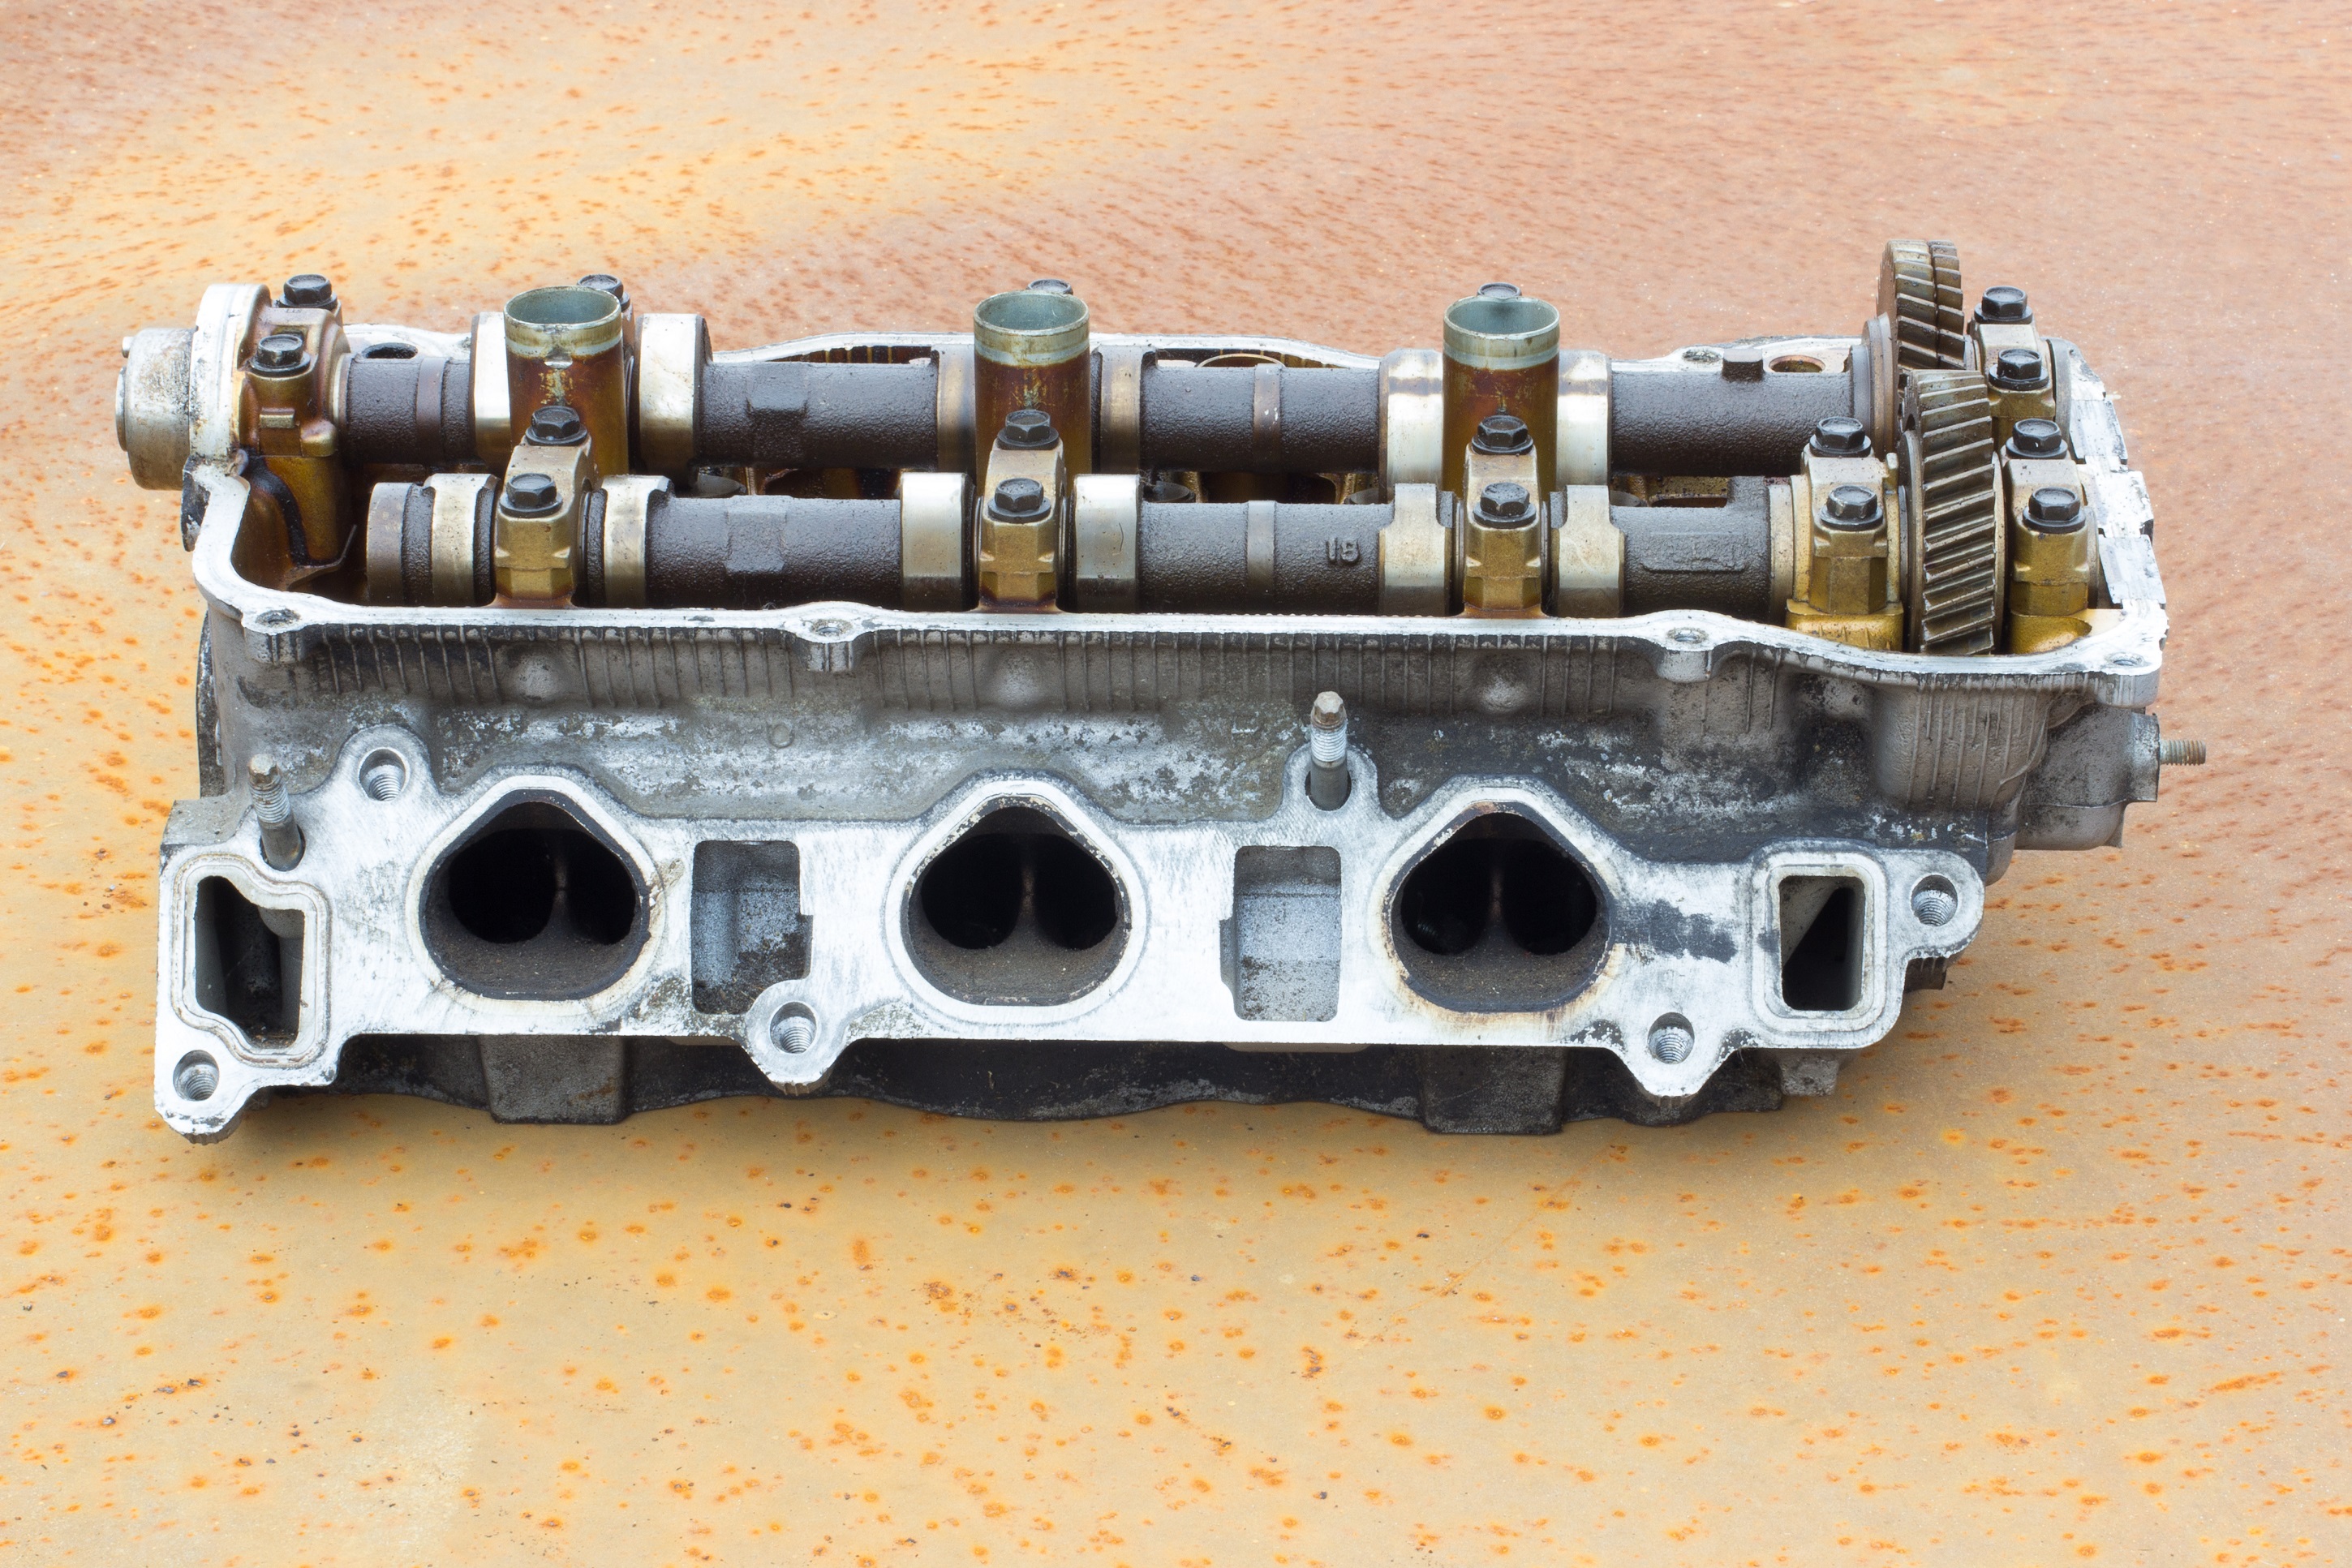
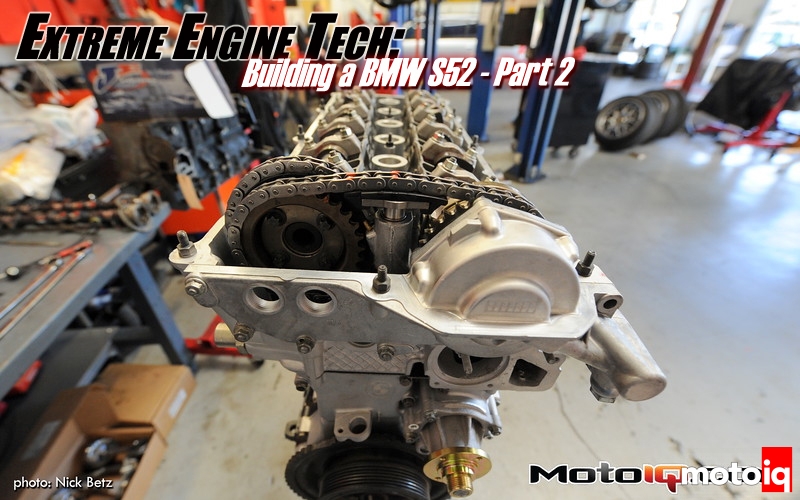
BMW M54 Camshaft Replacement DIY

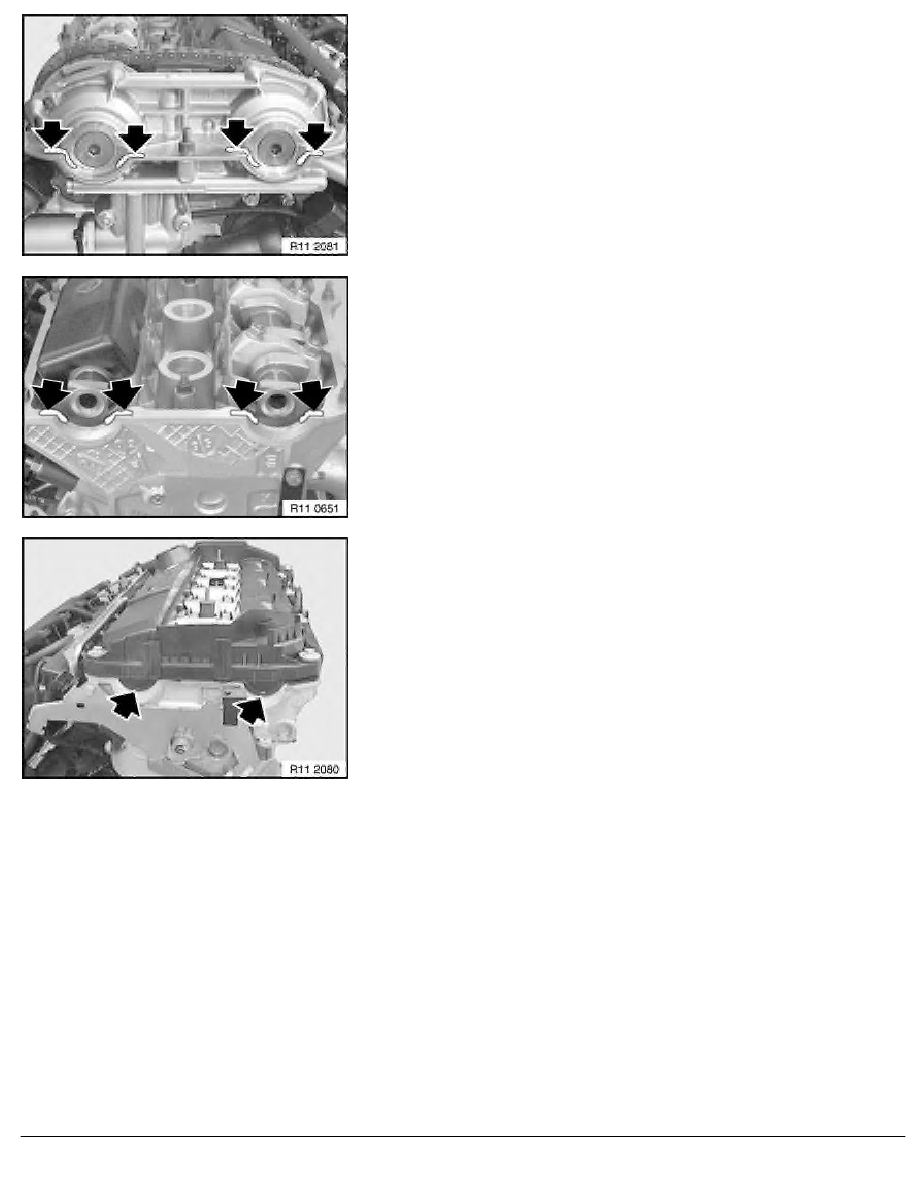
I prefer to leave the camshafts installed as this saves time. Install new connecting rod bolts. Stage 3, use an angle finder and tighten the head bolts an additional 90°. Journal A1 has a thrust surface that can possibly hang up when the cam starts to rise. After all the caps have been lightly tightened you can go back and torque them all to 14Nm-10. Figure 67 Remove the crankshaft locking pin and the camshaft locking tools.
BMW E46 Head Gasket Replacement

Upholstery and Panel Removers are designed for plastic fasteners. Be sure to use earlier noted location of each fastener as they are different lengths. Removal: Removal of pistons is described separately from installation. The goal is to keep an eye on both sides of all 3 caps, and adjust your tightening slightly as you go to keep all gaps equal. Note: Piston diameter 84 mm: Use special tool 11 8 141.
M54 Archives
Drain and dispose of coolant. See our tech article on engine cooling fan replacing. This is the best position to control the movement of the camshaft as the journal caps are loosened. If your head had to be machined, be sure you ordered the thicker head gasket to make up for the material that was removed. Increasing the allowable pressure in the cooling system allows the coolant to exceed 100 degrees c before it boils.
5645
Then remove the bracket from the engine. Lightly coat the threads with clean engine oil and install finger tight. It is reachable with your hands…use a flashlight and our images below to locate and disconnect. Install the cam so that the side of the flange with the 2 holes is facing up and angled toward the intake cam as shown. Tighten fasteners to 10 Nm 89 in-lb Figure 47 Lock camshafts in place. Pay more attention as you get close to zero gaps to make sure that the caps at E4 and E6 bottom out at same time. Do not mar or scratch the surface while cleaning and take care that no gasket material gets into the water jackets.
5645
Just think how easily it can happen You pop in to fill up with fuel at your local petrol station. This update is for owners of the first two printings of the book. Watch the gaps between the caps and the head as you proceed. White smoke can also be a crack in the cylinder heads exhaust port, losing coolant directly into the exhaust manifold. It is this loss of coolant that causes overheating and further engine damage. I'm baffled any assistance would be helpful May 12, 2015 Followup from the Pelican Staff: Step 55 shows the camshaft chain alignment, if you followed this step with the engine locked down it should stay in time. Replace the connecting rod bearing shells.
Head Bolt Torx Socket BMW E12
See our tech article on secondary air components replacing. Chains stretch over time, sometimes even snapping, and guides wear down to dangerous levels. Apparently when he gets a buffed block from a stealership he calls their service manager directly and tells them to go into the shop and take away every single bristle wheel. Setting: Installation of pistons is described separately from removal. The steps are the same as if it was installed. I'm about to do the head gasket job and would like to use this article as a reference.