Loop playlist fl studio. FL Studio 12.1.2 Producer Edition 32 and 64 Free Download 2019-01-13
How to Loop instrument samples in FL Studio « FL Studio :: WonderHowTo

Be careful when slicing a pattern: any notes that start before the slice will be omitted from the resulting piece. You have no idea how much help your article has given me. Now you can control the volume of all your drum elements with just one track. When you want to navigate to that location in the Browser, press the associated number key while the Browser is in focus. This is a great way to gel similar instruments together and simplify your mixer window.
How to stop a loop from continuously repeating in FL studio
From here you can change the pitches to play completely different notes. Tip 8 - Limiting Your Audio If you want to add extra loudness to your audio so that it compares with other commercial releases, then add the Fruity Limiter last on the Master Inserts chain. If you enjoyed this or benefited from this tutorial please subscribe to our YouTube page and share this tutorial by clicking on one of the links below. This way you get the original audio blended with the processed audio. Scale automation clips Automation clips can have their minimum and maximum values scaled, enabling you to edit the depth of the automation without going through and tweaking each point in the clip.
How to save loops in FL Studio

Using the Slicer tool C , click and drag across a clip, or hold Shift and click to slice without dragging. Still, there is an advantage of doing this in the playlist instead of Gross Beat. Now, you can avoid that all together by rearranging the bars of the sample. This would be compatible with both 32 bit and 64 bit windows. Now that it is selected we want to copy this information and add it to the piano roll to make the part twice as long.
FL Studio 12.1.2 Producer Edition 32 and 64 Free Download

To play it back, make sure the Pat icon is on highlighted and hit Play to hear your beats. Now you get access to the entire keyboard of notes to play. Notice how the track selection of that channel changes in the Mixer window. You can automate any parameter. Snap to events At the bottom of the Snap to grid menu in both the piano roll and the Playlist is the Snap To Events option.
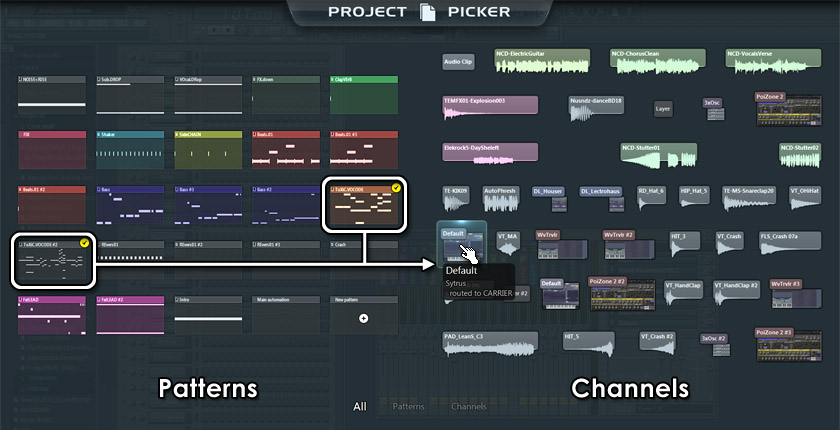
Download From Loop (Channel Rack) To Full Beat (Playlist)
When you hold shift and left click and drag with the mouse it will copy anything that you have selected automatically. So you have one Pattern of beats with the sounds you are happy with. But here, the Patterns are pockets of their own sonic data so can be moved anywhere you like. This will avoid the mistake of simply adding drums to loops and risking copyright strikes from others who already used that exact loop in one of their beats or songs. When the note or clip is at a point at which it will snap to another one, the other notes or clips will be coloured purple. Experiment with the other options. This will be heavily compressing your drums.
How to Loop instrument samples in FL Studio « FL Studio :: WonderHowTo
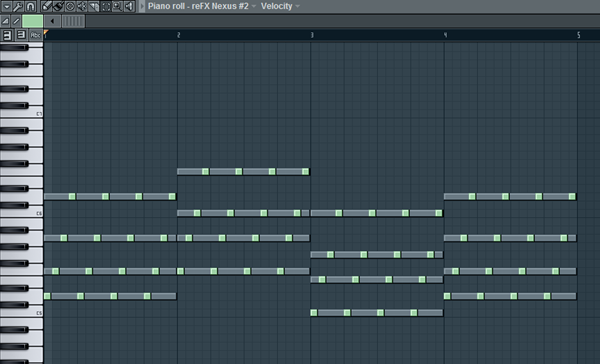
Right-click the track and choose Rename, or use the shortcut F2. Quick tip: On the Selected track, insert a Wave Candy plug-in. First thing you need to do is make sure each track in your song is connected to a separate channel in the mixer. The first way is to hit Ctrl-C on the keyboard or go to edit, copy, within the piano roll window. Then, navigate to the area of the piano roll that you would like to paste it and hit Ctrl-V or going to the edit menu and selecting paste.
10 Essential Mixing Tips for FL Studio Users : orgmode.com
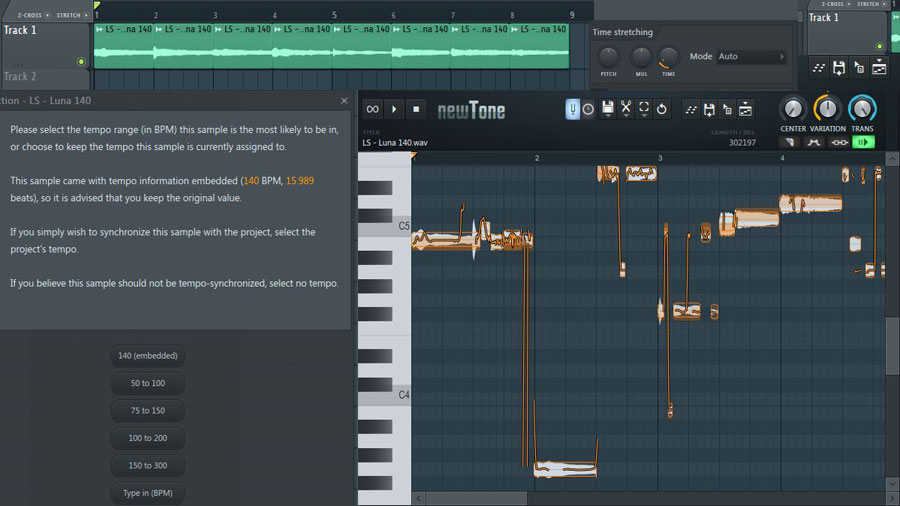
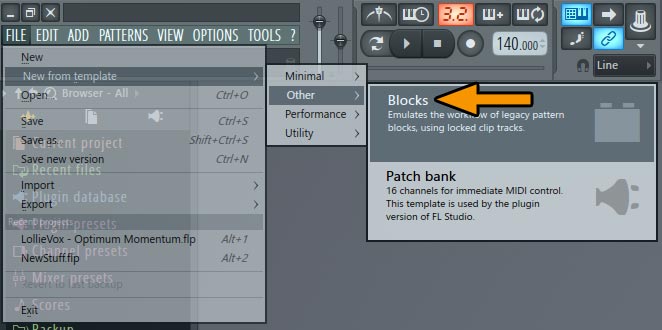
Two settings that you may want to apply to your playlist are Z-Cross and Stretch, which are located in the top left, directly above the first track. First select one of your drum tracks and click on the orange arrow on the master track. Make sure you make different patterns by creating new pattern or cloning your old pattern and modifying it to create variance in your song on the timeline. As a self-taught pianist, who later learned traditional music theory in college, he brings knowledge and understanding from both forms of education. Patterns can be merged by selecting them in the Playlist and clicking Edit»Merge pattern clips in the Playlist options.
How to Copy & Paste on Fruity Loops

You can change the routing by dragging up or down. It has got sufficient Help content which will let the rookies to handle the application efficiently. This shows which insert track the channel is routed to. This is nice in that you can customize your channel layout in the mixer by determining which channels go to which track. Group similar elements together and then route then to an insert track so that you can edit and process those elements with one single track. This affords you a lot of flexibility when it comes to adjusting note properties and can be very useful when a number of notes are too loud or too soft and you want to make them fit better without sacrificing their relative levels. Then go to an empty insert track and click the arrow under the volume fader.
How To Flip Loops Using FL Studio's Playlist Tools
-Step-4.jpg)
In this way you can very quickly build up an albeit simple song. Tweak this to change the amount of dry versus wet signal. This has Oscilloscope, Spectrum, Meter, and Vectorscope views to help you analyze your audio. Perhaps these tips will even help you win a sample loop flipping contest in the future. . Copying and pasting small bits of melody can help speed up the composition process. Now select another track, and then go back to the Send reverb track.
Download From Loop (Channel Rack) To Full Beat (Playlist)

I am right now on tip number 2 of your article and already I have a breakthrough. You may be in Pattern Mode. Simply route a track to another track, and this becomes the send track. In the step sequencer, click the pattern selector and select Split by channel on the right. Read the for more information on how you can use the loops.