Logic arpeggiator to midi. The Logic Pros: Getting the most out of Logic’s built 2019-05-05
Logic Pro X: Use the Arpeggiator with a Smart Control

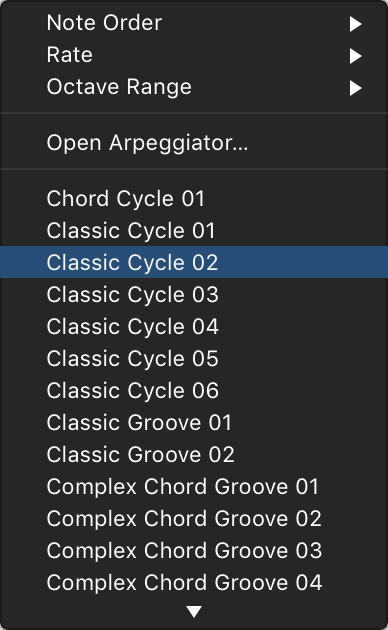
In our selection, we took some crucial features and factors into consideration, such as pads and controllers, software included, keys features, dimensions and weight. I can change this to go downwards, so it's going G, E, C. Arpeggiators go back to the beginnings of electronic music, and basically. You can choose an Arpeggiator preset and adjust Arpeggiator settings, including note order, note range, and octave range from the Arpeggiator pop-up menu. The only version this keyboard comes in is the 25 keys, which might be a bit too limiting for some users.
Arpeggiator from Midi?

The 37-key setup with three octaves provides an excellent medium among the whole range of configurations. Velocity determines the dynamic range of the loudness of each note in the pattern making it pretty useful for locking all notes to the same value. While you might also go for 61 keys to have an additional octave, that option boils down to personal preference and budget. It has features like chord memory, gate, swing, accents and much more. So when I click on this one, it's going to tap out the chords in a random sequence. Grid mode is where we will be spending most of our time editing, but we will talk more about Live mode below. After that, there are 48 keys, 61 keys, and 88 keys, which is the maximum.
6 Best MIDI Controllers for Logic Pro X (May 2019)
First give that last big white button to the right in the Note Order section a high-five. I'd always thought it would be nice if it could. It comes with full-size and semi-weighted keys, which do feel excellent. Scott shows how to use samples and Apple Loops, and conform their time and pitch to better fit a song. Kirnu Cream has so many cool features - it would be impossible to list all them here.
Synchronising LPK25 arpeggiator with BPM on Logic Pro 9

Featuring 61 keys and a number of various controls, you will find it difficult to come up short on activities. You can also open the Arpeggiator plug-in from the channel strip. While Logic can be a little finicky when it comes to creating Live patterns this way and then implementing them into your project, the next tip will solve all of that for you: Own your patterns. That is sufficiently big to be able to handle melodies across four octaves, yet will not consume a lot of space on your table. Unfortunately, logic's arp afaik does not. If there is any gear you would like us to take a closer hands-on look at, let us know in the comments section below or. It also comes with many bells and whistles which include various faders, switches, assignable knobs, and pads.
Synchronising LPK25 arpeggiator with BPM on Logic Pro 9

Getting the Arpeggiator object working in Logic is quite straightforward, but the interface, as it stands, doesn't encourage experimentation. So let's make a custom user interface to make controlling the Arpeggiator object much more intuitive. So now I'm going to click the Play button to stop the playback. If this is not enough for you there are so many ways you can control Cream that you never feel bored with it. If you remember the ultra beat movie we had a sequencer going on and we sort of had a grid where we can tap out. The Arpeggiator pop-up menu appears in the menu bar.
6 Best MIDI Controllers for Logic Pro X (May 2019)

By Geoff Smith As arpeggiators always seem to stay popular in music production, especially for certain dance styles, this month we're going to walk through the creation of an arpeggiator in Logic Pro, complete with a custom user interface that should make it more inspiring and immediate to use during the composition process. But let's just look at some of the customized grid patterns first. And what you play or sequence gets turned into arpeggios. Once I did that the Arpegiattor follows Nuendo's tempo. Weighing at under four pounds and measuring about seven inches in width, this is one of the most portable keyboards out there.
MainStage/ Logic Pro X Arpeggiator Tutorial

You'd have to capture the data from the mc303, and then enter the data manually into the logic's arp, but you can then save it as a preset. Let's go back to 16. Sometimes, when trying to get an arpeggiated part to fit in with a pre-existing groove, these additional options can come in very handy when it comes to creating tightly locked in patterns and interesting syncopation. We will use this to control a switch that bypasses the Arpeggiator. This is a double-edged sword, because yes it will give you way more control for arpeggiators and much more, but at the same time it adds more complexity in practical usage.
Exploring MIDI plugins: The Arpeggiator
Tap tempo will be disabled when the arpeggiator is synced to an external clock source. And in this setup, you cannot go wrong with the smoothly portable iRig keyboard. Thanks Dennis I figured it out. That's all that is necessary! We'll then create a series of button objects to control the different parameters of the Arpeggiator and, lastly, we'll arrange our dedicated interface in the Logic Environment. This keyboard is a no-frills model — it comes with no knobs or pads.
Exploring MIDI plugins beyond Arpeggiator

So, I'm going to click on that. You can resize, rearrange and change the colours of your control objects as you wish. Furthermore, the Nektar Panorama P6 comes with weighted piano style keys which every pianist will appreciate since they have similar feel and shape as acoustic pianos. And then you notice when I started playing I had to, once again, hit a chord, and it automatically latched. However, you can use the Logic Remote on your iPad, which is quite useful in a number of You can utilize Logic Remote to control several workflow functions remotely in Logic Pro X — project navigation and playback, recording, loading plug-ins, patches, automation, and mixing. But there are varying velocities.
Arpeggiator Logic X

From the in-detail table to the of each product complete with their pros and cons to our handy , everything included in this list has been aimed towards guiding your every step. Cable the outlet from that to the Cable Switcher. In another measure to save space, instead of the regular pitch and modulation wheels, the device comes with a four-way thumbstick. Just clicking on the…left side of the plug-in. And it's a big payoff.