Harley davidson wla parts manual. Harley 2019-03-19
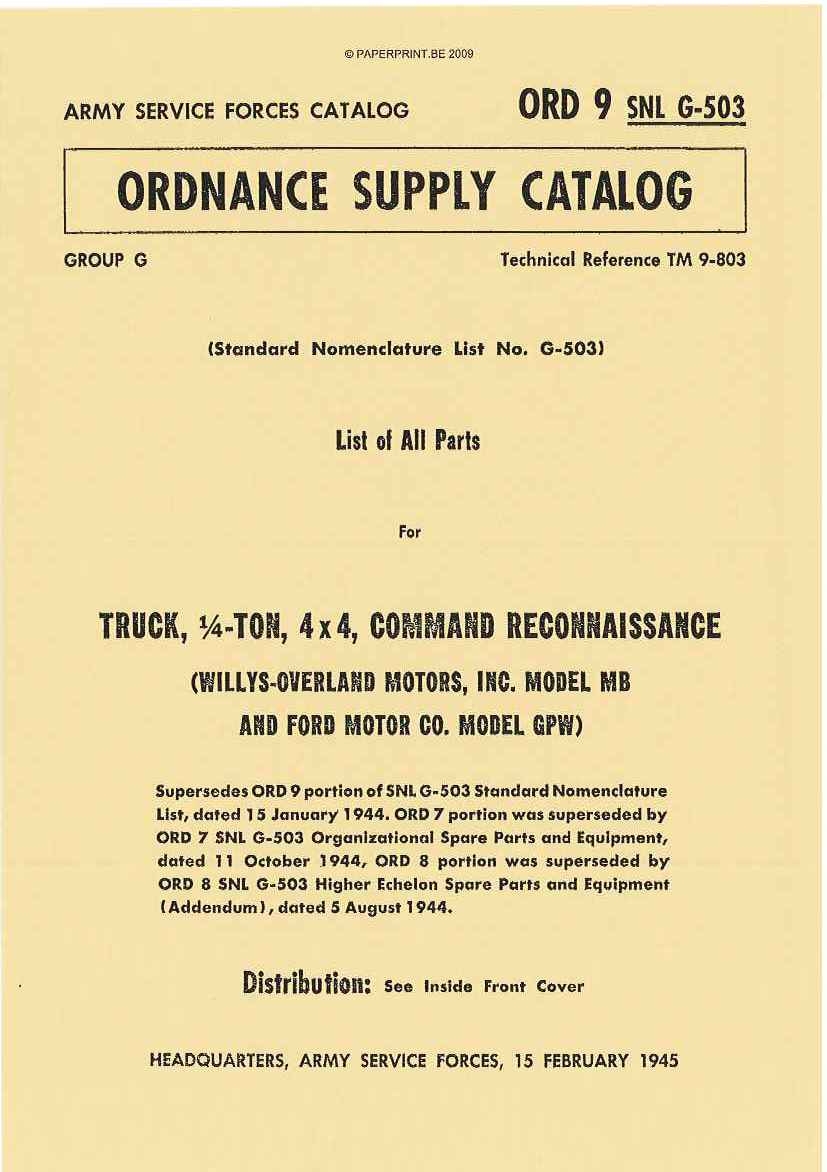
Technical Manual TM 9

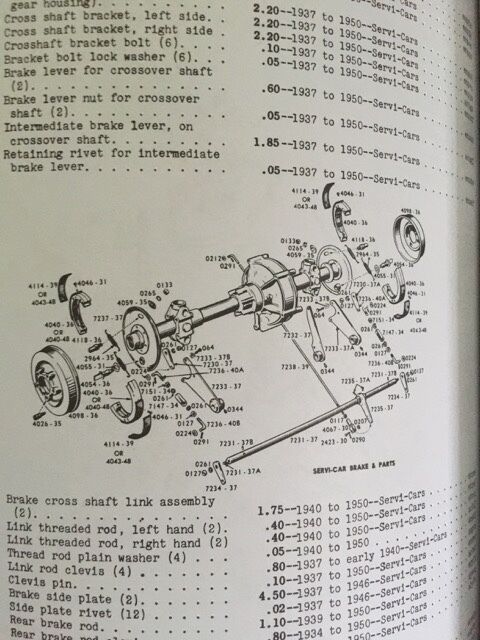
Attach clevis to brake operating lever, installing plain washer, clevis pin, and cotter pin. Free front cylinder high-tension cable from clip at upper engine frame mounting. With- draw cleaner from end of air hose. Chains under most operating conditions require a very small amount of oil; therefore, chain oilers require very fine adjustment to supply just enough oil without waste. This bolt also secures lower tool box bracket and speedometer cable clip to mudguard. Lower end of mounting bracket, battery box bracket, and speedometer cable are all secured to the mudguard bracket by the same bolt and nut. Rear chain adjustment and rear wheel alinement are both made by means of the rear wheel adjusting screws.
1942 Harley
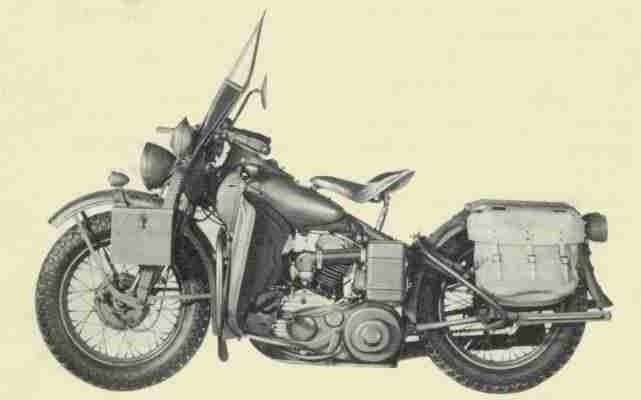
If the lining on the brake shoes is loose, worn, or defective, replace shoes par. In addition to a description of the Harley-Davidson motor- cycle, this manual contains technical information required for the identification, use, and care of the materiel. See that spring and operating control wire exert a straight pull on switch plunger when foot pedal is operated. See that wire connection is secure and screw is tight on oil pressure switch terminal. Check front brake for correct operation and, if necessary, adjust par. Follow procedure outlined under steps a and b above.
Harley

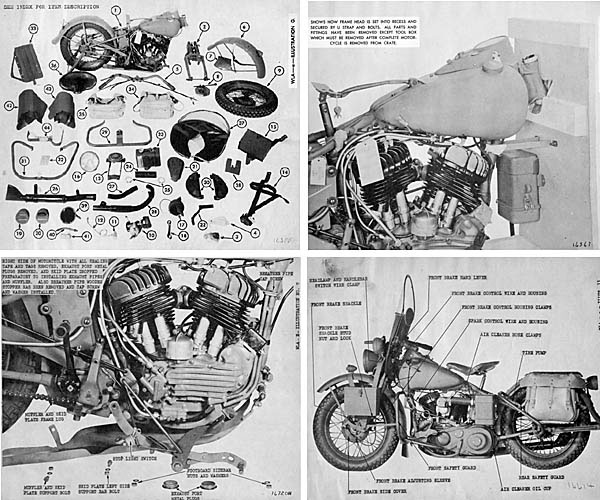
Engine compression should sustain the weight of an average size rider several seconds before crank passes through complete range of its travel. Remove handle bars after removing handle bar bracket lock nut and cone lock plate. This is a simple compression test. Examine footboard and rest for good condition and secure attachment. Exhaust pipe ends are a slip fit in cylinder exhaust ports.
Harley Davidson Wla Parts Manual
Engage slots in stay- clips on rocker plate studs, installing the special locks in the clip slots. Rider should be advised whenever wheel bearings are serviced or adjusted. To lengthen or shorten clutch control cable, cable adjustable end must be removed from foot pedal stud figs. Engage clutch fully foot pedal toe down and disengage clutch control cable end from slotted end of clutch release lever. Remove and Install Scabbard Carrier. If brushes are badly worn or sticking in holders, replace generator pars.
Parts and Spares

Replace connecting link and spring clip in one end of chain to pre- vent its loss. The manual is divided into two parts. Harley Davidson Wla Parts Manual picture published ang uploaded by Admin that saved inside our collection. Sometimes tightening lock nut takes up on bearing play. Pull on spring end, at same time prying spring free of sprocket cover so'as to pull spring off square shaft. Lower saddle and saddle bar into position.
WWII MILITARY VEHICLE PARTS
You might also use this web to find out when a distinctive day or date in 2018 takes place. Connect rear chain oiler pipe to oil pump. Lights Burn Dim but Brighten Up Considerably When Engine Is. Carburetor has two manual controls: the throttle, which is operated by the right handle bar grip, and the choke, which is operated by a lever on the carbu- retor itself. All note references in the guide itself are to the steps below having the corresponding number: 1 Brake Fittings. Do not tighten clamp bolt nut as yet.
Download Harley 45 Wla Military Repair Dg61116 Pdf Enligne 2019 PDF Book
Back out to left needle valve to make mixture richer. Stowage on vehicle tools and equipment 35 T Tabulated data engine 72 vehicie specifications 7 capacities 8 performance 7 Tires, wheels, and hubs description 193 front wheel hub adjustment 197 installation 196 removal , , 195 rear wheel installation 199 removal 198 rims and spokes - 195 tires description 193 installation. A further check of alinement is observing that rear sprocket runs centrally in chain. Examine saddle bags for good condition. If the clutch still slips, replace either the disks, springs, or both par.
Technical Manual TM 9

If light does not bum in making this test, it indicates that lamp is burned out. In addition to a description of the Harley-Davidson motor- cycle, this manual contains technical information required for the identification, use, and care of the materiel. The chain in this condition has not been receiving enough lubrication. Clean the hole in which the fitting is to be installed, and lubricate after the new fitting has been installed. Wipe oft' excess applied lubricant that may drip onto brake or operating surfaces, soil clothes, or detract from vehicle's appearance. Find out the most recent pictures Harley Davidson Wla Parts Manual, and also you can have the picture here simply.