Gwxux.exe has stopped working. Fix GWXUX has stopped working in Windows 10 2019-02-06
How to solve the orgmode.com error
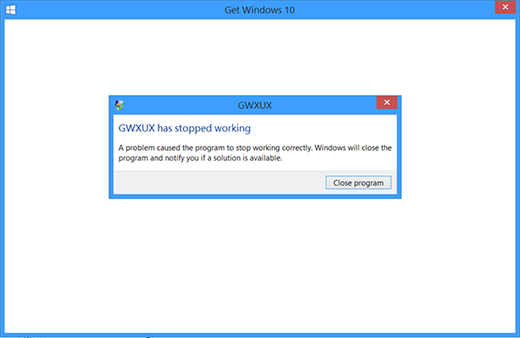
To launch the transition process, the individual should click on the Get Windows 10 icon located in the taskbar. The basic technique which is followed to fix this issue is to uninstall or disable the application. Visually both messages look the same. If you have not fixed the issue yet, try the methods discussed below, and you will find a fix for your issue. You can take a backup of the registry before you make any changes if you like by selecting File and Export. If you are yet to find a solution, have a look at the methods discussed below. And then pick on the proper entry to open Regulate Panel.
GWXUX has stopped working in Windows 10

Once you download it, you get a suite of optimization tools, including an uninstaller, one-click registry fixes, defragmenters, and more. Follow the instructions given below carefully. It will solve your problem. Also, read — Method 4: Restore the System to An Earlier Date Now, restoring the system to an earlier date shall work only if then issue has caused due to some recent changes made by you. It was essentially adware that Microsoft installed onto your computer without your knowledge. It replaces bad and corrupted system files to good system files that might be causing the error 0x80200056. After that, his computer started crashing several times a week.
Gwxux Has Stopped Working
Additionally, you can follow Application. Select Windows Update on the results list. Programs and Features 4 Then click on View Installed Updates. First of all, start by searching for the Task Scheduler in the Cortana Search box. However, users should be careful with free software downloads in order to avoid Application. Startup Settings 6 Click on the Restart tab at the left bottom of the screen.
GWXUX has stopped working in Windows 10
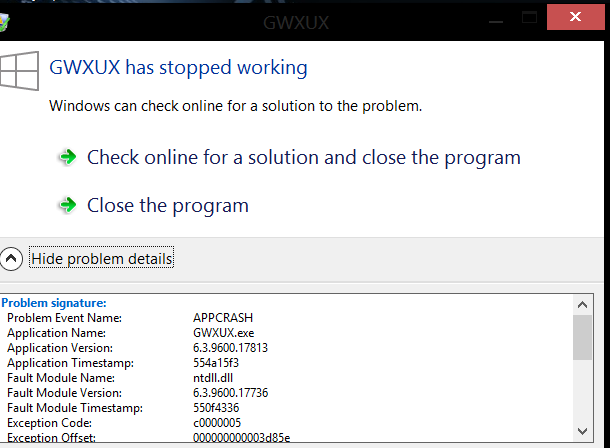
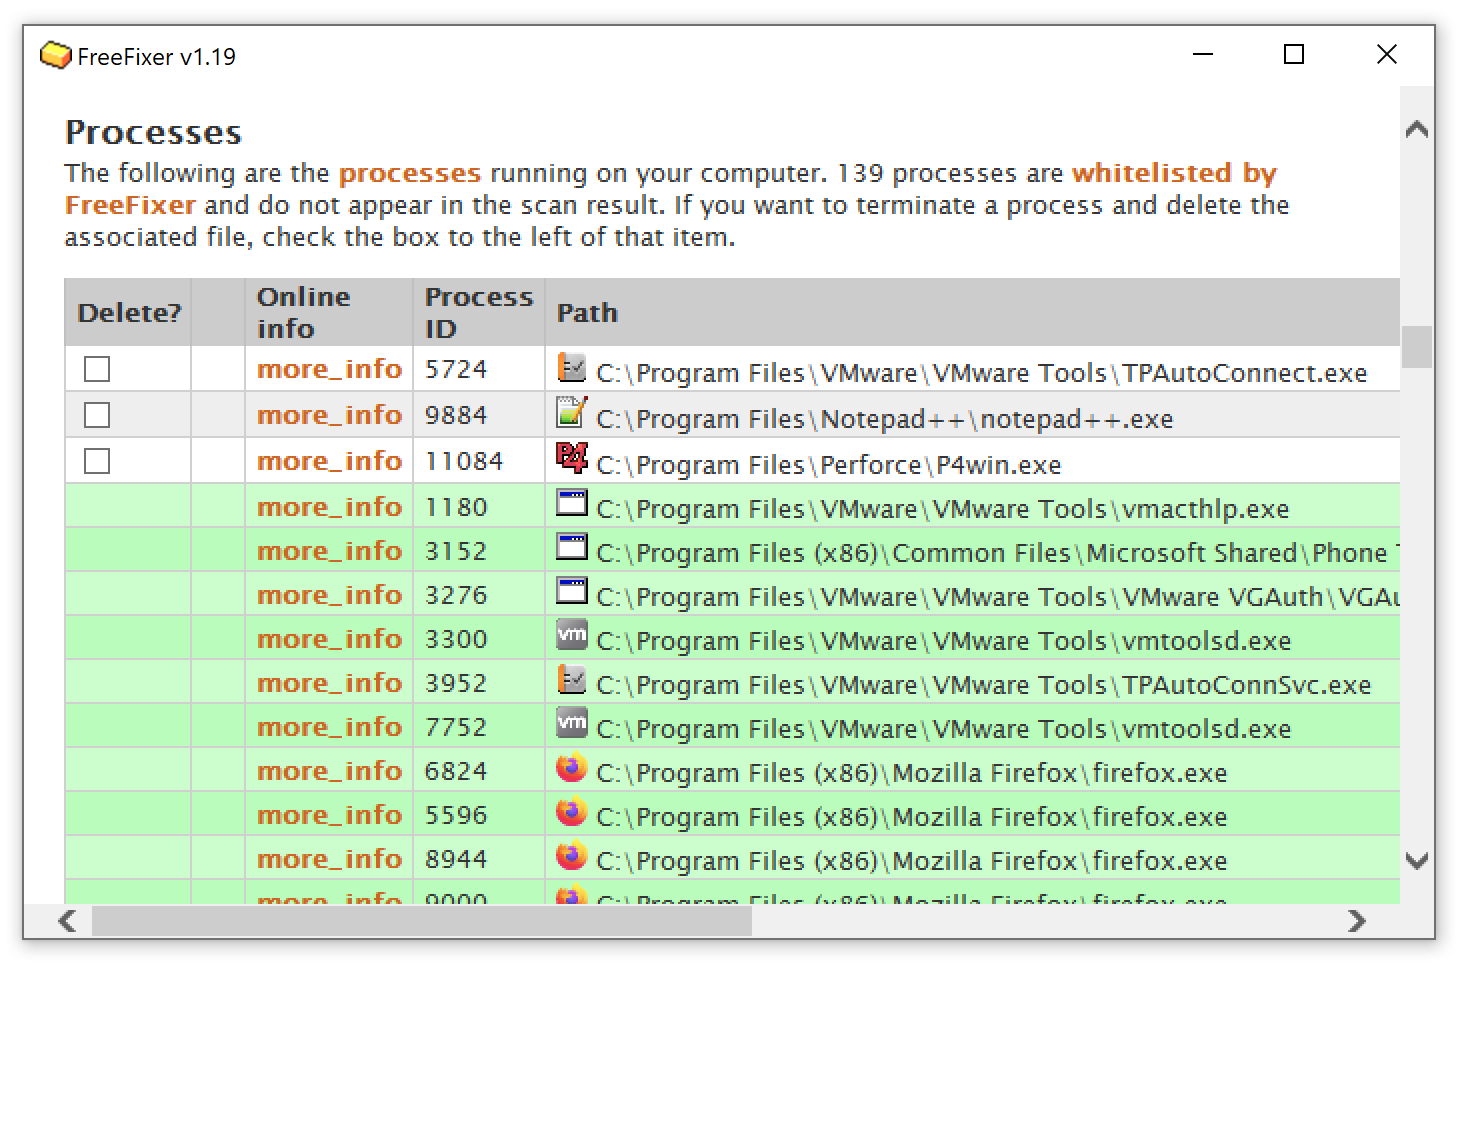
Every time a new Windows session starts and in the further course of it, the process in question triggers the notifications with non-functional controls that end up causing the obnoxious popup alerts. Keep in mind that this method requires putting more effort, patience and time. If your issue has not fixed yet, try the next method, i. I had to add the yellow folder by hand. The update is an opt-in. Or words to that effect.
How to solve the orgmode.com error

. Right click on each of them and select End Task to end these entries. If one method is not working for you simply move on to the next method. For this, we need to undertake the following steps. Now your system will boot into safe mode, and your issue shall fix. To add insult to injury, the application that was promoting another Microsoft product was crashing and throwing up errors! If the error is still not stopped and is still popping up on your screen. You might also like — Method 3: Fix Using the Troubleshoot Feature This method lets the Windows look out for specific issues and fix them itself.
Remove orgmode.com error “GWXUX has stopped working”

Anybody who wants to avoid the Windows 10 popups that come with this update should also remove it. We declined to agree to the user agreement. Disabling it from Task Scheduler Gwxux. This entry was posted on 2017-11-28 at 05:18 and is filed under ,. Windows 10: How to fix ms-resource:appDisplayName solved Discus and support How to fix ms-resource:appDisplayName solved in Windows 10 Software and Apps to solve the problem; How to fix ms-resource:appDisplayName in start menu. This will definitely fix your problem until you repeat what causes the problem in the first place. Repair Your Computer 3 Select Troubleshoot option.
How to fix “orgmode.com has stopped working” on windows 10

Select that to uninstall that update. Check out — Method 5: Boot in Safe Mode Booting in safe mode will help your system to run on minimal resources and hence it is a useful method to fix the gwxux has stopped working error on your system. Thanks for reading this article. Once Quick Access Menu shows up, select Control Panel and Uninstall a Program. How to fix a computer. The bogus alert includes a phone support line number.
How to fix “orgmode.com has stopped working” on windows 10

Decide on it, and you will see an uninstall button to pop up on the major part in the sub-menu ribbon as revealed in the display snippet underneath. Finally, he reset the Internet Explorer settings, and he was able to install. With this, the Get Windows 10 pop-ups are installed and then initiated by Microsoft. We will try to help you in every possible way. Hence, it can be stated that the file gwxux. Click the Reset button to complete Application. On the search field in the top right part of the window, search for View Installed Updates.