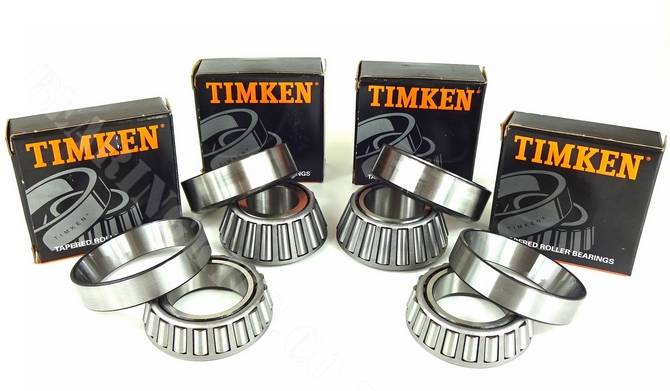
Ford 9 inch bearing rebuild kit. FORD 2019-05-08
Ford 9

I was encouraged by friends since I was already pulling the engine out that it was a good idea to freshen up my transmission and 3rd member. . I put white gear-marking compound on about seven teeth and regular, old, brown assembly lube grease on about three teeth because the brown makes a more identifiable footprint onto the white compound. The bearing comes pre-assembled left with a pre-lubed bearing and seal as one unit plus the axle-retaining ring. This goes for all Loctite joints. I replaced the wheel bearings so I'm going to replace the axle seals also.
FORD

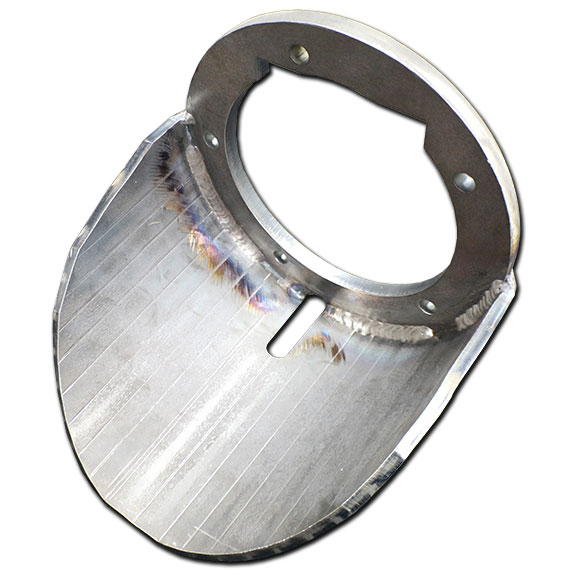
Setting the pre-load on the pinion. When installing the bearings and setting up the back lash and case spread use a little motor oil on all moving surfaces. My mesh pattern was centered a little high on the tooth. There are 4 main areas to a tooth, the coast side the drive side and the heal and toe. Third-Member Installation Step by Step Step-1: Double-Check Axle Lengths if custom If you want to use a custom-width axle, the shop that fabricates the unit needs to take some final measurements to make sure all dimensions are correct. I notice a piece of paper in the new ford racing posi box. Step-3: Install Third Member Carefully lower the third member in place.
9 INCH FORD Rebuild Bearing Kit

The smaller diameter should point toward the outside of the differential. I came along when the Rear Seal killed itself and the trans place did the rest of the damage. Step-8: Install Bearing and Lock Ring Place the components in a hydraulic press and press them together left. How this all started: in 2007 i went through an extensive rebuild of my car in an effort to make it road worthy. There is suppose to be a pre-load on all the bearings in the 3rd member. I was able to wiggle my yoke up and down and in and out, so i knew my bearings were shot.
9 Inch Ford Rear End Overhaul Kit
With plans from the internet and 1 day getting lumber i was able to construct a bench large enough and strong enough to work on a rear axle. With the grinding of the case Carefully done according to the ford racing instructions sheet i was finally happy with the fit and clearance. So the old posi traction was damaged beyond hope. With the case in good shape I installed the new pilot bearing for the pinion shaft. These bolts hold the brake backing plate and axle retainer plate in place right.
FORD
It is partially installed here; you want to chase the O-ring into the groove all the way around. They got me for a one, two punch! Step-16: Test Torque of Pinion Assembly Precision Measurement For new bearings, target a torque-to-turn in the range of 13 to 15 in-lbs. Take extra care to make sure that the threads are lined up correctly. This would be a light load situation, your floating along the road. While this may seem like overkill, it is an effective technique rather than trying to clamp the differential case in the vise. This was the cause of my 'water flowing' noise that started me down this path of rebuilding my axle mechanically not cosmetically. As evidence take my original posi, it was damaged beyond repair due to incompetence in the past.
9 Inch Ford Rear End Overhaul Kit

For used gears, aim for. Here is where people Screw up big time when rebuilding a 3rd member. The easiest way i approached it, worry about the pinion spacer first, get the mesh on both sides of the tooth drive and coast to be as centered up and down as possible. Thread locker and sealant orange comes pre-applied on the nut threads and the bottom flange surface. I had a 2 foot long breaker bar with a 5 foot pipe on the end to get the force needed to start to crush the sleeve. This is where you have a drive line noise under light load or cruise. Take your time and make sure that the wider of the tabs are locked into the groove in the third-member casting right.
Ford / Master Bearing

No wonder I had a pickle of time trying to see what the original backlash was it would have been impossible. You can achieve the same arrangement with a socket on the bottom side of the axle shaft and using a hammer to seat the stud. I also found a way to test for float based on what i read. I also took the time to inspect the ring gear carefully. This helps lubricate the seal during initial running and helps the axle slide in place.
How to Rebuild a Ford 9 inch.

This makes the yoke a press fit on the pinion. I had my share of engine problems but the drive train of my car was in decent shape. Torquing the ring gear to the posi; I would of never guessed that would of just drained the life out of me the way it did. Install the differential case with its bearings and races in place. Originally this was a rambling collection of thoughts and multiple posts. Complete install kit for a traction lock, bearings, and hardware.
Ring and Pinion Gear Installation Kits

Be careful to only press on the bearing inner race. The new shaft The Thrust and side gears were in good shape and i would reuse them. Because that would mean they will reuse your original bearings if they are good or bad. With our kit in hand, we rebuilt a four-pinion, 28-spline Trac-Lok differential in a few hours. Complete install kit for a traction lock, bearings, and hardware. For good measure, also apply grease to the seal running surface on the axle shaft right.
Ring and Pinion Gear Installation Kits

I like to use an actual inner race where the cage and rollers have been removed. Before installing the 3rd member clean off the marking grease from the ring and pinion gear, you can use electrical cleaner or parts wash, but try to get as much of the white grease off as possible. My bearing adjusters at 20 ft pounds with red lock tight. Because my rear end had so much wrong with it I decided to put everything together and start to double check measurements. Just be careful and make sure that the stud is driven in straight. I thought it was a problem with my fuel delivery system because of the sound of running water the problem made.