Fl studio production tips. 7 FL Studio power tips 2019-03-30
FL Studio Tutorials, Production Courses, Tips, Tricks & Beginner's Guides

Once you have an audio clip in the playlist you can left click the drop-down box on the left side of the audio clip. In this tutorial we show you. This can be useful when you want to add notes to a phrase that isn't strictly quantised without them overlapping, or when slicing audio in the Playlist. Like F5 for playlist, F6 for Step Sequencer, F7 — the Piano Roll, F8 — Sample Browser and F9 for the Mixer. Good thing you've got Alan to teach you how to do it right the first time. So in terms of panning, I'd suggest you watch some videos on the theory of it, why and when to do it, and maybe some rock and roll-mixing videos to see how it's used in real pro songs. Too much and the song will become muddy.
The Ultimate List of FL Studio Tips

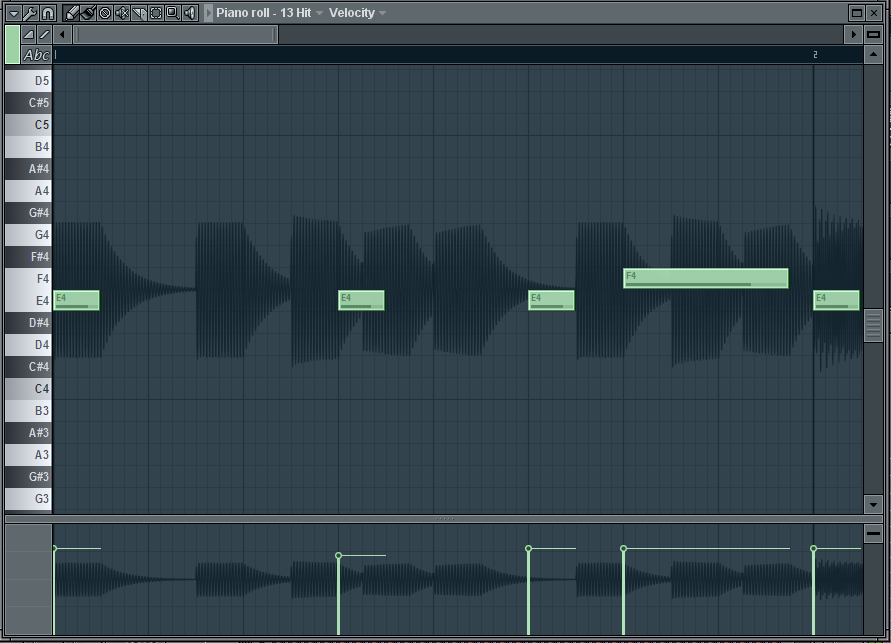
Pan automation Panning is a great tool for adding width to your music as well as separating music. Scale note properties In the piano roll, the velocity levels or other parameters of the currently selected notes can be scaled by pressing Alt+X. Learn Home Mastering Basics The opposite of over-limiting is a weak and low-volume track, another sign that the track is not properly mastered. The Fruity Multiband Compressor, or Maximus. Once you have recorded a midi performance it will be displayed in the piano roll.
FL Studio Power Tips (Hip Hop Production)

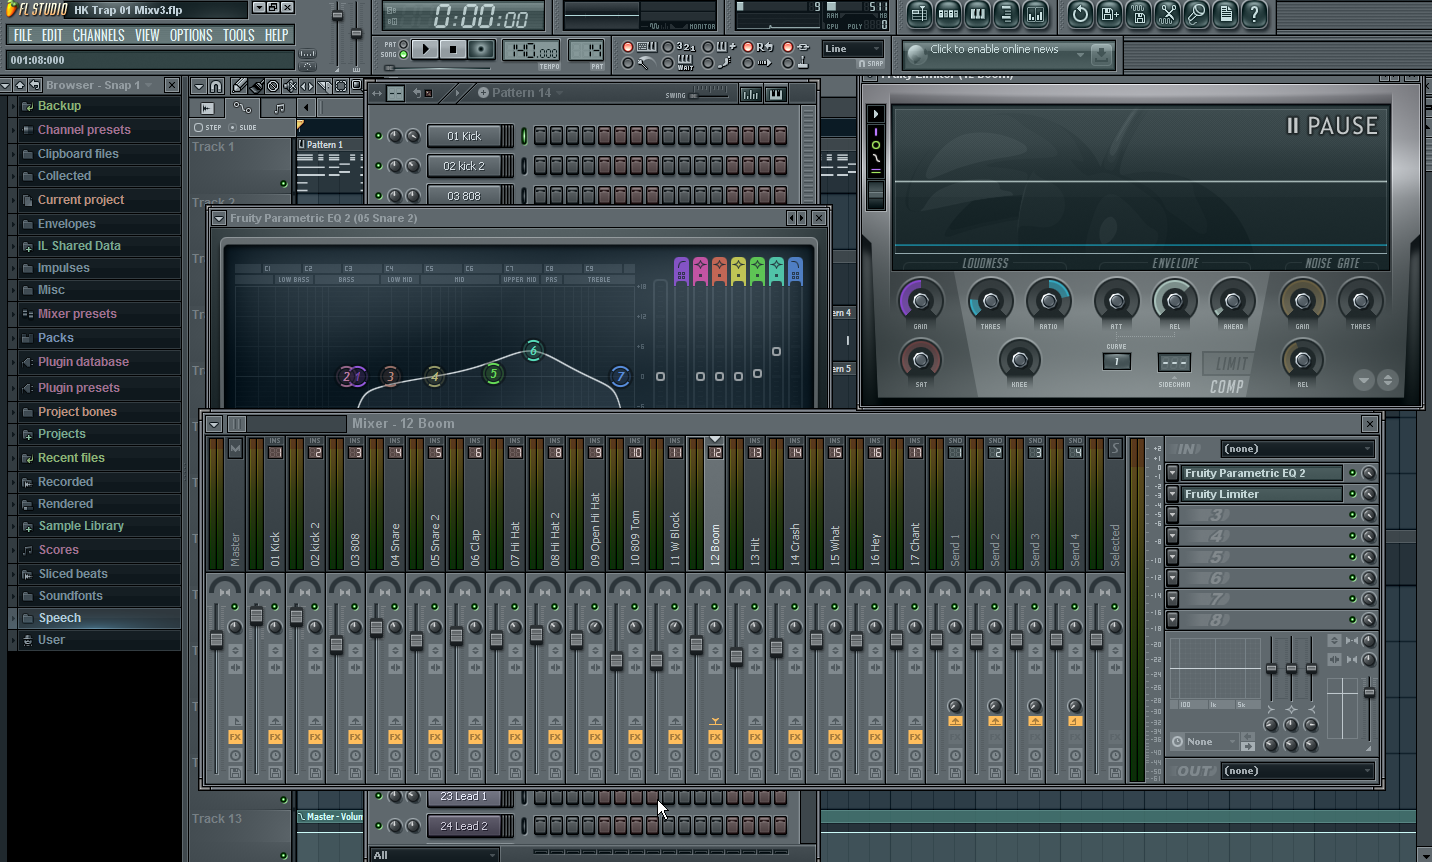
In some instances you may only want to send one track to the mixer. Also, sometimes you may need to quantize certain groups of midi notes on their own, apart from the whole drum truck. All of these have sequencers onboard, and offer sampling. Mastering comes after the track is finished and is fully mixed. And, I will try to pull out every possible thing I could remember to help you get better at audio production from any given angle.
Hip Hop Production and Mixing Tips
This frequency range essentially offers nothing to your mix other than a low end rumble which will quickly clog up your mix as you add more and more elements within this frequency range. Masters of hip hop beats are masters of groove, and can lay down a drum pattern with no correction. If you thought the first 6 lesson where good wait till you see what is still to come!! You can do hip hop on a multi track recorder. Compression, this is used to even out the dynamic range in an audio signal. Learning to achieve a balance between loudness and dynamic range is important. But also a good, balanced mix, clean audio image, dynamic versatility and professional sounding environment. Not only can we hear downwards of 25 or even hear 20hz, many headphones and good speakers will have a frequency range travelling well below 40hz.
11 secret FL Studio tips
I spent years right clicking around and clicking icons. Thank you for visiting my blog. This moves all the notes you highlight by midi ticks, the smallest possible note division the sequencer is capable of. First, to select a portion of time, hold Ctrl then click and drag on the timeline at the top of the Playlist. I find that keeping related elements near each other optimizes my workflow as I compose the beat. Get it wrong and it's a different story. For those who are into making esoteric beats, you can borrow elements from one audio loop and precisely place it in another with simple copy and paste commands.
The Ultimate List of FL Studio Tips

To be a producer, focusing on our genre of Hip Hop, you need to be open to a lot of versatility. Knowing how to master your tracks properly can make an immense difference in making your tunes sound more professional. This is where things start to get fun as you actually start building the foundation of your track. Most importantly learn the basics of synthesis. This functionality is great for a number of different things such as remixing a song. In this tutorial we show you.
FL Studio Tutorials, Production Courses, Tips, Tricks & Beginner's Guides

Simply add a Layer track, open its interface, click the Channel Selector of the multiple channels you want to layer to select them, then click 'Set children' in the Layer screen's window. Your ears will be fresh and you will avoid the dredfull 4am sindrome where everything sounds so good! From there you want to choose automation and then panning. If you find any joy and value in what I do, please consider supporting with a recurring monthly donation of your choosing, between a beer and a good dinner:. It is only ever detected by human hearing as very deep noise, if it is detected in the first place. Alternatively, use your mouse's scroll wheel as you hold Ctrl to zoom in and out horizontally; or scroll vertically by holding Alt as you move the wheel.
FL Studio Tutorials, Production Courses, Tips, Tricks & Beginner's Guides

Also using a high pass is removing sound from higher frequencies near 40hz that are also important for your mix. The secret volume control A channel's volume can be automated in the piano roll by right-clicking the grey box under the keyboard and selecting Channel volume. Metronome customisation To change the level of the metronome and the audio preview in the Browser, go into the Audio Settings window — which is accessed from the Options menu — and select a Mixer track with the Preview Mixer track selector. Route every channel to the mixer. Tip 6: Fruity Limiter has an unprofessional algorithm that causes a lot of pumping, even if you increase attack and release times, and can't apply in awful lot of gain. As this is the place you can create melodies in court progressions for correct notes that were played with your midi keyboard for pads. Now, this is a bit tricky in a way that it can make your producer life easier by saving your personal settings of the plugins, mixer channels, instruments etc.
8 Essential Tips for Mastering in FL Studio : orgmode.com
Self-promotion is not allowed apart from the feedback thread. This will maximize the perceived volume of the whole mix, plus help prevent any clipping on your master output. Then set Snap to Step and draw in your automation. I fumbled with knobs with out really knowing what I was doing for a very long time. The typical dilemma is this: as more sounds are layered together, the audio may start to clip. So for example if you wanted to sweep something from left to right you put your first node on the left side and your second node all the way to the right side.