Fl studio distortion kick. Having trouble with my kick becoming distorted after exporting for mastering [FL STUDIO]... : edmproduction 2019-05-11
RAWSTYLE KICK TUTORIAL
The third is the same section only I exported it from my mastering file none of the master plugins were engaged, so it should have been the same as the first and second sections. I set a basic pattern for the kick and a few simple chords for the Swagger Bass synth I made in Sytrus and overlapped them in the Playlist. Now to my ears, the notes in the highest octave E5 were playing a bit too loud so I dropped their velocity values. Well at 1, your attack and release will be immediate. Synth Bass — Filter somewhere 40 Hz and below using a high pass filter. Pitch Sliding The Air Horn So, after opening the air horn Channel Settings panel, I set the Pitch Knob Range to 6 semitones and created an automation clip for the Pitch Knob. At this point I also raised the Gain this is the output gain or make-up gain to 13.
RAWSTYLE KICK TUTORIAL
Anyways, appreciate all the tutorials and help and hope to hear from you in the future! I put a link in every YouTube description, but I also present the download in different places on this website. Now, in the Playlist, I extended the rising air horn pitch envelope by two bars, and created a drop from 100% to 0%. With these doubled parts you want them low in the mix. It's just so weird because when I export out only that section from the original file, it sounds fine. Make a one-time donation Click the button below to make a one-time donation. Especially for a Guitar track, there is a very heavy bass and also with nice melody. So, first I copied the drum pattern from 17 and pasted it to bar 27:03 and made it unique.
Fl Studio Sound Packs & Kits

Getting a powerful low end bass on your beats can be a difficult task. Next, I enabled the second Delay unit and under the Feedback I set the Time to 5:00 echo in every fifth beat , Pan to 100% right, and Feedback volume to 26%. The open hihats were ready and I moved on to claps. Your gift immediately ensures the continuity of Screech House. This will visually show you when the kick begins, peaks, and ends. Short decay time works best when creating basic slapback echo effect with reverb.
Learn subwoofer, sub woofer, and bass techniques & tips in Fruity Loops FL Studio
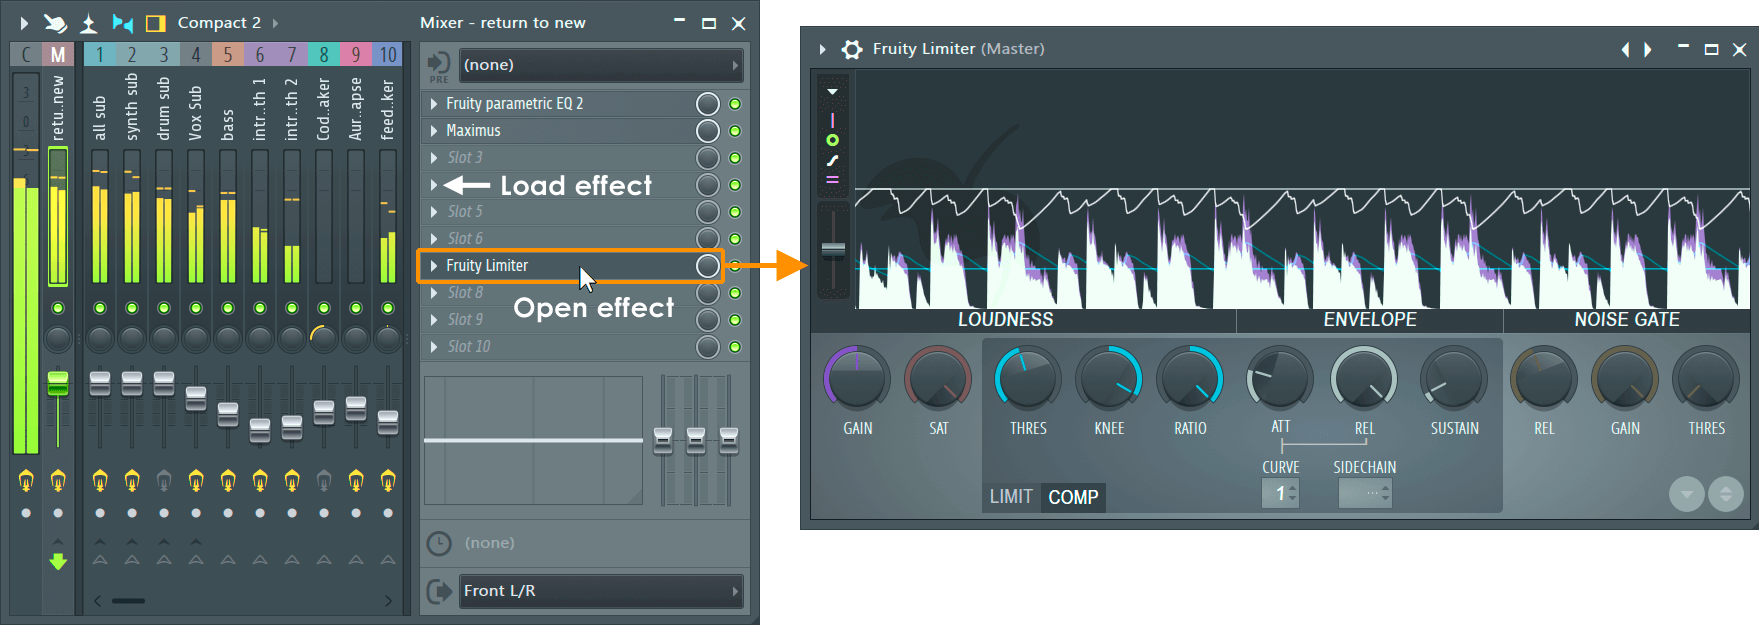
You can load our sounds into your Fruity loops based program or our. Next, I planned to use compression to shape the kick. Step 1: Add Fruity Limiter We first need to add a Fruity Limiter to the bass Mixer track or whatever track you want to duck under the kick. This setting alters the tension of the attack and release curves. Then I adjusted the Input panning all the way to left. Next, I set the Attack to 2. I also extended and edited the envelope so that it restores back to the default value of the volume 78% at bar 27, beat 03 as that was the point where I planned to end the break and bring back the air horn, beat, bass and everything.
How to sidechain a kick without effects? : FL_Studio
Now, we need to make the signal link from the kick track to the bass synth track. Stacking Your Kick With 808 Now we want to grab our favorite 808 drum sample. If you boost frequencies before feeding the signal to compressor, the compressor reacts to these raised levels of frequencies and makes things sound different. We are going to be doing some filtering. Any program that allows time-stretching can produce exceptional and unique subwoofer effects. This is how the drop sounded: Allright.
Fl Studio Sound Packs & Kits
If want to side-chain light I mess with the settings until you can barely hear the synths ducking when playing the kick and snare but the ducking is obvious when you don't play the kick and snare. This will give you the punch of the mid kick and the deep bass hit of the 808 sample. I will slide my high pass filter up slowly until I hear it impact the kickdrum. The exported songs bass is extremely loud an distorted, while in fruity loops, the bass sounded just fine. Step 2: Shape the Automation Clip We want to achieve that same ducking effect as before. January 15, 2016 Subwoofers are a respectable medium of creativity.
RAWSTYLE KICK TUTORIAL
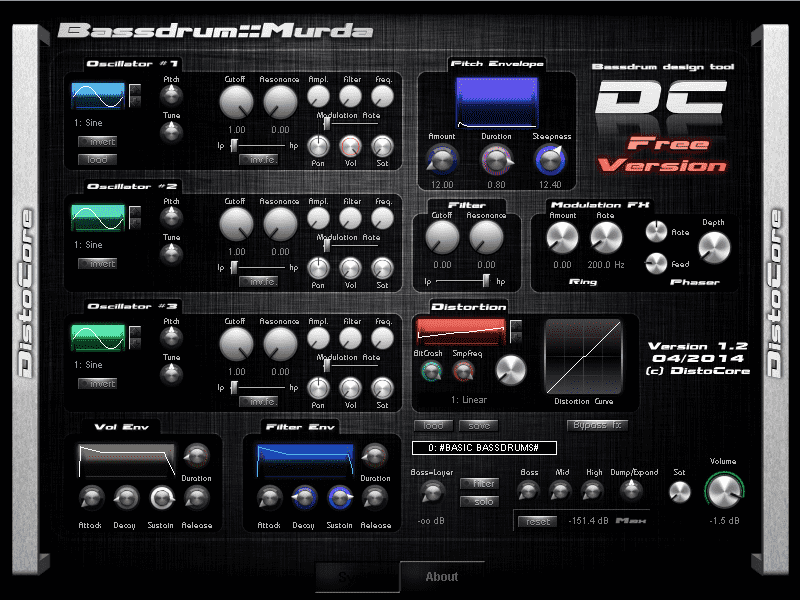
Next, I placed a Fruity Fast Dist distortion effect to the kick drum effect chain. Next, the most essential element of this beat: the kick. Feedback volume -14% seemed to give a right kind of volume balance between the echo signal and the dry signal. And at 8, your attack and release will be more sustained. Note: Using this method you are removing almost all of the high end on the sub bass which is good in most situations. I also edited the Velocity values via the Graph Editor to make the velocity rise gradually.
Learn subwoofer, sub woofer, and bass techniques & tips in Fruity Loops FL Studio
Next, I copied the reversed crash, bass, bass channel volume automation, air horn pattern, love philter mute solo automation and air horn channel pitch automation clips to 27:03. I use it to add a very subtle distortion to the kick. Then I set the Editor Target to Volume and Articulator Part to Pattern envelope. We offer quality drum samples and drum one shot samples. It can make your kick sound a lot bigger. This is how the arrangement sounded starting from bar 17 and ending up to the break: Now, after the break, I was going to make a slight addition to the drums: ride cymbal sequence.