Excel worksheet password protected. How to Password Protect an Excel Spreadsheet (with Pictures) 2019-04-12
Use a password to secure access to an Excel workbook

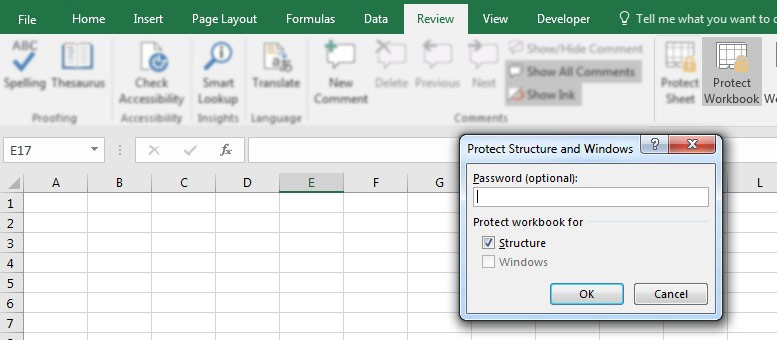
It will maintain the privacy as well as will let any other user to read the document. If you leave only these two options selected, the users of your sheet, including yourself, will be able only to select cells both locked and unlocked. Part 3: Unprotect Excel Worksheet When password protect a Worksheet, you can edit the data on it anymore, unless unprotect it again. In addition to password-protection, you can secure your Excel files further by using the BitLocker Drive Encryption, which is available in the Ultimate and Enterprise editions of Windows Vista and Windows. Click on Insert, select Module. Use PivotTable reports Format, change the layout, refresh, or otherwise modify PivotTable reports, or create new reports. For example, if you're using Passware Excel Key, you'll first have to click Remove a password before you can select a file.
How to Remove Password from Excel (Workbook/Protection/Open)
Then click the Save button to save your workbook. How to protect Excel sheet To protect a sheet in Excel 2016, 2013 and 2010, perform the following steps. Now you can unlock it, and manually remove passwords from Excel files via. If forgot the Excel opening password, go to. This will prevent users from moving, resizing, minimizing, or closing the workbook windows. Change the Suffix of Excel 3. Now let's see how to retrieve or delete the forgotten Excel password as soon as possible with the best settings.
How to Open a Password Protected Excel File (with Pictures)

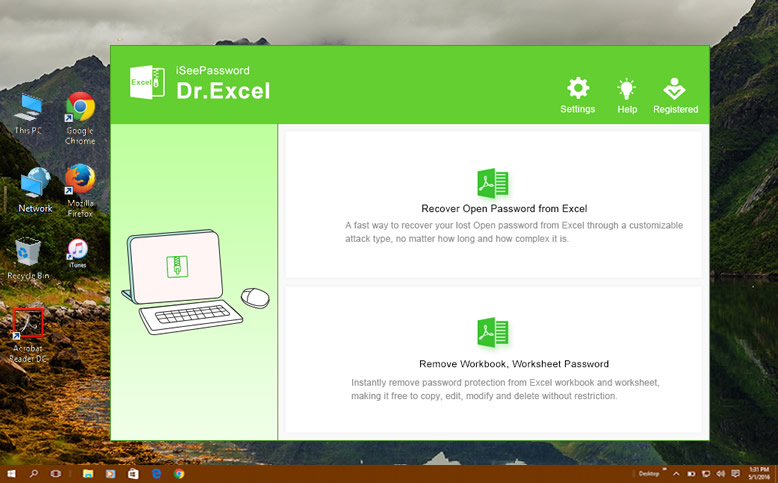
Copy the protected sheet contents to another worksheet Another way or rather a workaround to unlock an Excel sheet that was protected with password is to copy its entire contents to a new sheet. Note: Users cannot apply or remove AutoFilter on a protected worksheet, regardless of this setting. In Excel 2007, click the Office button and choose Save As. Use good password policies, which means longer passwords with different types of characters, numbers and symbols. This article was co-authored by our trained team of editors and researchers who validated it for accuracy and comprehensiveness. After adding Excel file, just choose which file you want to remove workbook password, then click the Start button to begin. Given below are the steps to protect your sheet.
How to Password Protect an Excel File
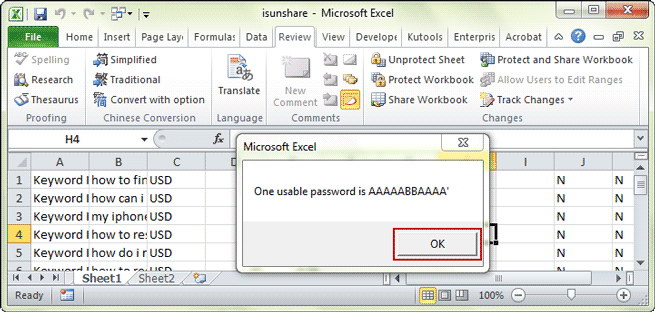
Setting a password to open the workbook is self-explanatory; if a user doesn't know the password, he or she can't open the file. To assign a password to an Excel workbook, do the following. This user just can't save the changes to the protected workbook. Say you own the team status report worksheet, where you want team members to add data in specific cells only and not be able to modify anything else. In a flash of few time, the password will be shown cracked on the screen. Even when you protect your Excel worksheet with a password, that password is very easy to break. Note: ActiveX controls, form controls, shapes, charts, SmartArt, Sparklines, Slicers, Timelines, to name a few, are already locked when you add them to a spreadsheet.
How to Open a Password Protected Excel File (with Pictures)

Be sure to note the password somewhere safe, just in case you forget it. Do the same for all worksheets Step 6. The bottom line is — lock an Excel spreadsheet to prevent other users from accidentally tampering with your data, but never store sensitive information in your Excel sheets. You'd better remember the Excel password or use a more familiar password. Password protect Excel workbook from modifying If you don't mind other users opening your Excel file but you want to prevent them from making any changes to your workbook, perform the following steps. It also helps files from being spied on when you send them digitally.
How to copy data from protected sheet?
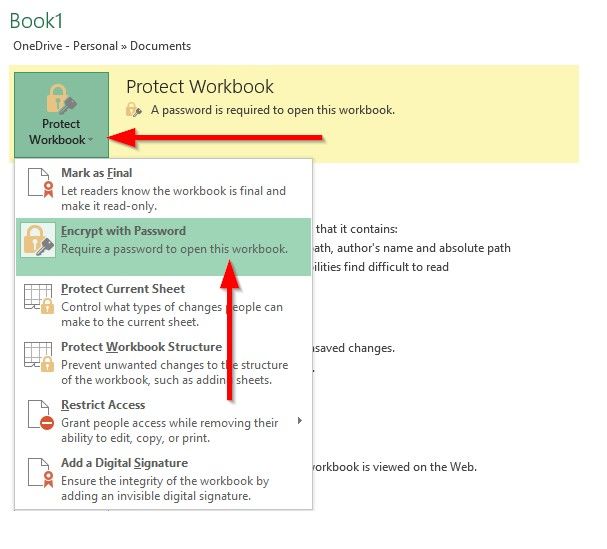
This will enable you to password protect the entire workbook and prevent anyone else from opening it and viewing its contents. If so, you can to unlock it. Keep it simple, direct and apprehensive. Now, whenever you want to open that protected Excel file, you will first see a screen like the one below asking for your password. If you want to protect your Excel file both from modifying and opening, type the passwords in the Password to open and Password to modify boxes. As you can see, sometimes removing protection from Excel is not that simple. The Windows option is not available greyed out in Excel 2013 and Excel 2016, as shown in the screenshot above.
How to copy data from protected sheet?
The easiest way to do this is by double-clicking the Excel file; if the file opens like usual when you double-click it, the sheet is protected but the file is not. When the Workbook structure is unprotected, then you can edit it without asking password. Go to the methods in 2 and Part 3. When the file-save window appears, type in your file name, then select the Tools drop down menu. A common example is Locking formula cells to prevent inadvertent erasure or modification of formulas. Click on Insert, select Module.
Protect and UnProtect Worksheets in Excel VBA

If you want to protect your Excel file both from modifying and opening, type the passwords in the Password to open and Password to modify boxes. If want to unprotect the Workbook, follow the steps below: Unprotect Excel Workbook with password 1. It also explains how to unlock Excel spreadsheet without password if you forgot or misplaced it. Figure A Enter the password and note it in a secure place. As soon as the file uploading is finished, the password recovery process begins. Double-click the Excel sheet, then edit it as needed. Copy data from protected sheet with Name Box If you need to copy a specific range of data from the protect sheet, you can apply the Name Box to finish this job.
How to Securely Password Protect an Excel File

From that menu, select General Options. A passphrase that uses 14 or more characters is better. When a pop-up window appears, select your options and type in the desired password. You can't add a password to a file open in the browser, nor can you open it in the browser. Wait for the process to recover your Excel file opening password, and then use it to unprotect the Excel file. Supposing, you receive an Excel file from another person which with worksheets are protected by the user, now, you want to copy and paste the raw data to another new workbook.