E46 side trim removal. BMW E46 Radio Removal 2019-02-23
Me and my e46: BMW e46 Touring Rear Speaker Replacement DIY
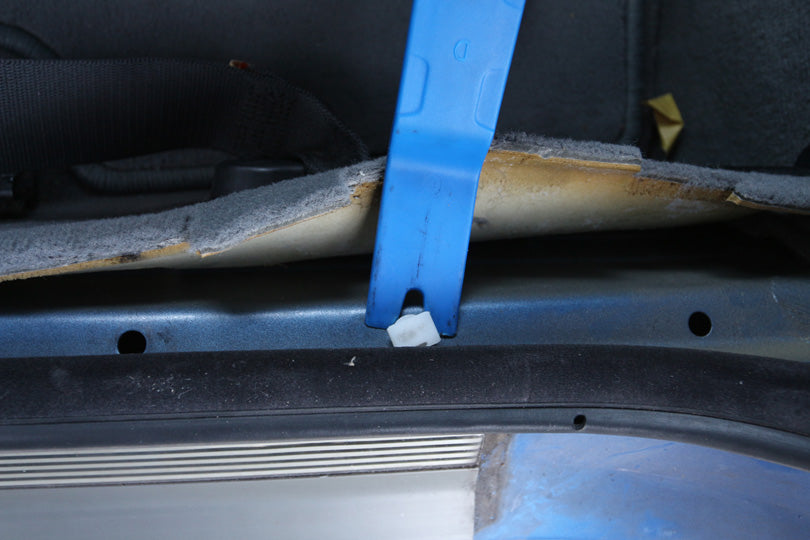
Driver's side: Using two screwdrivers, lever out mirror switch 2 towards top of control knob 1. I started by replacing the Head Unit, this was relatively straightforward. The area behind the molding can rust and is sometimes hard to notice when the molding is in place. Once you have raised it up, you will be able to remove the roller blind clip. If you're lucky you can push the centre piece through just enough to release pressure but not enough to lose it. Once the molding is removed, inspect the body for rust. These clips are at the top where the panel meets the carpet, wiggle it a bit and then pull or pry it off and the panel should come off fairly easily.
Shadowline Matte & Gloss Black Window Trim & Roof Vinyls
In reality it falls into the sill though The clips under the skirt are similar but you can actually pull out the centre piece. If you are reading this post then you are probably aware that the standard sound system in the e46 Touring leaves a lot to be desired and I was determined mine would have a sound system that was worthy of an otherwise great car. If you are replacing your working stock head unit with an aftermarket one, we suggest holding on to the original. Unclip clips 1 in door trim panel with special tool 00 9 317 trim panel wedge. Need to buy parts for this project? Do not work on your vehicle if you feel the task is beyond your ability. Did you need the adaptor anyways? Disconnect plug connections 1 and 2 and remove on-board socket 2.
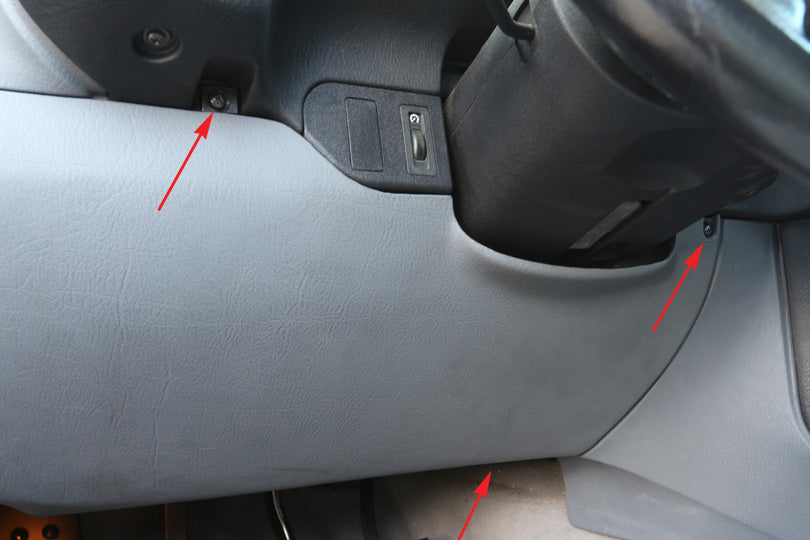
E46 front door panel remove instructions

I also used the little the tube to spray some on the top clips; you can pry the rubber gasket along the top of the skirt back just enough to squeeze the tube in and lube up the white clips. Disconnect plug connection 1 and remove mirror switch 2. It took me roughly two hours per speaker, but as always I reckon I could do it quicker now I know how to do it. When I checked, I found that the part of the moulding inserted to the clip were broken. Just take your time and think logically and methodically and it should be easy enough. Vehicle models change and evolve as they grow older, so the vehicle shown in our illustrations may vary slightly from yours. New videos are always being uploaded every week! Removing this trim is fairly straight forward, but we do want to take extra care as we can damage it.
How to Replace Window Clips in Grand Ams

If you ever go to sell the car later on, a lot of potential buyers would rather see a stock stereo unit in the car. All of our articles are original and written by our staff. Figure 4 Inspect the molding clips for damage or wear. Ok, I see why you are confused. Remove mount 3 for on-board socket from trunk wheel arch trim 5. Ebay is without a doubt your best source of original and rebuilt head units that match your car. With your vehicle info handy, give The Pelican Parts parts specialists a call at 1-888-280-7799.
Shadowline Matte & Gloss Black Window Trim & Roof Vinyls

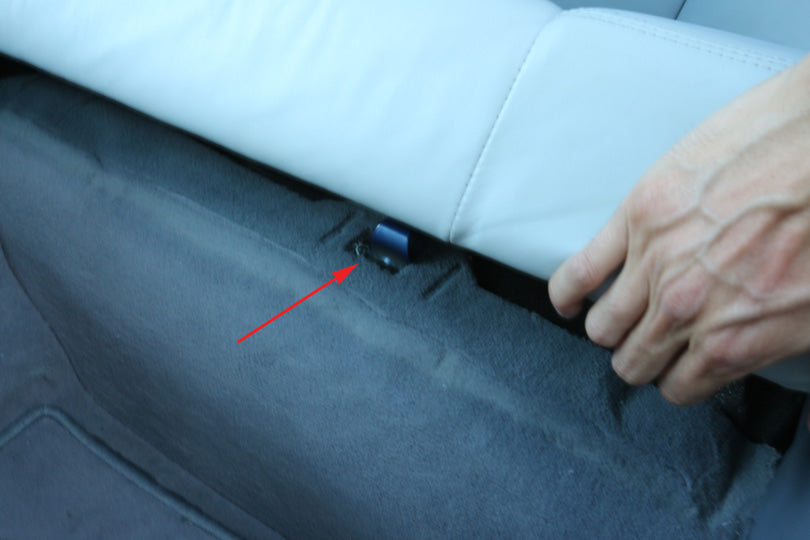
The glove box trim just needs to be loosened just enough on the left side so the radio trim can be slipped out from underneath it. But, unfortunately most people on said forums seem to think the rear speakers are too difficult and must involve some sort of black magic to get at. Ok , so you needed adaptors anyways? Haynes doesn't cover the rear boot trim in the touring. My new speakers bolted to the adaptor and the adaptor fits the three bolt arrangement. You had 17cm originally and fitted the same size too? Remove trim 1 from lashing eye at opening. Ok so you did not have to buy any adaptor then? When leaving a comment, please leave your vehicle information.
Guide. E36 side skirt removal

Also, colors on screen may vary due to different monitor calibrations. When reinstalling, screw 1 is longer than the others. If you spot rust, now is a good time to repair it while you have it apart. The next thing to remove is some sort of plastic rivet and they can be a complete pig. Remove your boot floor and you should see it. Since most of us enjoy listening to music while cruising in our bimmers, it can be a real drag when the stock stereo head unit takes a dump on us.
Guide. E36 side skirt removal

Repair finished If you have any questions or comments, please feel free to comment on this article or. Did you go for bigger speakers or smaller than the original? To precisely adjust the window regulator for this function, you have to remove the door molding and reach inside the door cavity. Remove screws 1 and 2. Carefully unclip door trim panel 1 at top with special tool 00 9 317 trim panel wedge. Recycle parts, packaging and fluids when possible. Disconnect plug connections 3 and 4 and remove door trim panel. Haynes doesn't cover the rear boot trim in the e46 Touring and most of the forum posts I came across about the matter talked about how hard it is to do and you shouldn't bother.
E46 front door panel remove instructions
If you own a two-door coupe or convertible version of the E46, the door glass has no frame but instead fits in the rubber door trim when the door is closed and the window is up. If necessary, replace faulty clips 1 in wooden finisher 2. Have a look at the picture then have a look at some adaptors on ebay and you should see what I mean. Just follow our instructions below and you will be back to jamming out to your favorite tunes in no time. Even models within a series have different sizes.