Dng to jpg convert. How to convert DNG photos to JPEG online 2019-01-27
How to convert DNG images to JPEG in batch for free

Alternatively, you can use raw. One of its main advantages is providing a good image quality in a relatively small file size, which is easy to store and transfer. Logically it makes sense to always select this option. This would be a silly thing to do. Clearly that would be a useful enhancement to the spec. Why do the new tools allow this, and why might it be useful? Watch our website for updates. Instead, software gives the user complete control over the conversion settings.
dng to jpg
The image loss is minute and you need to print it very large and peer at it with a magnifying glass before you may see any difference. For example, white balance is not applied to the raw file but is stored with the file so the software can default to the originally-intended setting. It stands out as something with special editing properties. Unlike most manufacturer-specific raw formats, the Digital Negative is an openly published specification that not only is supported by Adobe, but is also freely available for other software and hardware vendors to support. A dialog box showing the status of the conversion appears. The only change I would make to these settings is when I have finished with the images and I am archiving them. The term device independent means that the bitmap specifies pixel color in a form independent of the method used by a display to represent color.
Convert dng to jpg (Free & Online)

Besides, you can convert from native raw formats like. So, my advice is to check the box and let Lightroom do all the work for you. You can choose the extension to be either uppercase or lowercase. . But the fact that raw. Archiving your file as a digital negative eliminates worries that the raw file will no longer be readable once the camera format that created it becomes obsolete.
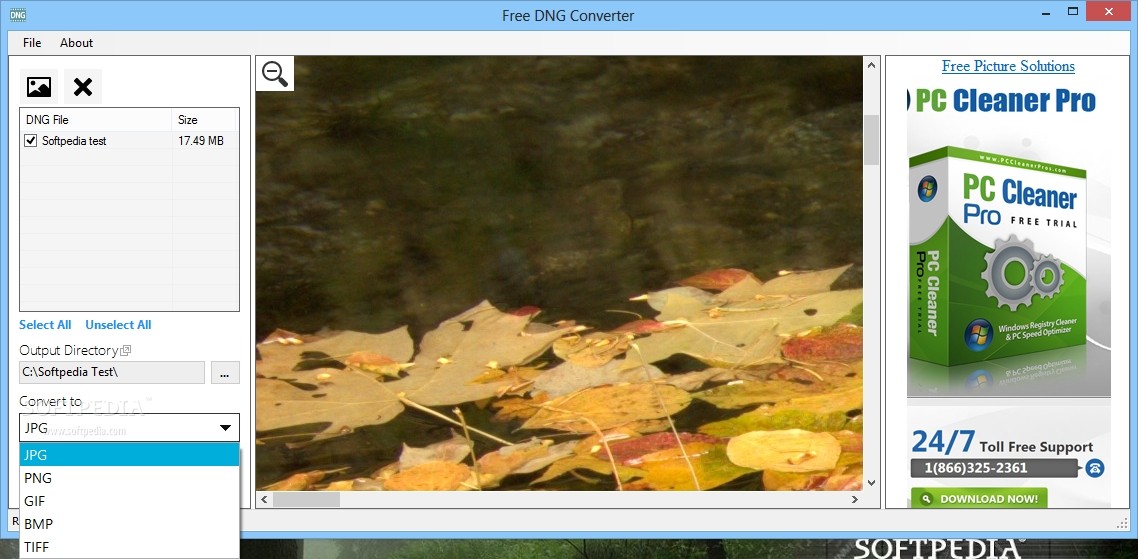
DNG to BMP
That would cause you to go through storage at an alarming rate. What file types are supported? These profiles are copied to a common resource location. Is that something I should consider? Some loss of the data stored in the image file occurs during the compression process. Step 1 Make sure that you are in the Library module by pressing the G key. Surely it makes more sense to describe the import process before describing the process to adopt for Raw files that have already been imported into Lightroom. This enables Windows to show the bitmap on any type of display device - such as your monitor.
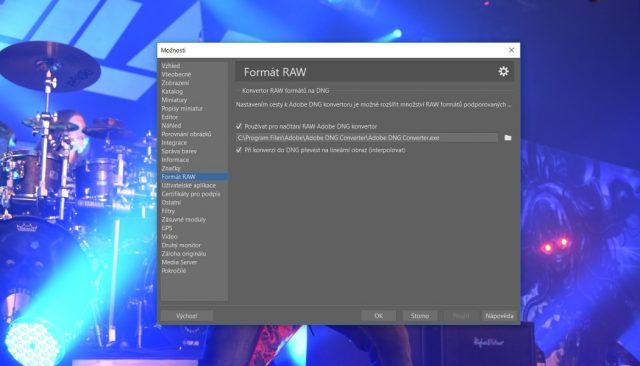
DNG Converter
Be warned, it will take a long time. How does one do it? Your help would be much appreciated. The format is more commonly know as Bitmap files. This data can be modified with the help of online editor and convertor, such as raw. The biggest disadvantage here is that they are not free and require installation.
Convert DNG Online

This shaves off more of the size, without any observed quality loss when processing. This depends on your perceived future for the file. I wrote an article on a while back. Consequently, it can be a safer file format to use for long-term archival purposes. Although it is fast, this software is extremely efficient in managing a wide range of conversions.
DNG to JPG
We shoot Raw so we can have access to all that Raw loveliness when we develop our images. It is irrelevant which one you pick. When working with raw files, the file is not compressed or processed in the camera. Also, and this explains my back-to-front structure of this explanation, performing the conversion on a few existing Raw files allows you to get a good understanding of what options you have for the conversion. Add serial numbers or letters to the name: Advanced patterns; an example of the resulting name appears after Name Example.
DNG to JPG
The term bitmap was originally coined in computer programming to refer to a map of bits. That adds up over several thousand files. To help you do this, a series of buttons is conveniently placed at the bottom of the reaConverter window, so you can simply press on the one you need or click Plus button to add new options. The images that come off cameras are one of those. Mosaic image data can be converted to linear data, but the reverse is not possible.