Dd windows iso to usb mac. How to create a bootable USB drive 2019-05-10
How to Burn ISO to USB on Mac
Step 1 : Install the Etcher software on your Mac computer after downloading it from the official source. After that, extract from the following files from the latest release of from and copy them into the following folders. You can leave all default settings as they are. There is no confirmation, therefore it is critical you use the proper drive identifier and proper syntax to avoid erasing the wrong thing. Assuming you know what you? Thus, the has to be set accordingly, for example using gparted. Here's a full set of instructions that I have devised.
How to Create Windows 10 USB Installer in Mac

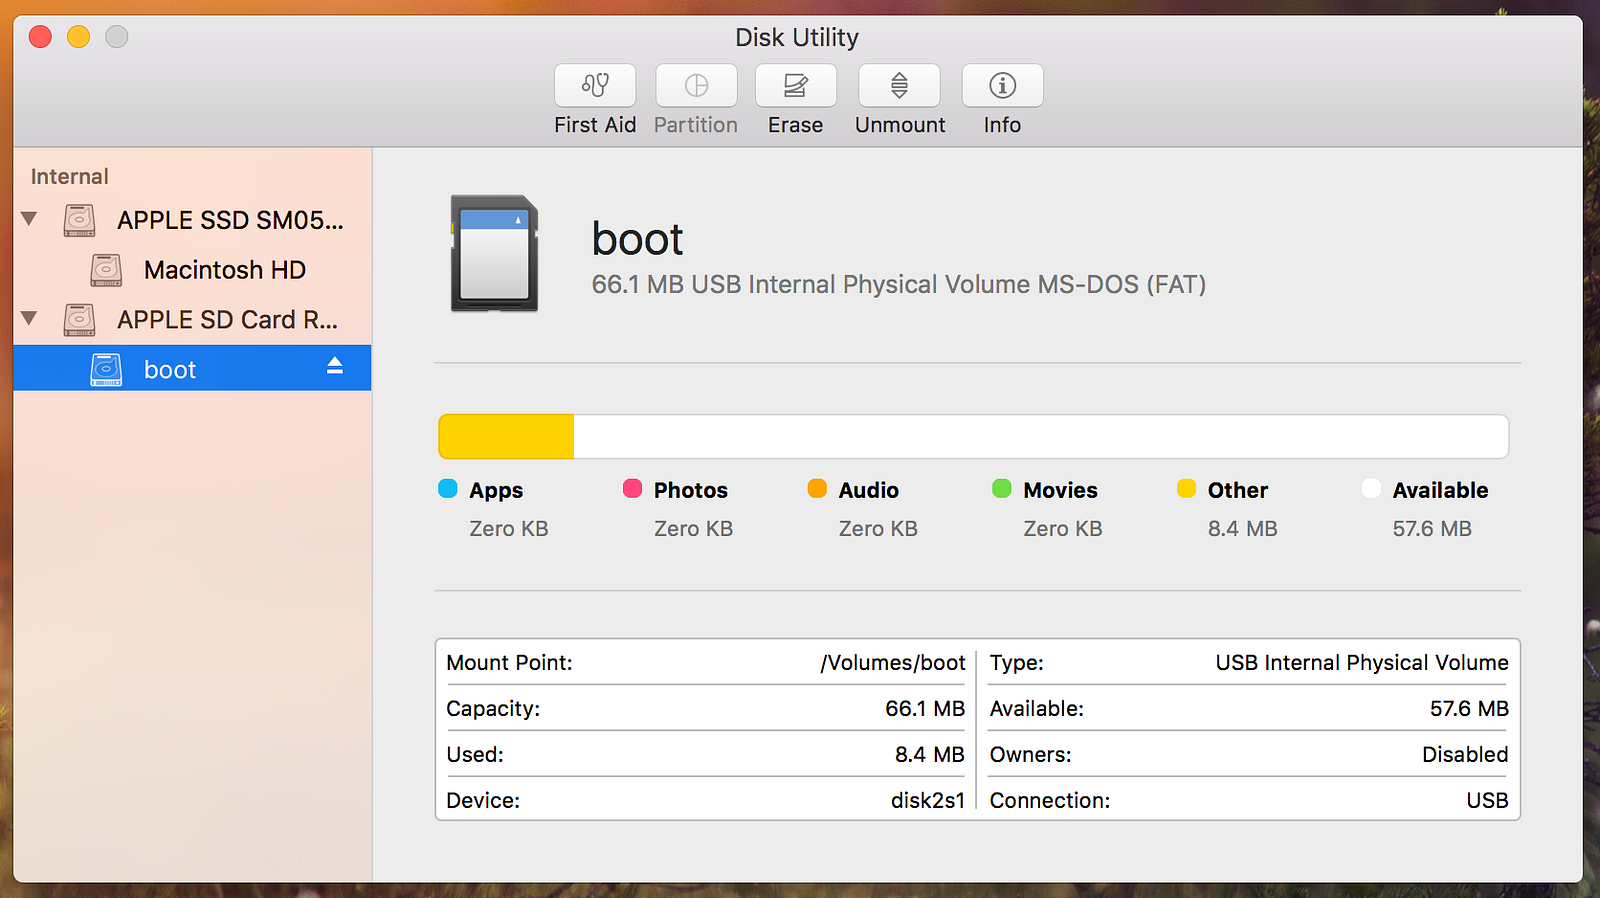
Considering that can be used to boot an installation media and it is already linked from the Related articles box at the top, maybe this section should be merged there? This should interrupt whatever Terminal is doing. The only other computer I have around is a macbook. Start by listing the current disks and volumes: diskutil list Now unmount the current volume for the disk you are about to overwrite. All of them are quite popular with users of the respective platforms. It is specifically characterized by the extension it uses, that is.
How to Copy an ISO to a USB Drive from Mac OS X with dd

If you have any more questions please feel free to ask me. Tip: If you do not want to install Cygwin, you can download dd for Windows from. A prompt will appear to inform you that the drive will be erased. That means no wasted time trying to do the job over and over again until it's done correctly. Doing this is very simple.
USB flash installation media
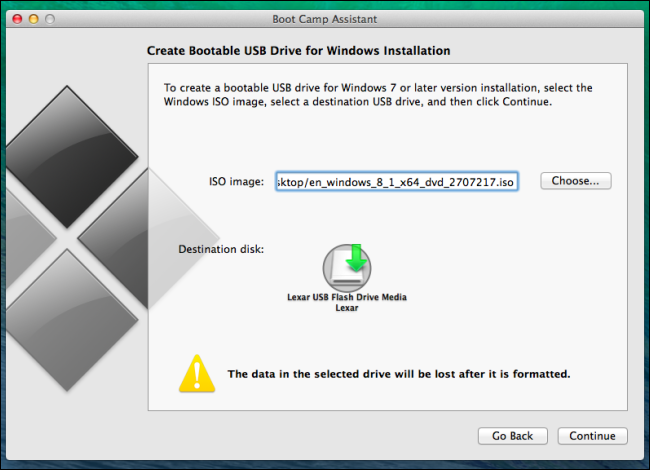
So, unless your hardware is a decade old. Leave the last checkbox install or remove Windows 7 or later version unchecked. Note: this procedure requires an. You will need to format the drive as well. . All the files in the drive will be deleted, so make sure there are no important documents inside.
How to Make Bootable USB from ISO/IMG file in

So, go ahead and mount the. The conversion from iso to img must not preserve any boot support. Well not to worry I did this just last week on my MacBook Air 3,1! Form the article above, you can clearly deduce that iSeePassword is the only reliable burning image tool with no demerits or limitations at all. You can make this change during the first phase of boot by pressing Tab when the menu is shown. Since Unetbootin came out, I pretty much avoid any other method if at all possible.
Create A Bootable USB Drive From An ISO Image Using dd Command On Linux

However, most of time it's working and your data will be copied. Using smaller block sizes can potentially corrupt the newly created iso and will slow down the process tremendously. If you format the usb to ntfs, mark the partition active, and then extract the iso onto the flash drive it might work. I have tried Unetbootin, Etcher, Boot Camp Assistant, and nothing is working! I tried to use dd, but it doesn't work. But I'll try to help you out! Step 4: Follow the screen instructions to complete the creation process. For our purposes, we only care about the drive. Can I save my machine or am I done for? Therefore, Cybrary is a free community where people, companies and training come together to give everyone the ability to collaborate in an open source way that is revolutionizing the cyber security educational experience.
How to get Windows 10 bootable ISO on a USB flash drive on a Mac? : buildapc

Keep reading to know them in full-length. The advantage of this over Cygwin is a smaller download. And they are tested by 10+ Mac laptop and desktops without running into any issue. I had to do a couple tweaks, so below are the instructions from the first post modified with the additional stuff I did: +Download Ubuntu. You can use it to from scratch.
Create Windows 10 Bootable
Here is how you can. I'm not sure what all the uproar is about. If under Vista or Win7, you should open the console as administrator, or else flashnul will fail to open the stick as a block device and will only be able to write via the drive handle windows provides Notes: This is the same method, only Syslinux is installed from Windows. This will take several minutes to complete but your data should be copied and the flash drive will be bootable. By using sudo dd, there is little margin for error, and a wrongly implicated disk identifier could result in permanent data loss. Did you encounter any issues? I also want to do this. Getting a superdrive might be your best option if you want.