Create system repair disc windows 7. System Repair Disc 2019-01-13
Solved: Can’t Create System Repair Disk in Windows 10/8/7
Test carefully Test your disc immediately to make sure it works - it only takes a moment. For example, I have Windows 7 installed in my C drive, so it is already selected by default in image 4. You will reach the system image creation screen as shown in image 3. A window of System Recovery Options appears. Or else, you should opt for a tape drive or a high capacity or a network drive allowing you to save large volume of data. Does there exist any alternative methods to solve this problem? In the early days of Windows 98 administrators used to create a bootable disk so that they can repair Windows 98 computers in case anything goes bad with them. He has extensive knowledge of all kinds of technology, from consumer-tech to enterprise solutions.
System Repair Disc

The Windows will not allow me to create a system repair disk. . Windows 7 will do several check and fixes that can solve the problems. Create system recovery disk from Windows installation disk This requires you to have a Windows installation disk first and you shall be very familiar with Windows system operation. Creating a repair disc in 10 minutes 1. Windows will ask for your keyboard language, press Next when you are done.
Windows 7 System Repair not functional

To illustrate the process in creating a System Repair Disc, I will be using screenshots from Windows 8 since it looks the same as the one found on Windows 7. How to Create A System Repair Disc In Windows 7 and Windows 10 The process of creating a System Repair disc is almost the same for Windows 7, Windows 8 and Windows 10. When you are ready to use it, simply insert it into your computer and reboot. Rather than the normal windows startup, Windows Boot Manager appears. Windows comes with a built-in repair environment called the Recovery Environment.
How to create a System Repair Disc in Windows 7
Why System Image and Repair Disk? The System Repair Disc is designed to let you boot up Windows — even if nothing else works — and provides you with several options for repairing your failing system. If your operating system does not boot to a state whereby you can see a log-in screen, then it is likely to be a difficult problem to fix. Once the recovery environment is loaded, you can then access the recovery options that are available. Here you select your preferred option. Thanks and Regards: Umesh P - Microsoft Support. If you cannot boot your operating system, try performing a Start-up Repair. Select your Windows installation, then 'Next' again, and you'll see the recovery options.
How to create a System Repair Disc in Windows 7

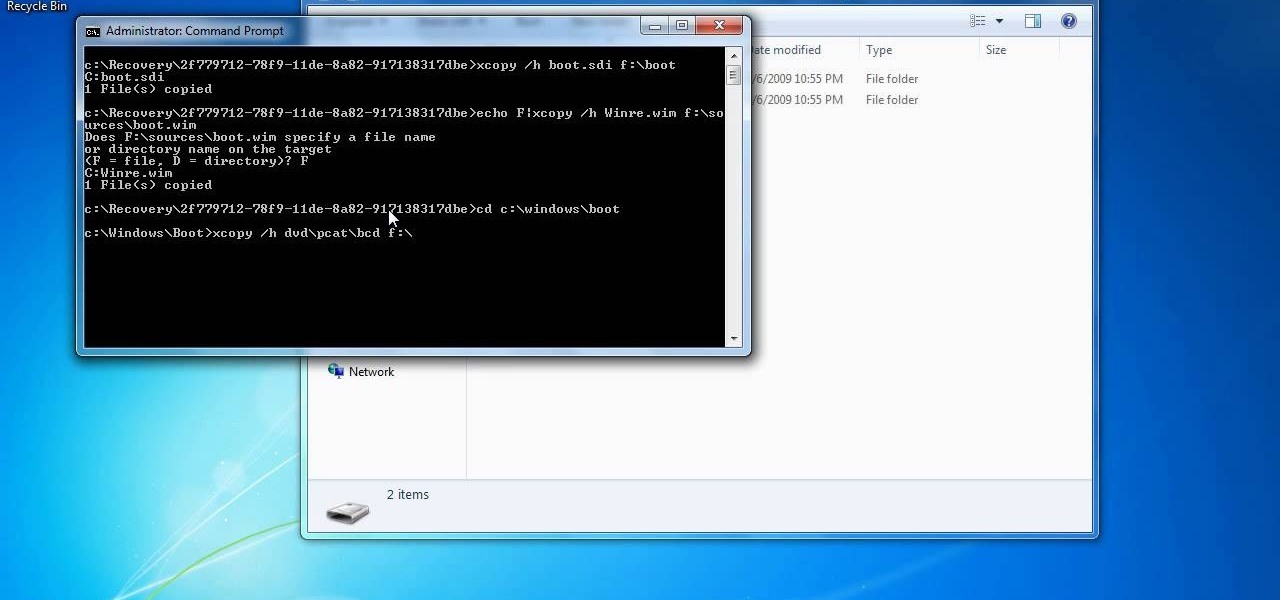
This environment is particularly helpful in resolving issues when Windows crashes, does not start, or when you have malware that cannot be removed while Windows is running. Close AutoPlay, if it opens. After installing or purchasing a Windows 10 or 7 system, the first thing you need to do is create a system repair disc. Creating Directories and Copying the Necessary Files Create a folder on your desktop called Win7. When the disc is done, Windows 7 may start the AutoPlay dialog box. A confirmation screen will appear to get your confirmation about the selections you have made.
Create a System Repair Disc in Windows 7
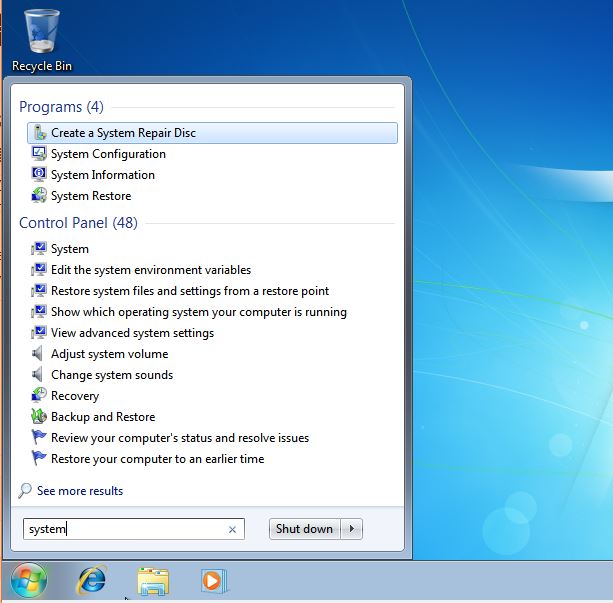
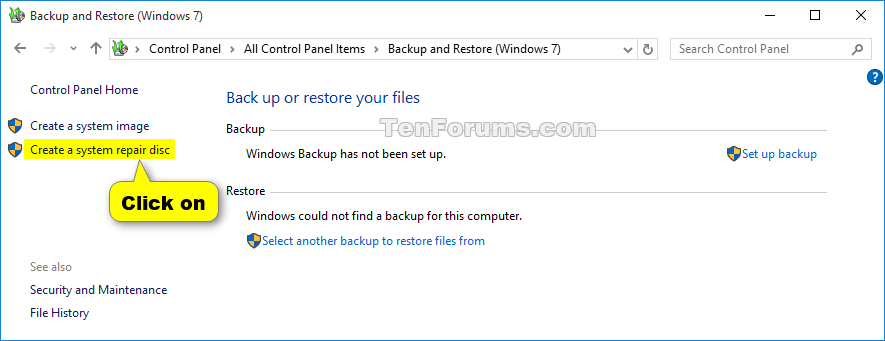
Wait for the burn process to complete. This will restart your computer and look for memory problems. You can manage your hard disks and partitions through the bootable drive whenever the computer fails to boot normally. It appears to have something to do with Outlook--I do use 2010 Office Outlook. Step 5: Select the burning drive from the dropdown menu. What other ways do you use to repair your system? You can also use the command prompt to run the recdisc command.
How to Create a System Repair Disc for Windows 7

Have tried Search box typing recdisc. Once the process completes, a prompt will appear on the screen which tells you what the disc is used for. Whether that be the operating system not booting, programs not working, or random errors and crashes. The dialog box opens where you select the right drive and click Create disc. The same concept is now carried forward Windows 7 and the operating system also allow administrators to create repair discs so that they can be used in case Windows 7 computers fail to boot. How to create a System Repair Disc in Windows 7 System Repair Disc is a useful option found in Windows 7, and is valuable in many situations. This is where the magic happens.
Create System Repair Disc for Windows 7

Leave the Command Prompt window open until the command completes. You can now click on the Close button and then remove the disc from your drive. I also create system backups on a regular basis. Keep it somewhere safe, but not so safe that you forget where you put it. For more information about the various tools that you can use in the Windows Recovery Environment, please see these tutorials for your particular operating system. Then click the arrow to the right of the currently selected drive, in the 'Create a system repair disc' program, and choose the drive that contains your disc.
How to create a Windows System Repair Disc

But this doesn't mean that there will be no solution to fix such a problem. The Create a System Repair Disc dialog box appears. Here you can add more logical drives if you want to back them up as well. This will make your partition active bootable. Repair disk is created by Windows 7 not only ensures that the system boots successfully but also allows administrators to restore the operating systems from any backup image file. How to create a System Repair Disk? Otherwise, if you are using Windows 8, type recdisc at the Windows Start Screen and then click on the recdisc search result when it appears. Uncheck the box next to Hide extensions for files whose type is known and Hide protected files of the operating system.