Create a bootable usb windows server 2016. How to create Windows Server bootable USB media for deployment on UEFI based systems 2019-02-28
How to Create UEFI Bootable USB Media to install Windows Server 2016
. This is the long way. I also like the cleanness of this solution. Mounting Windows Server 2019 bootable image. While this sounds simple, another problem I ran into was that.
Use PowerShell to create a bootable USB drive from a Windows 10 or Windows Server 2016 ISO

You need it to run the scripts. Someday, I maybe write my own one too. In my case it is D: and 32gb You will likely need at least an 8gb drive as the bits will require 4. Now you can do list all this by using To split the. Or, you can exit the script. I am part of the Azure engineering team and engage with the community and customers around the world. All drives connected to the system are scanned after starting the script.
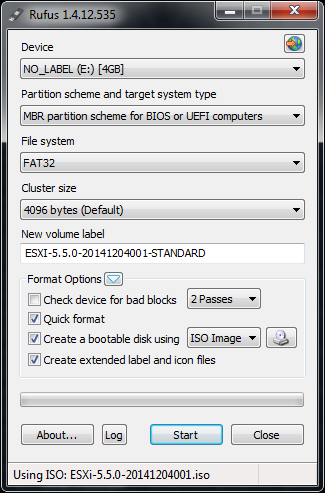
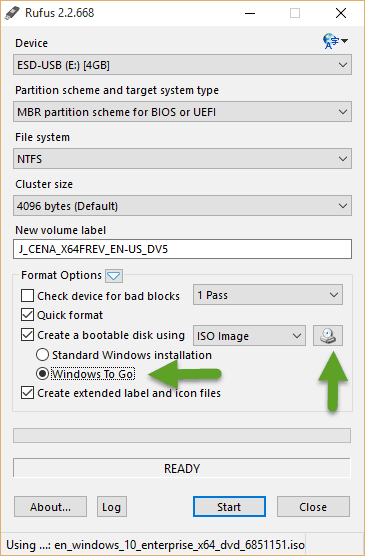
Create Windows Server 2016 bootable USB (Rufus)
And not only for Windows Server, but for all versions of Windows since Windows 7 till Windows 10! Have a look at the following YouTube Video and this may help you. Note that all data are wiped out from that drive! Once script finishes, the disk where the image resides gets automatically unmounted. You can exactly see what is going to happen and you know that there is nothing else done to that image. Your bootable flash drive is ready to use! Otherwise, you can exit the script. I strongly recommend you have a good backup before running. That should tell you something.
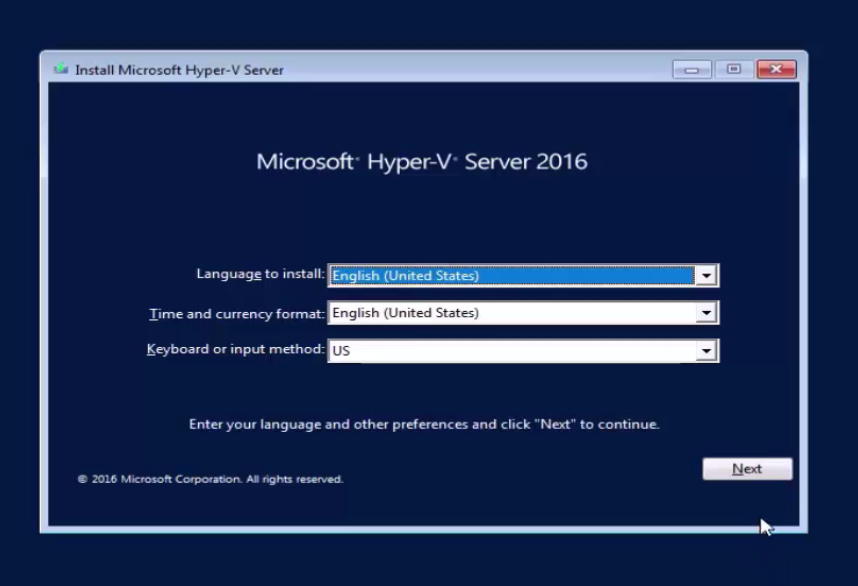
installation

What kind of drives and workloads do you have? Your flash drive is ready to use! If you have any suggestions or improvements, please leave a comment. I am located in Switzerland. See for the Technical Preview. Now, finally, the script comes. Now our usb stick is ready to receive the Windows files. If you have any questions, feel free to let us know in the comments section below. Have tried every possible thing under the Sun.
Create a Bootable USB Flash Drive
This is the long way. I have never tried this option. These procedures were written and tested using Windows Server 2016 February 2018 build, but should work on any version of Windows Server or Windows Desktop version 8 or above. I did not reinvent the wheel here. Next, we need to copy the boot sector. A Raid 0 Array isn't as reliable as Raid 1 as only half the data is ever copied back to your new hard drive. I hope that my way to create a Windows Server installation disk comes in handy! You can either do it manually, as shown below, or using an application called.
Create a Windows Server 2016 bootable USB
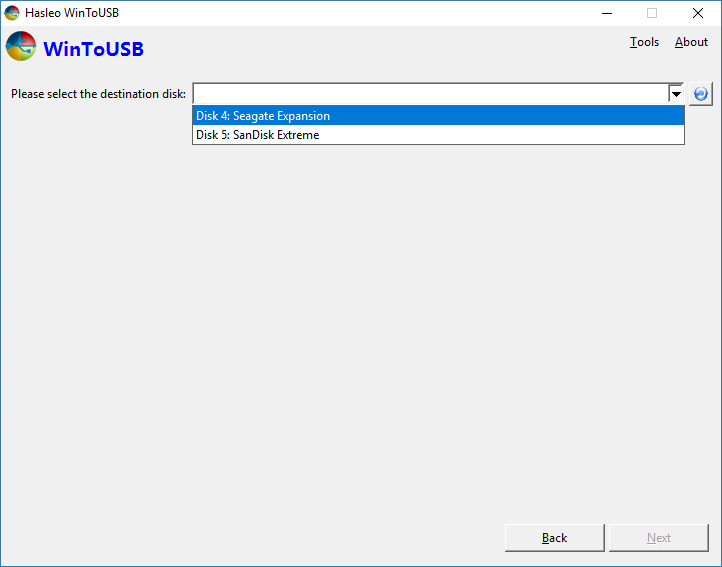
The simplest way I found is to compare the drive letters before and after mounting it. If you get an error message similar to below… you may need to close any open windows with that drive and try again. Next step is to select the disk to use. These procedures were written and tested using Windows Server 2016 Technical Preview 5 but should work on any version of Windows Server or Windows Desktop version 8 or above. He sends me just the license file and no media. All the same, I was stuck and found your article and it worked flawlessly.
How to create Windows Server bootable USB media for deployment on UEFI based systems
Your flash drive is ready to use! It's essential that the backup prefix of the backup storage matches that of the backup itself. Keep the script in that directory it is just more convenient. I am focusing on Microsoft technologies, especially cloud and datacenter solutions based on Microsoft Azure, Azure Stack and Windows Server. Run the following PowerShell one-liner. The Installation gets stuck at Install. All data on this disk will be deleted! So by pass all the hard work. You should get the following message.
Creating a Windows 2016 Installer on a USB Drive
Let me know if you have further doubts. You can use CloudBerry Remote Assistant to give an authorized administrator or support personnel access to your computer. Devices with partition type, in turn, require. I did this quickly for a new I bought as a local software development workstation. The PowerShell commands in this blog article are written to be compatible with PowerShell version 4. Proceed at your own risk. Start by opening a Windows command prompt as Administrator and run the following commands.
Create a Bootable USB Flash Drive for Installation Windows Server 2016
The whole Server Freeze up. Select the necessary disk afterward. If you liked this article please feel free to share it with your friends. This file is very large 4gb so it takes forever, let it go, it will eventually finish. If you do not have the media, you will need to download.