Bmw e46 navigation system manual. BMW 3 SERIES 2002 E46 Mk3 Navigation System Manual 2019-05-13
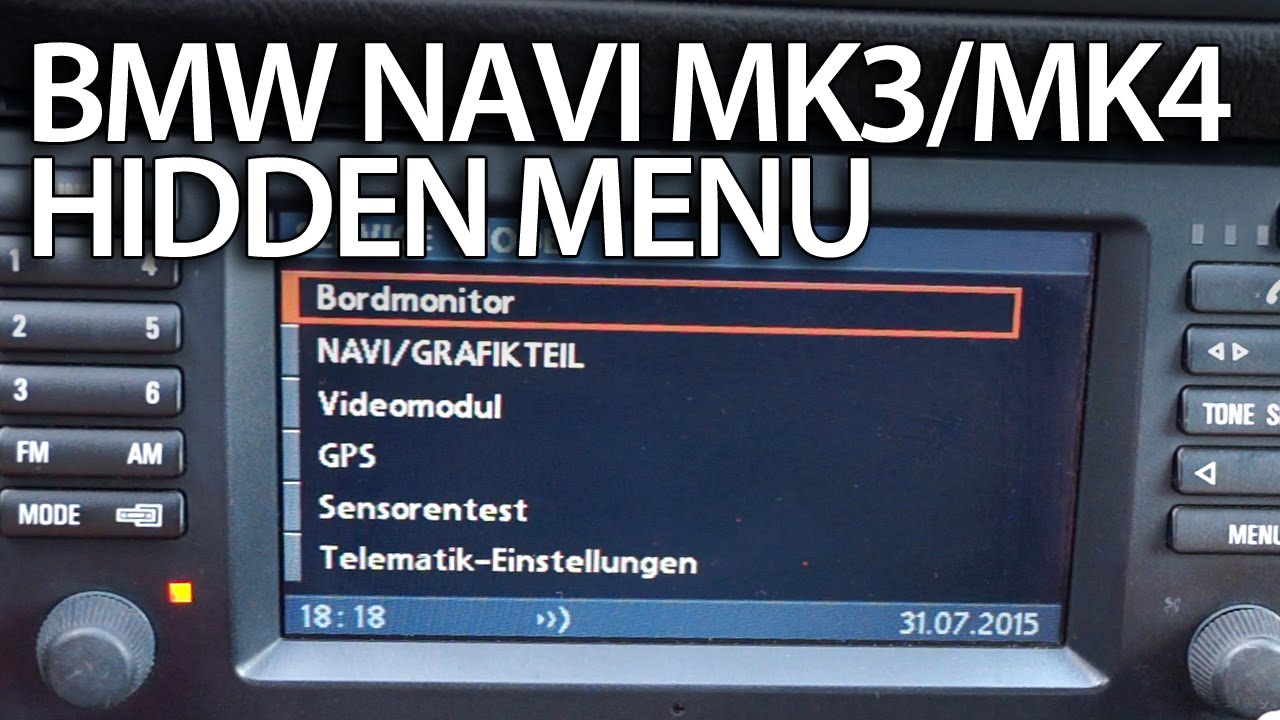
E46 M3 Navigation System

If your car have manual seats, disconnect the negative post of the battery before step 1 below. This system support audio file, it can play it. Major soilings can be removed carefully with the wet cleaning rag. Do not use or put the headunits in the dusty or smudgy place, which may damage its detachable elements. Customer support is excellent, highly recommend this product. The radio should work however.
BMW Communication & On

You only can see the bottom two screws once you remove the shifter trim. E46 Sport Wagon: Above the rear glass under the spoiler. Has good resolution, but, at the end of the gravel road, you're on your own! For those that also have been researching a way of retrofitting Nav in their 3 Series you will inmediately notice how less complicated and time consuming this installation is compared to the old way of unplugging the current non-Nav harness from all its components and installing one built for a Nav car. Its 54 pin blue connector, with a shorting plug is inside the cubbyhole above that shock tower. Prewiring includes wiring for all telephone equipment. Check behind the trunk liner first to locate your telephone wiring harness.
Popular Bmw E46 Navigation

E52: Left front corner behind the dashboard. E46 Convertible: Behind the instrument cluster. The eject box installation allows for charging cradles to be installed, but at the sacrifice of the cup holders. If it looks very dark and you can see a felt cover, then you most likely have a microphone already installed. Joint connector X428 is located on top the fuse box. If you have any other questions, please send an email to sales dvdgpsnav. Although our Bluetooth kits ship with detailed step-by-step instructions for the kit in your car, the below guide will be useful in preparing for your installation.
E46 M3 Navigation System

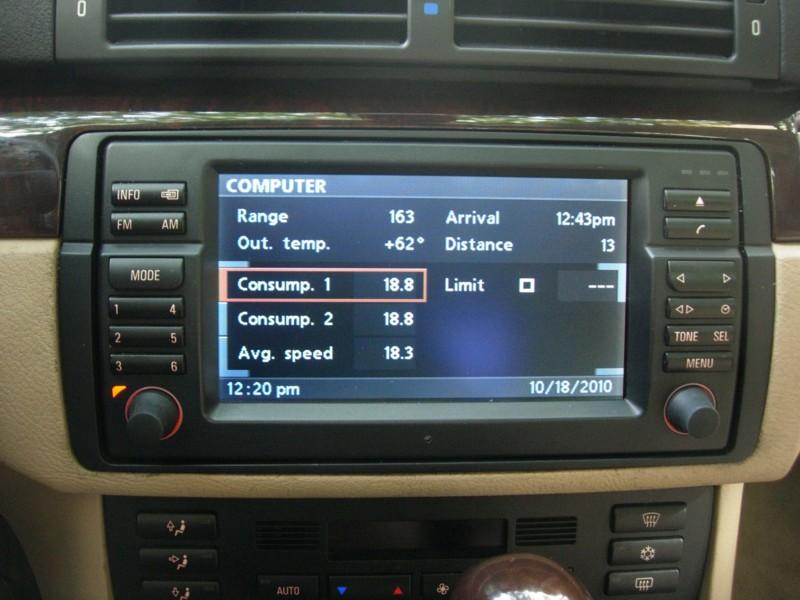
The system provides 6 radio areas for choosing. Customer support from dvdgpsnav was also a deciding factor for my choice since they were really helpful. The two screws are behind this separate assembly. Every time I got into the car, I had to do this. The liner is tucked into the top, bottom and side and takes a little manoeuvring to swing out of the way. The soaking or moisture will ruin the components, cause irreparable damage.
Download Bmw E46 Owners Manual Qs16605 Pdf Enligne 2019 PDF Book
Open the lid, and press up hard on the inside top front corners of the rubber cubicle and then pull forward; it will come off. A lot of people are very happy with Dynavin as a solution. The optional eject box provides a cradle for charging and boosting the antenna of your cell phone and is not required. Please save this manual in case you will need to clarify further possible ques- tions regarding installation and usage of our product. The trick of the center assembly removal is that there are 4 screws at the bottom and in the top.
BMW 3 SERIES 2003 E46 Mk3 Navigation System Manual

If not, reach inside and find the Bluetooth antenna wiring to connect to your Bluetooth antenna. Start your installation by lifting up the center arm rest to remove the cup holders. Or just check all our to find the unit which is specific for your car. All North American E46s are currently prewired for phone. Fitted perfectly and easy to install.
Popular Bmw E46 Navigation

Once disconnected, cover it with electrical tape. Does the head unit just screw to the dash where the frame mounted? Just pull up the bottom seat and slide forward. Popular bmw e46 navigation of Good Quality and at Affordable Prices You can Buy on AliExpress. Our selection of brands is always growing, so chances are your favorite is on AliExpress. Took 20 minutes to learn how to use the Navi the first time. E39 Sport Wagon: Behind the dashboard on the left side. Once the firmware is loaded, you should see the main screen shown below.
E46 M3 Navigation System
Product and company names talked about in this manual are only for identificationpurposes, these names may be registered trademarks and copyrights of other companies. The signal provided by the gyro is a mili-voltage that changes as the vehicle rotates. Keep the headunits away from the extremely cold place. Do not use the strong chemicals, detergent or strong abluent to wash the machine. Otherwise its bottom tab will be broken.
BMW ON

You will only need to remove the Assist module and mount the Bluetooth module to the same bracket. I traded the car for what I have now -- haven't look back since! Then, since I used the car for Going-to-Work, I already knew directions, I would have to turn off the monitor, rotate the knob 2 places and push in to kill it. Starting in the trunk area, remove the trunk liner on the drivers side to gain access to the electronics area. Click two sides icons to adjust. Please check our new Android model here: This bmw e46 navigation system has been upgraded to new version with the latest main menu and interface which is similar to original bmw navigation.
BMW 3 SERIES 2002 E46 Mk3 Navigation System Manual
You will need the battery power to move the seat back and forth to gain access to the bolts. Otherwise the temperature increment may accumulate moistureinside, which will damage the circuit board. Easy fix though - bought a nushield anti glare screen protector. Snap-in adaptors are optional, but performing an eject box installation without the snap-in is rather pointless. Specific operations please refer to Page4. Pull the fuse box further down over its detent, it will not break and connector X428 is the big junction box snapped on top. This is a simple guide of my installation, with tips to facilitate its reproduction in your car.