Automatic repair loop fix. Fix: Windows 10 Automatic Repair Loop [ 5 Solutions ] 2019-02-11
How to Fix Automatic Repair Loop in Windows 10

Solution 1 is what worked for me. After entering Windows, run a disk check to check if there is any problem with the disk, and run a system file check to check if some system files are corrupted. Read on to find the solutions. Note: After your system restarts without any problem, go to the command prompt with admin privileges. Optimize your system and make it work more efficiently Optimize your system now! Highlight the long number, including the brackets, and copy. Now, press any key to continue.
Windows Stuck in Automatic Repair loop? Here how to fix !!!
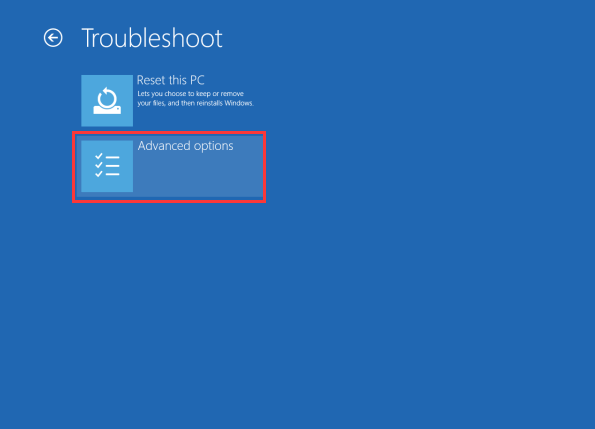
To optimize your computer with only one click, select one of these tools:. How do I fix this? I hope the solution here help you to fix Automatic Repair Loop in Windows 10. Initially, we will know the causes of Automatic Repair loop Windows 10. Hi, Thank you for posting your query in Microsoft Community. So, check out how you can fix the preparing automatic repair black screen windows 10. You can also disable automatic reboot using the registry. In Advanced Options screen, select Command Prompt.
How to fix Windows 10 Automatic Repair Loop issue?

What you will need - A Windows 8 or 8. Here is how to create one! After the successful execution of the command, reboot your Windows device and check whether the Error Code 0xc0000221 persists to occur or not. To do this again open command prompt from advanced options and perform command bellow one by one. Step 2 Select a restore point that created before the automatic repair loop. Or sometimes windows get stuck at this Automatic Repair Screen? Else skip to the next step. Now on the command prompt, you need to enter the following command.
How to Fix Automatic Repair Loop in Windows 8.1 & 8
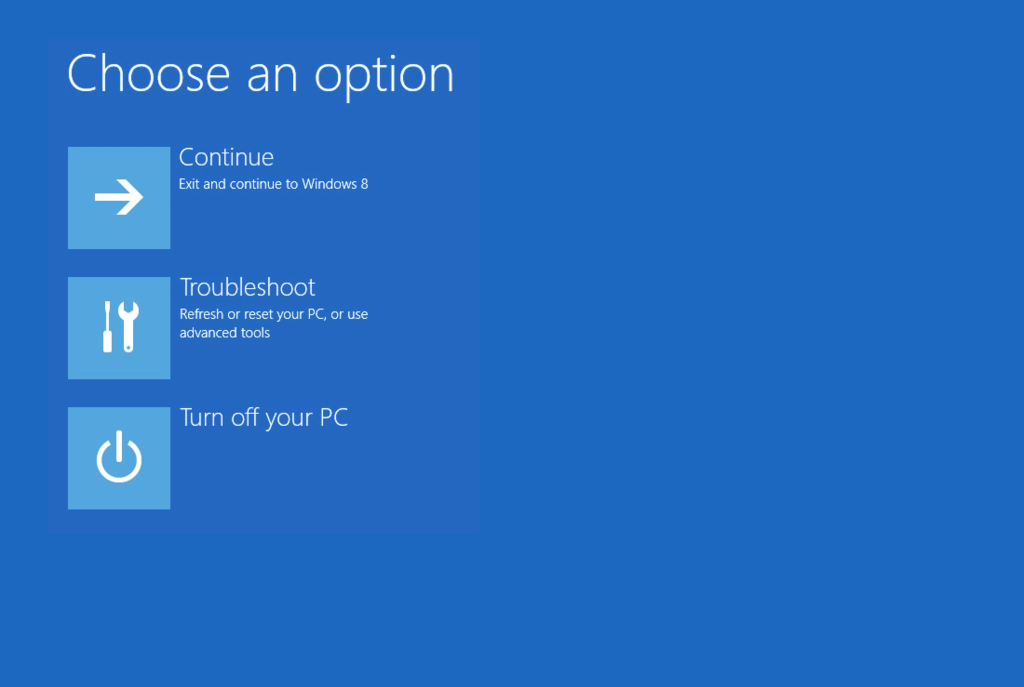
Why do i need a second computer to fix this one?!? Windows need to sort this out. On Windows 8 and Windows 8. Do try to comment regarding this post through the comments section below, we love to hear from you. Here select the latest restore point and hit Finish to let start this process. After rebooting the system a couple of times, you should be granted the option to access boot options.
Preparing Automatic Repair Windows 10 Black Screen Loop (Fix)

My case, nevertheless, is quite unique. Anyway, I hope this helps someone. I tried everything and spent hours googling! Actually, we do not ensure you that the above method would solve out your issues completely but we believe that you would actually get the most accurate output out of it. I tried all three of these solutions and could not bypass the loop! Conclusion The above solutions will help you to fix Windows 10 preparing automatic repair loop. All these solutions have been tested by ugetfix.
HELP! Stuck in Windows Automatic Repair loop!

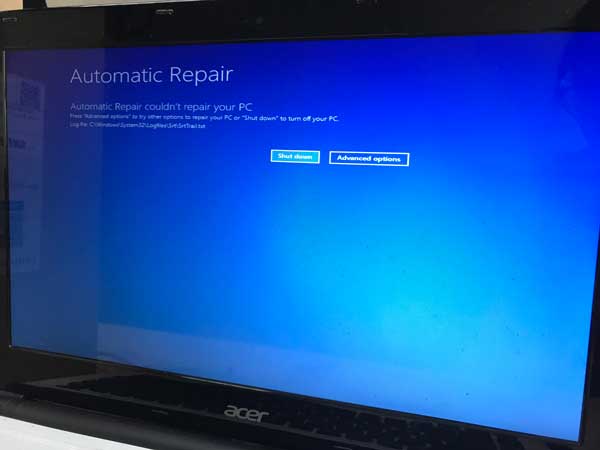
How to Fix Preparing Automatic Repair Error? Here's what the laptop looks like and all info if that helps Thread starter Similar threads Forum Replies Date 1 Mar 16, 2019 4 Feb 22, 2019 7 Feb 3, 2019 4 Jan 31, 2019 4 Jan 19, 2019 1 Jan 2, 2019 1 Jan 1, 2019 0 Dec 24, 2018 0 Dec 22, 2018 1 Dec 9, 2018 0 Nov 28, 2018 8 Aug 14, 2018 1 Aug 9, 2018 1 Aug 7, 2018 6 Aug 6, 2018 3 Sep 22, 2017 1 Jun 14, 2017 1 Jun 4, 2017 1 May 10, 2015 5 May 5, 2015. So, you can actually reinstall Windows 10 without losing any file. But far too often, it can do more harm than good by getting stuck in a startup repair loop. First of all, save and close all the active apps. In just a moment you will see a blue screen window on the screen which will.
Preparing Automatic Repair Windows 10 Black Screen Loop (Fix)

However, the most prevalent issue is a corrupted registry or missing files to the hard disk. Step 7: Now you will be able to log in and restart and boot your computer normally. I restarted it several times and ended up with the same 'preparing automatic repair' windows. The tool is designed to launch automatically when a start-up problem comes up on Windows system. There might be few files which are interrupted by the Anti-malware protection causing the Automatic Repair look.
Fix Automatic Startup Repair Loop in Windows 10, 8 and 7
Additionally, if you have updated your system to Windows 10 Anniversary Update, there might be some mismatch problems between Windows Defender and your preferred anti-malware tools. I can't access my log in or any documents at all and it has all of my up to date uni work on there for my corse! Additionally, if you find the article helpful or have any query, comment, questions or suggestion related to it, then please feel free to share it with us in the comment section below or you can also go to our Fix Windows Errors Page. You are probably facing this blue screen like this after Preparing Automatic Repair. P ress Windows and R hotkey together and type ms-settings:recovery in the blank box. After successfully going into Safe Mode, try out the below-mentioned workarounds and see which one works for you.
Fix Automatic Repair Loop in Windows 10

For example, the command is like bcdebit 7ce0dd34-d277-11e4-8263-68f7286346fb recoveryenabled No and click on enter button. Solution 3 Running check disk to see if your hard drive is the problem What you will need - A Windows 8 or 8. This guide can help you you have installed. Here you will find the best solution on how to fix this issue on your own. Disabling the automatic repair when Windows 8 starts. Then maybe corrupted registry causing the issue. If you are facing the Windows 10 repair loop, go to the next solution to fix it.