Arctic cat 50 atv manual. ARCTIC CAT 400 3IN1 OWNER'S MANUAL Pdf Download. 2019-05-02
Arctic Cat ATV Manuals

The low range is before attempting to shift from one for carrying heavy loads or trailer range to the other or into reverse. Open the movable sheave on the driven clutch assembly with a suitable pry bar or wedge; then remove the drive belt. Rotate the drive belt and sheaves until the drive belt is flush with the top of the driven clutch. Tighten to specifications see Section 10. Battery under the seat 02. Arctic cat prowler 550 utv dump bed diagram arctic cat atv repair manual online 06 arctic cat dvx400 exploded parts diagram free download 2008 arctic cat h2 parts list how change clutch on 400 2009 arctic cat 400 dvx betriebsanleitung owners manual arctic cat 400 2006 arctic cat 250 repair manual arctic cat atv technical manual carburetor for arctic cat dvx 500 atv quad arctic cat 400 service manual arctic cat 1000 service manual 2001 arctic cat 350 parts spark plug gap 2013 arctic cat 250 owner's manual what year arctic cat dose part 0506-676 go on how to reinstall a carburetor on a 2006 arctic cat 200 over heating arctic cat prowler wire diagram for fan relay 2000 arctic cat 500 owners manual 2004 arctic cat 300 2wheel drive shop manual arctic cat manual service for grease repair manual 250 arctic cat. Remove the air filter housing assembly.
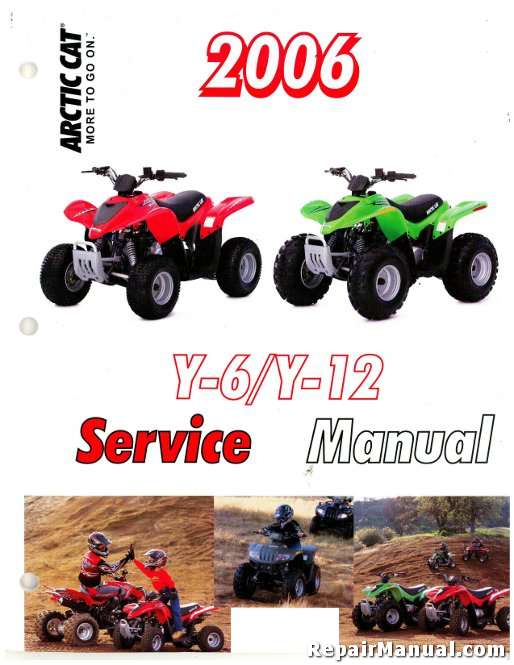
2008 ARCTIC CAT 50 DVX 50 UTILITY ATV Service Repair Manual

Inspect the pads for gouges, chips, or wear. Unscrew the oil level stick and Vehicle type front rear clockwise. Support your body weight on the inside of the footrest. Diesel that the engine may need to be ser- vehicles must always be taken to viced or the carburetor may need the dealer! Arctic cat 4 wheeler repair manual 500 arctic cat grease nipples 2010 arctic cat maintenance chart arctic cat 650 h1 troubleshooting guide 2005 arctic cat 300 2x4 owners manual 2004 arctic cat 300 service manual arctic cat 400 4x4 repair manual shifting problem on 2003 arctic cat 50 changing arctic cat ignition switch arctic cat troubleshooting for a 500 2009 arctic cat 0609-915 instruction arctic cat atv 90 manual wheres the choke on a 2011 arctic cat free printable repair manual arctic cat 400 2 x 4 basics arctic cat utv front axle parts break down manual 2006 arctic cat 250 2x4 oil filter arctic cat 500 manual how to tear down a 2010 arctic cat utility 400 motor arctic cat 400 troubleshooting arctic cat dvx 400 owners manual arctic cat dvx 90 manual 250 arctic cat atv manual 2002 arctic cat exploded view brakes. Other- activated by the hand lever.
ARCTIC CAT 500 4X4 OPERATOR'S MANUAL Pdf Download.

Shock absorber spring broken or sagging. Keep the spare key in a safe place. Install the drain plug and tighten to specifica- tions see Section 10. Gradually increase your speed the advanced skill of sharp turns. How to adjust the reverse cable on 350 2002 arctic cat 500i owners manual prowler 650 h1 utv service manual arctic cat 650 prowler service manual free arctic cat 250 timing marks arctic cat 700 h1 owners manual air filter replacement 2008 arctic cat 400 atv service manual 2003 arctic cat 300 owners manual 2007 arctic cat 250 service manual free pdf free 2000 arctic cat 500 repair manual 2002 arctic cat 500 atv free repair manual arctic cat 650 h1 repair manuals dvx 90 wont start my arctic cat 450 4x4 wont shift in reverse owners manual 2011425 h1 arctic cat tav 04 arctic cat 90 atv problems arctic cat prowler 650 manual arctic cat dvx 250 owners manual arctic cat 90 atv utv repair manual arctic cat atv manual. Do not twist or wring the element or it will develop cracks. Do not idle the engine for excessively long periods of time.
ARCTIC CAT 500 4X4 OPERATOR'S MANUAL Pdf Download.

Using this repair manual is an inexpensive way to keep your vehicle working properly. Replace damaged cables or cable ends. Shut the engine off and allow to stand for 2-3 minutes. Place the drive clutch cover and one rear brake cable tab into position; then secure with the eight cap screws. Anytime service is performed on Avoid contact with skin and eyes. Using compressed air, blow any debris from around the spark plug. Make sure the steering moves many kilometers and hours of trou- freely and does not bind.
ARCTIC CAT 500 4X4 OPERATOR'S MANUAL Pdf Download.

Remove the eight Phillips-head cap screws and four cap screws securing the footrest cover to the footrest and front and rear fenders; then remove footrest cover. The clearance between the brake The hydraulic brake must be pro- Be sure to inspect the hydraulic pads and brake discs is adjusted perly maintained to be fully func- brake system before each use. Riding over logs and front tires make contact with the your weight to keep it in balance. When using this manual as a guide, the technician should use discretion as to how much disassembly is needed to correct any given condition. Other straps are not recom- Avoid sudden accelerations and mended.
Arctic Cat ATV Manuals

Gradually in- as you come out of the turn. Shift the range lever to the neu- and type of tires as specified. To close it turn the filler cap 1. Remove the two cap screws securing the brake caliper to the axle housing; then lift the caliper off the disc. While holding the throttle lever in the full-open position, crank the engine over with the electric starter until the gauge shows a peak reading five to 10 compression strokes. Loosen jam nut to allow cable adjustment nut to be adjusted.
ARCTIC CAT 500 4X4 OPERATOR'S MANUAL Pdf Download.
Account for a washer, kick starter ratchet, and cooling fan. Make sure the steering moves mends the following procedure to freely and does not bind. Install the timing inspection plug. Start the engine and allow it to ricant at the scheduled intervals. Fuse The main 7 amp fuse is located on the frame near the battery under the seat. .
ARCTIC CAT 500 4X4 OPERATOR'S MANUAL Pdf Download.

Start the engine and allow it to idle. Shift your body weight as far 2. This manual will assist the service technician in becoming more aware of and efficient with servicing procedures. A troubleshooting section is also included in this manual. Start the engine and warm it up to normal operating temperature. Do not bend or obstruct the routing of the carburetor vent hose.
DOWNLOAD ARCTIC CAT ATV REPAIR MANUALS: DOWNLOAD Arctic Cat 50 & 90 ATV Repair Manual 50cc 90cc

Depress the holder pins and disengage and remove the outer pad; then remove the inner pad. To maintain a hot, strong spark, keep the plug free of carbon. Place the inner pad spring clip into position and install the inner brake pad; then install the outer pad onto the holder pins. Product Service and Warranty Department Arctic Cat Inc. Install the air filter and housing cover. The producer reserves the right to make price, color, material, specification and model changes without notice.