Ableton 16 macros. Using the Ableton Chord Plug 2019-02-23
Improve Your Workflow In Ableton Live With Our Drum Rack Tutorial!
I've had a read of the instructions, fiddled with the numbers still to no avail. Step 2 — Mapping Parameters to Macros Now let's add some of the parameters of the effects to the macros for easier control over the effects. Choose what gives you the widest sound range. And I don't know why, because it should work and it doesn't. In your case, you could make both of them have bank select, as long as you have enough buttons on a controller to add this. This would make the world a perfect place to live in. This guide will explore one of the ways to use effects racks to tidy up and streamline your editing process.
Ableton Live Kick Rack, Macro Controlled Kick Sounds, Instrument Rack for Kicks, Ableton Sampler Bank

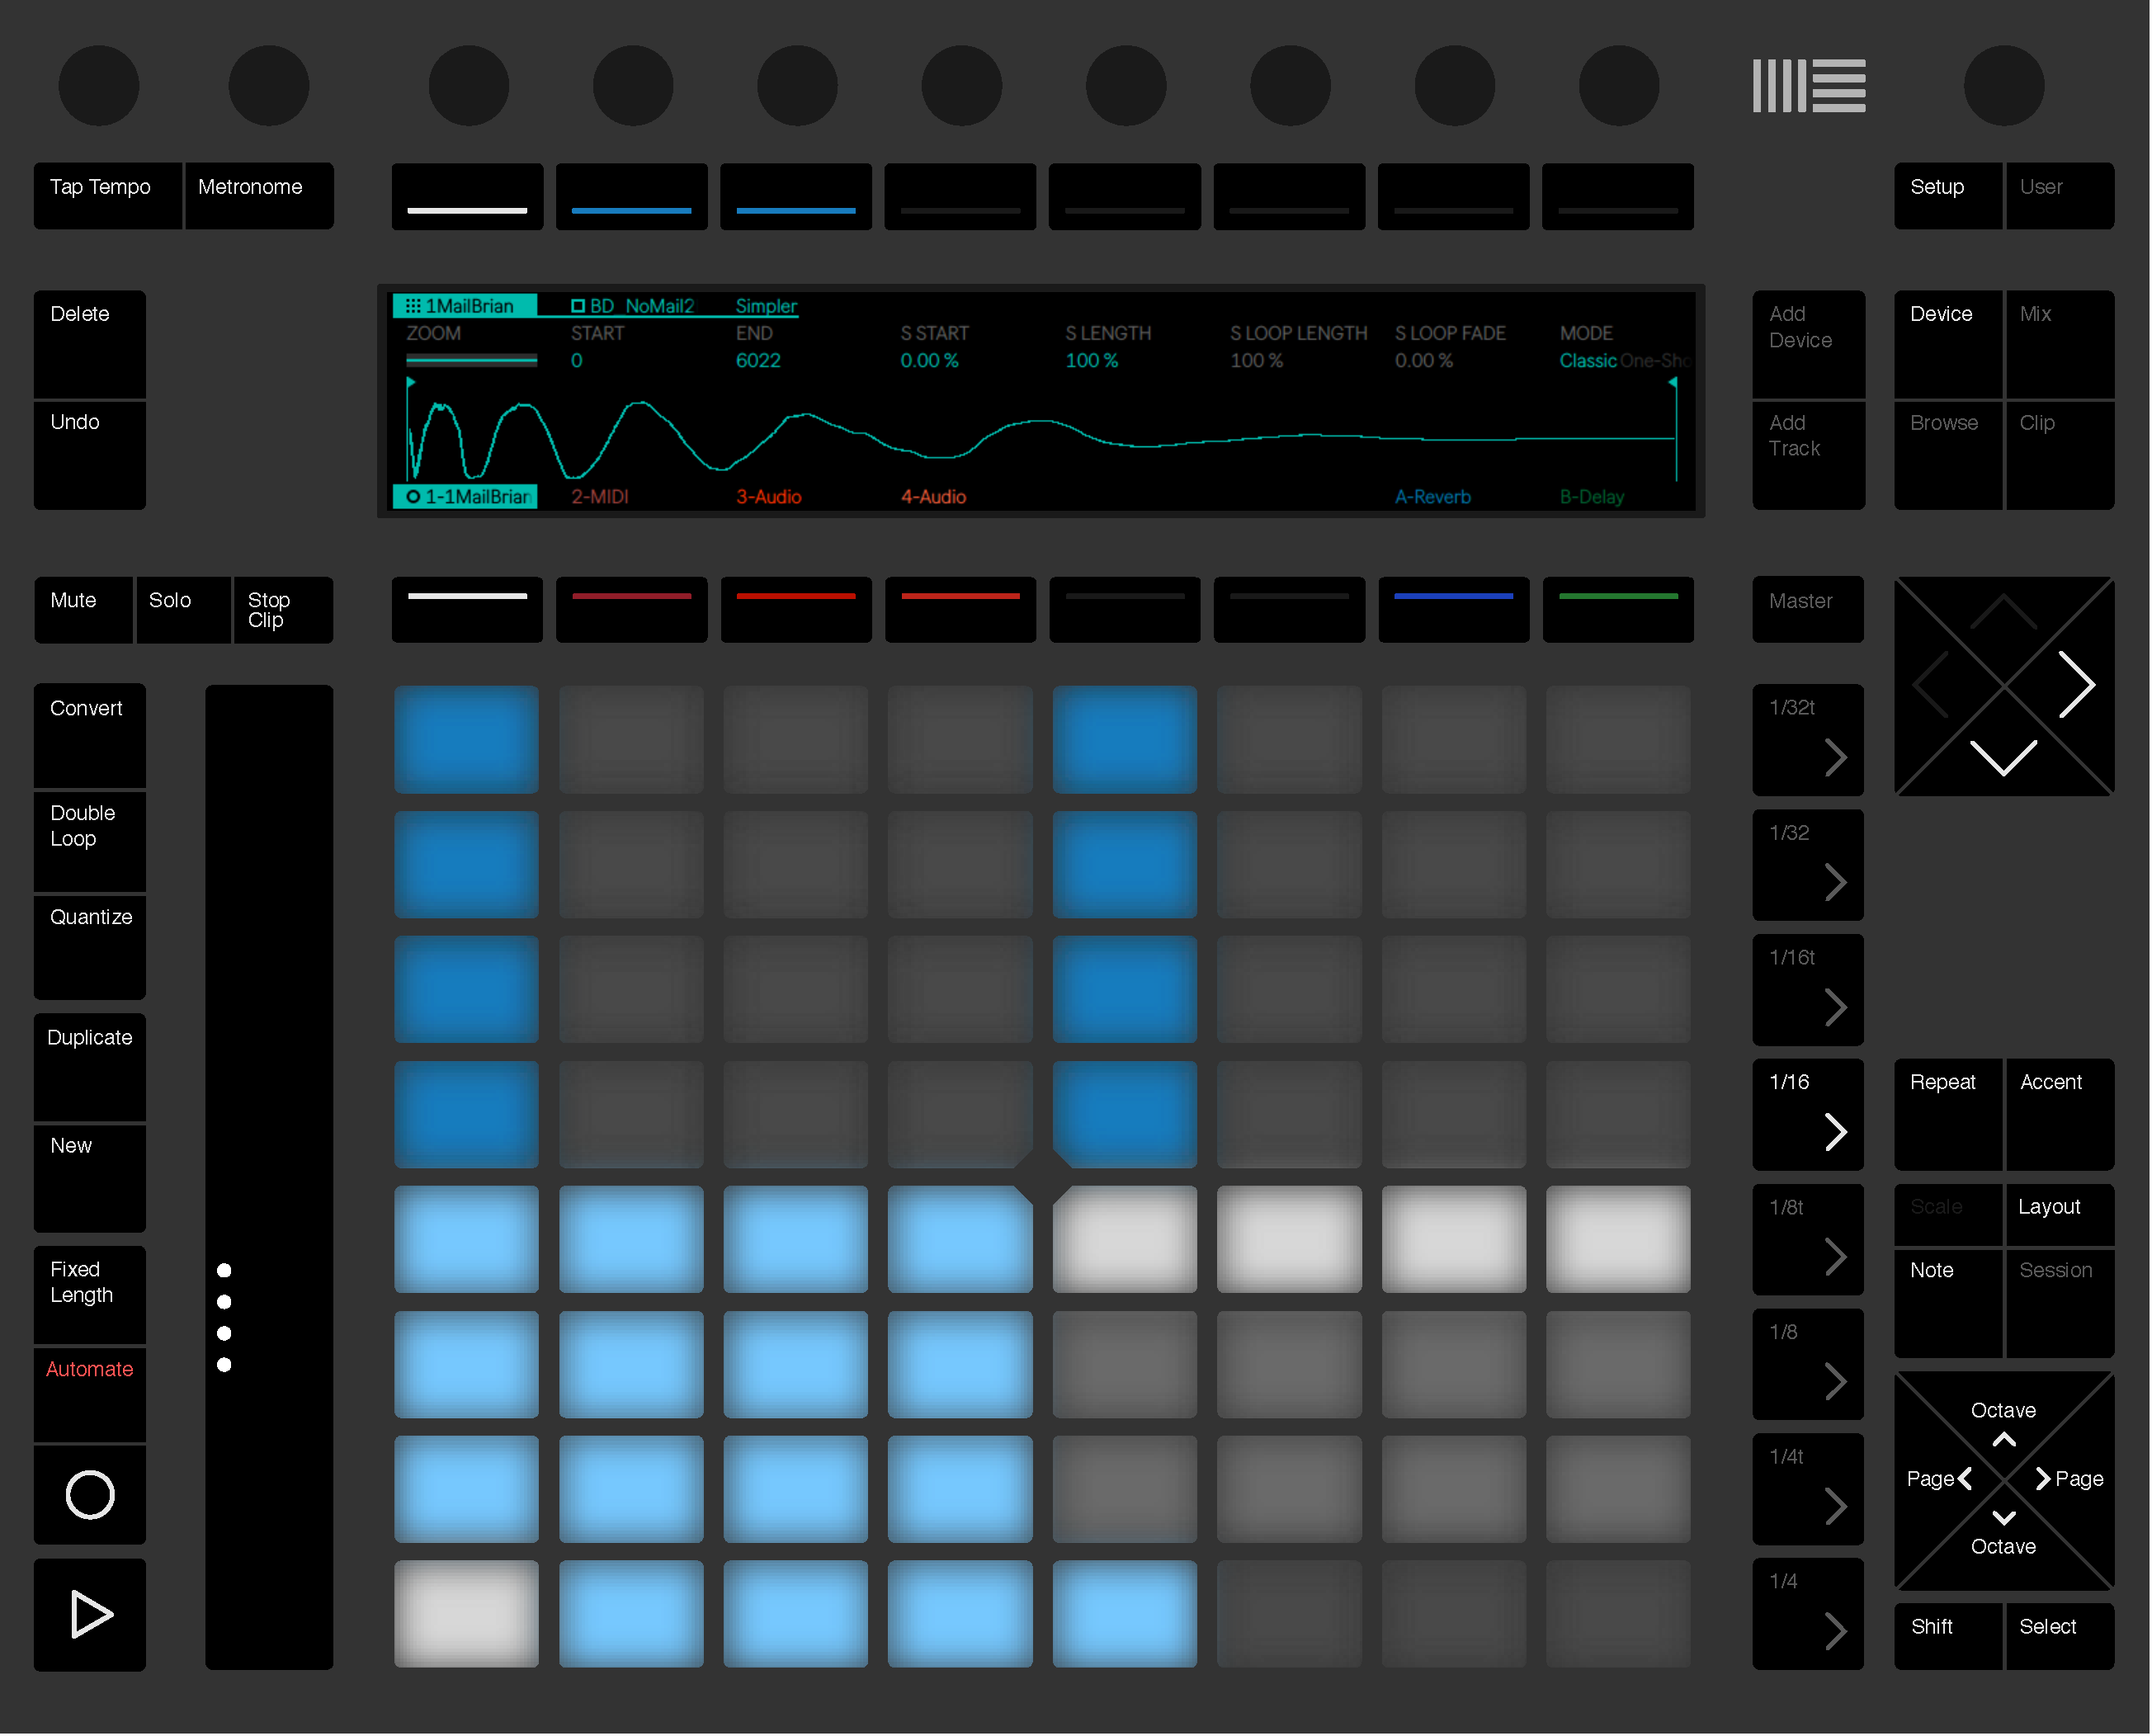
Select these three major chord plug-ins and group them to a rack. Each effect will act as a delay with differing delay times. The Chain Selector should already be mapped to the first macro knob in the outside rack; if not, re-map it. Are there any other devices I'm forgetting about? But I want to point out that, each one of these pads has a set of all of these parameters that I'm circling with my mouse, and that it can get quite complicated finding the parameter that you want to adjust. We can then colour code each of the macros and rename them to something appropriate. Beat Repeat is a nice effect to use in live performances as it adds the element of chance and randomization to your performances, which can keep them fresh and new sounding. He helps students adapt to new music tech.
Working with rack macros
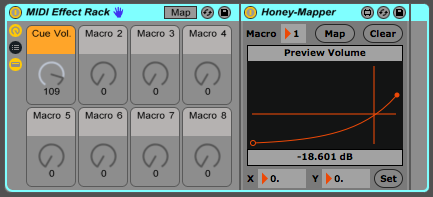
I want to map the Downsample knob to the Macro 1. Thanks for the reply by the way! If I had the chance to do so, I would use the automatic mapping in ableton, which gives me no jumps. The user script actually has more functionality than just knobs but the actual komplete kontrol keyboard only has the 8 knobs available. So let's open up exercise five from chapter 13, and let's take a look at this first track here, the impulse track. For a minor chord, set the first Shift knob to +3 and the second to +7.
Max for Live device for custom Macro curves? : ableton

In this walkthrough, we're going to take a look at using Ableton Live's Drum Rack for making tuned percussion patches - your ticket to everything from glockenspiels and xylophones to 808 kick bass lines and melodious, arpeggio-like hi-hat parts. By adding just a little bit you will get small variations and hits, but turn it up for more chaos as much as you like in your mix. You can also control more than one effect at a time with a single Macro. In this course, author Evan Sutton will dive deep into the instrument, including its flexible and powerful filters and routing, audio processing, and modulation features. It is for this reason that all of ModeAudio's are designed with chokes already preassigned. The final chapters offer an inside look at features added in Live 9, such as new Instrument Racks containing over 3,000 production-ready sounds, and Max for Live, a toolkit for building custom devices.
Working with rack macros

The original script allows me to control 8 macros and 8 volume encoders, but it's useless to me. One is a 'best of' and the other uses banks of 8. One of the big flexibilities of Ableton racks over combo plugins like this is that you can change the internal routing of the effects in the racks. Show the Macro and Chain List. Launch the C Note looped clip and start messing with these Macro buttons.
Max for Live device for custom Macro curves? : ableton
If you look for help, you need to be precise in describing your issue Dear, yes, I used relative encoder mode, but it jumps anyway. There is also an improved specially designed humaniser to help you get your groove on which can add controlled, yet random dynamic breaks, stutters and glitches to your drum track. Advocating, asking for, or giving advice on how to pirate is prophibited. One of the joys of Ableton Live is the flexibility with which you can create custom signal chains for individual drum and percussion samples. His work encompasses two distinct audiences: music educators and young people aspiring to careers in the music industry.
The Guide to Understanding Macros in Ableton Live

Otherwise this would have been perfect! This will allow me to add different amounts of Bitcrushing, Phasor and Reverb in my performance at will. If you are not willing to field questions then your post will be removed at mod's discretion. If I want to control 16 parameters with your method, I need to create and I did two presets on the minilab, with different cc's per knob, but when I change preset, minilab jump the parameter involved to 0, even with relative mode. You can also rename the macros so they make sense to you. Until next time, happy creating! On the Beat Repeat effect I have mapped the Chance and Bypass button to a Macro. I prefer it like that, but you could probably set the templates to absolute and use it like that, if you prefer. .
Ableton Tip for KK: Automap macros, efx and more to KK knobs
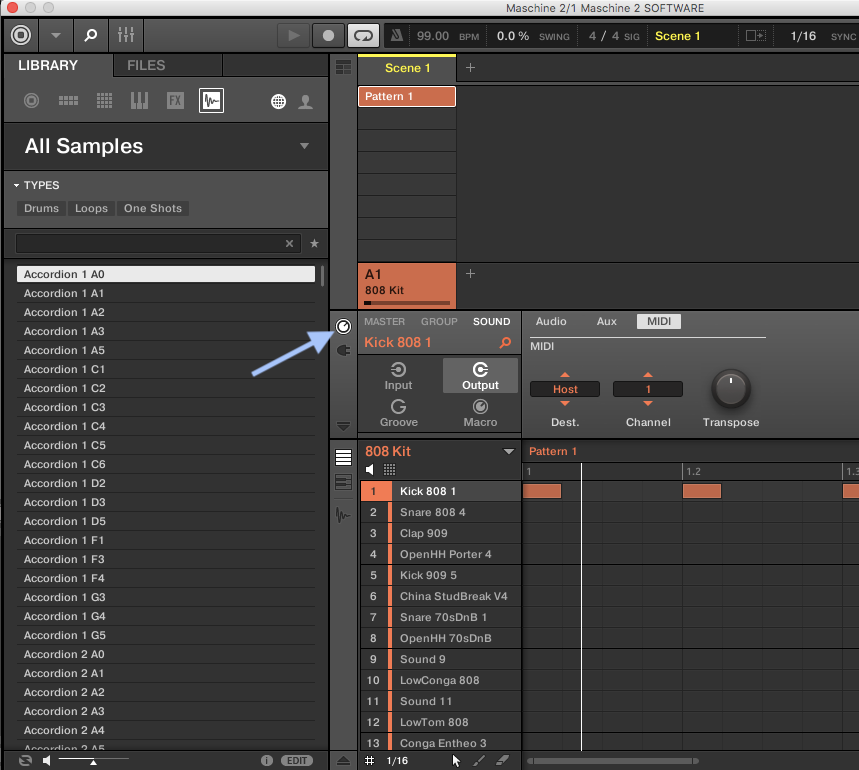
The automatic mapping allows you to use one bank of 8 macros, as you know. If you pick samples with an audible pitch - i. The last control I want to add is the compressor threshold, again it is easy to map but this time we need to consider the Mapping editor because it will map the wrong way for us to use. If I had the chance to do so, I would use the automatic mapping in ableton, which gives me no jumps. Drag the blue box next to the Minor chain so that it stretches from 0 to 8. Now to choose what part of your effect should be mapped.
Ableton Audio Effects Racks & Macros

Hope I was more clear, I'm sorry. The only issue - at least for me - was that while assigning Live recognises the knobs as 'absolute' whereas for it to work properly you need to change it to 'linear bin offset' at the bottom of the screen but that takes few seconds, so not a huge issue. Now I can use my crossfader to switch between the two different decks. You can now switch between chords by turning the first macro knob: a setting between 1 and 8 will play a minor chord, a setting between 9 and 16 plays a minor 7th, and values 17-24 trigger a minor 9th chord. This is a problem I notice when I'm opening a filter but want to turn it off once it's completely open. Create a user remote script to tell ableton the knobs should automatically control whatever the blue hand is on in ableton so macros, effects, midi effects etc.
Rhythm Machines for Ableton Live

And as I click another pad, I get another set of these. The automatic mapping allows you to use one bank of 8 macros, as you know. This can be fixed by altering the Min and Max values of the Freq and Q in the Macro Mappings section. Instead, with macros, the gradual convergence option of Live allows me to control the parameters with no jumps. Now, if you adjust the pitches of the samples using the Transp.