97 mercury villager knock sensor. Mercury Villager Knock Sensor 2019-02-18
1997 Mercury Villager Knock Sensor

If you go to Auto Zone, they have the sensor and can give you the step by step instructions to replacing the knock sensor with common tools. It it under the reservoir for the master cylinder. As it requires considerable disassembly and an expensive new gasket set to reach it, I suggest you make very sure there is something wrong with it first. There is already a screw with another ground wire there. Disconnect the air intake resonator tube from the air cleaner-to-intake manifold hose using the appropriate socket. Unplug the electrical connectors on the six fuel injectors. Well, it's been out of warranty for two hundred miles, now, he said.
Where is knock sensor 97 mercury villager

Read the underside of the cover to determine which relay is the fuel pump relay. The mechanic told me that the knock sensor was bad, I also had the timing belt, water pump, and O2 sensor changed. There are two oxygen sensors, one at the front… There is one sensor. This sensor shares a circuit with other components that often will set a… i have been working on one lately myself i have been trying to figure out. I replaced mine by using the bypass method which I uploaded a good video to youtube there now and already being done by people. Loosen the petcock and allow the antifreeze mixture to drain into the drain pan. Disconnect battery negative terminal 2.
Knock Sensor Headache.. @ Car Forums

The van has about 200,000 miles on it and has always run like a dream. If the drain pan is clean, you can reuse the antifreeze mixture, unless the mixture is several years old. Analysis of the codes indicates faulty knock sensor. The knock sensor works by sensing the vibrations in the engine, caused by spark knock. A knock sensor is a passive device that has no effect on normal engine operation. Open the relay box, located near the driver's-side fender well.
Knock Sensor Location: I Just Need to Know Where Is Located the ...

If the wiring is good that will narrow it down to either the knock sensor or computer not to throw a twist in the works but always a possibility. Mar 17, 2010 it's in the valley of the engine. I uploaded a very detailed video of the fast inexpensive fix. At first, I thought the transmission needed to be replaced due to hard shifting between 1st and 2nd gear, but the transmission guy insisted it is the tps sensor. I have a 1999 villager with check engine light on. Disconnect the left breather hose from the left valve cover.
1999 Mercury Villager/Nissan Quest Knock Sensor Relocation P0325 Code

Extend the ground wire from the pigtail right side and attach it using a ring connector optional to use ring connector to the ground on the side of the right fender near the power steering reservoir. Right know the car on repair and and themechanic said that the sensor is located at ignition part of this assembly a nd need completed assembly replacement. Remove the two thermostat housing bolts and then remove the coolant crossover tube with the thermostat housing attached. We also have the problem with the dashboard lights not working, this started after a couple hundred miles. Your truck's Mercury Villager Knock Sensor alters an engine's idling speed up and down to deal with motor knock. My car will from time to time not crank, it turns over fine, but will not crank. Recently while changing the oil, I noticed a bolt missing by the exhaust manifold, which oil has been leaking from a gasket.
SOLVED: 97 mercury villager had knock sensor and 1 of thr
I also am a licensed california smog technician. The knock sensor is under the manifold and if you fix it by taking apart the engine its a major financial loss. Unplug the engine coolant temperature sensor's wiring harness connector. If anyone can help out or add to the discussion of any of these problems I would greatly appreciate it, if anyone needs guidance with replacing bulbs or speed sensor, I got the answers. On the second go-around, tighten the nuts to 18 foot-pounds of torque, then tighten the bolts to 10 foot-pounds of torque. Next, remove the five coolant crossover tube-to-thermostat housing bolts and separate the coolant crossover tube from the thermostat housing.
Where is the knock sensor in 1998 villager

Loosen the clamps on the crossover breather tube and remove the breather tube and the bracket from the upper engine front cover. Pull the radiator hose off the intake manifold. Tape up the ends of the conduit. Normally it is the upstream sensors sensor 1 that go first. Mercury is one of the leading manufacturers of low-cost cars that are frugal and environmentally-friendly. Gained experience purchasing this automobile part on-line proved for myself I can trust this site. Once being told the exhaust manifold needed to be removed to replace the part I knew it would be kinda expensive.
Mercury Knock Sensor

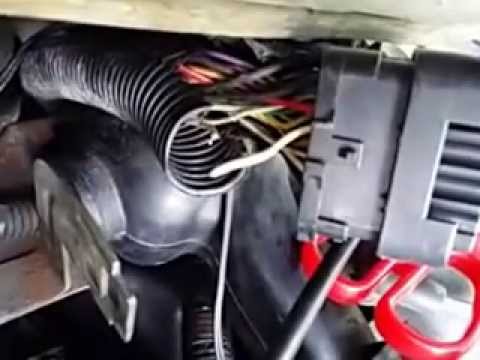
Flat head screw driver to unhook Connector C149 3. Unbolt and remove the two left breather tube bracket bolts from the upper intake manifold. Mercury Villager Knock Sensors operate with a computer chip to check ignition timing at all times in order to prevent engine pinging, which might cause problems. Remove the four manifold nuts. If you replace that, it should fix the rear. All communication was well received. After the shop cleaned that out, it runs fine.
Knock Sensor Location: I Just Need to Know Where Is Located the ...

Remove both wiring harness bracket bolts and the bracket from the upper intake manifold. Tighten the knock sensor bolt to 25-34 Nm 18-25 lb-ft. Looking at the back of C149, Pin 37 is the 4th from the top right and has a white wire. Connect the negative battery cable. Any of y'all have experience with this? We offer a wide range of Mercury Knock Sensors of all the best brands in the industry at an affordable rate that fits the Price Range you are looking for. Lay the new lower intake manifold gaskets on the cylinder heads, then position the lower intake manifold on the engine.