2012 vw cc headlight bulb replacement. 2012 Volkswagen CC HID Kits & LED Headlights 2019-02-17
2012 VW CC Parts

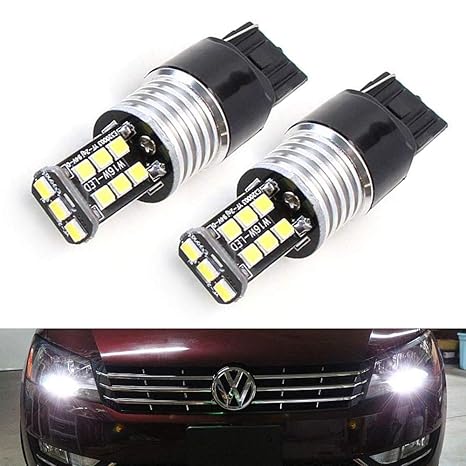
Though they are widely distributed throughout the industry, and their quality rivals that of the German and Japanese lighting giants, they do almost no marketing, instead pouring every dollar into the development and optimization of their Head Light Bulb line. Roll an edge back and the rest will follow, like a Tupperware lid. Plug in the replacement lamp. Remeber, exert some force on the thing. The bulb is a male part, with 3 prongs extending from below the wide metal disc base, and into the plastic wiring plug. It kinda screws in and out its a half turn to the left. It is a little hard to get the clip off but once you get it off it … is very easy.
12 Volkswagen CC Headlights
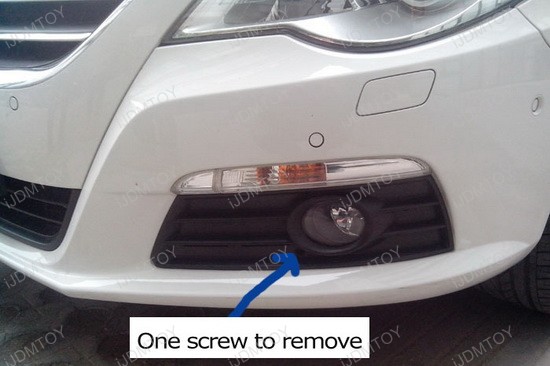
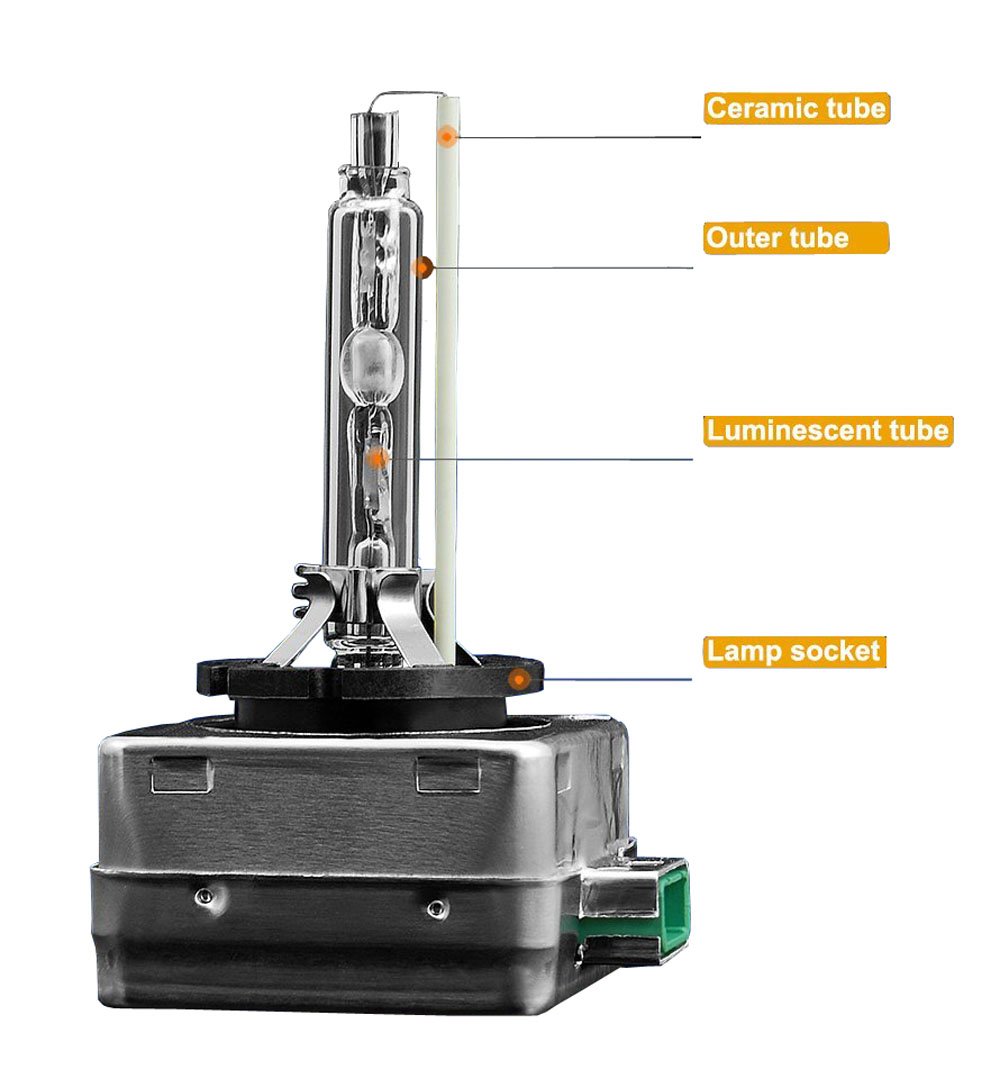
This coating is a modern reinvention of their Arctic White color which made them famous. Some Volkswagens have high intensity discharge headlights, sometimes referred to as xenon lights. With the air duct housing out of the way and connector removed from the bulb place a small mirror behind the bulb to reveal how the bulb is secured to the headlight housing. Use the screwdriver to pry some of the adhesive loose around the front of the headlight assembly. With these two pins removed put them in a safe place then lift the small plastic housing straight up and notice a post on the housing that fits into a grommet - this will need to be replaced back into the grommet and pin secured to reassemble after bulb replacement. Then find a large glove or small towel and place it over the resulting hole revealed when you removed the air duct.
VW Volkswagen CC Headlight Bulb

Then just pull the bulb out the harness an … d plug the new ones in. Fitting was even easier - Put bulb in place, clip the retaining clip in place, plug in and replace cover. As you hold the ring, turn counter clockwise until it stops then simply pull straight back and the ring should come out completely. Volvos normally use halogen bulbs which must be handled very carefully. You may want to consider replacing both left and right at the same time in order to keep brightness and color equal optional. By depressing this loop forward towards the bumper and moving it towards the radiator, it will unlatch this loop from the tab, and allow the metal retaining clip to swing backwards and down out of the way.
12 Volkswagen CC Headlights
Then find a large glove or small towel and place it over the resulting hole revealed when you removed the air duct. Replace the plastic hold ring. Though they are widely distributed throughout the industry, and their quality rivals that of the German and Japanese lighting giants, they do almost no marketing, instead pouring every dollar into the development and optimization of their High Beam Head Lamp Bulb line. This sounds like a major job but it isn't. Turn the ignition key to accessory position, and turn on the headlights to verify operation.
2012 Volkswagen CC HID Kits & LED Headlights
To do this, remove two small plastic pins that secure the plastic housing to the vehicle by pulling straight up or out. Therefore, you should turn your automobile's headlights on and make sure they are set on low beam so that you can better see what is in your path of travel. Make sure it is snug and in place. I saw that there was a flat edge to the round metal base at the bottom of the lamp, and I oriented the lamp so that flat edge was down. Note which way the bulb fits into the headlamp. The assembly will now pull out of the front of the vehicle.
2012 VW CC Parts

Answer On my ford aerostar I coudnt reach the bulb from behind so I had to remove the housing to get to the bulb. Then remove the wire from the bulb. Having just purchased a 2002 Ford Focus I found that the passenger side headlight had gone. The important tip about not touching the 'new' bulb when installing is why some people say the lamps don't last long. Screw on the back of the assembly. Turn this counter-clockwise and remove. Simply plug the wiring in, making sure it sets in place and is flush.
2012 VW CC Parts

The following applies to a 1995 Mazda B2300 and, I believe, to most near-year models. Unplug the wiring from the light assembly. Good luck, its not difficult, but the working area is a bit cramped for big hands. Place the new bulb in the headlamp making sure that it seats properly and re-clip the spring clip to hold it in place. It's only about three inches long, and once it's out, it's out.
2012 Volkswagen CC HID Kits & LED Headlights

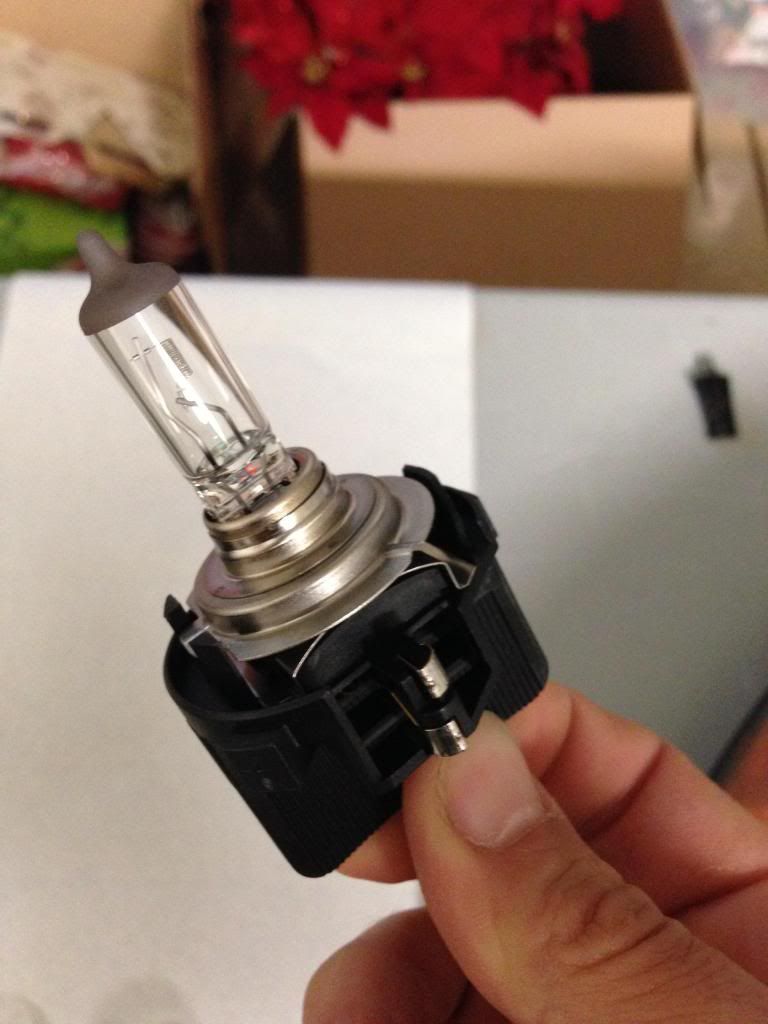
Start it onto the edge at one spot, and work it around until it's fully seated. Remove the two black screws at the top of the headlamp which hold it in place and carefully ease the lamp upwards and forwards until it's clear of the bodywork. Remove the connector from the bulb. Release clamping latch on side of headlamp housing, then rotate locking ring upwards. With these two pins removed put them in a safe place then lift the small plastic housing straight up and notice a post on the housing that fits into a grommet - this will need to be replaced back into the grommet and pin secured to reassemble after bulb replacement. Remove the entire burned out bulb assembly. The bulb has an almost square connector on it with wire coming out of the connector.
VW Volkswagen CC Headlight Bulb
The piece should set in flush with no gap. After sitting there for a few years the rubber o … ften getsa little hard and is usually stuck to the headlight assembly so itmight take a little effort. Popped to Halfords and picked up a H1 bulb, went home and had a look under the bonnet. . The result is the unsung hero of automotive lighting and favorite of automotive enthusiasts in the know; Nokya Pro-Halogens. Re-fit the electric plug and replace the weathershield, first making sure that the rubber gasket is in its grove properly. I know this because I j … ust did it.