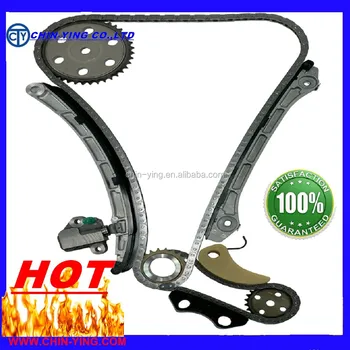
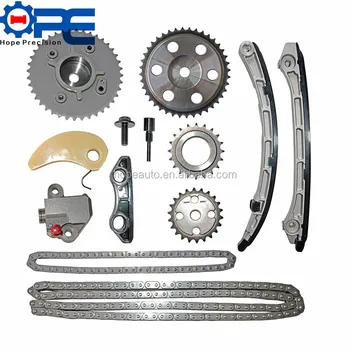
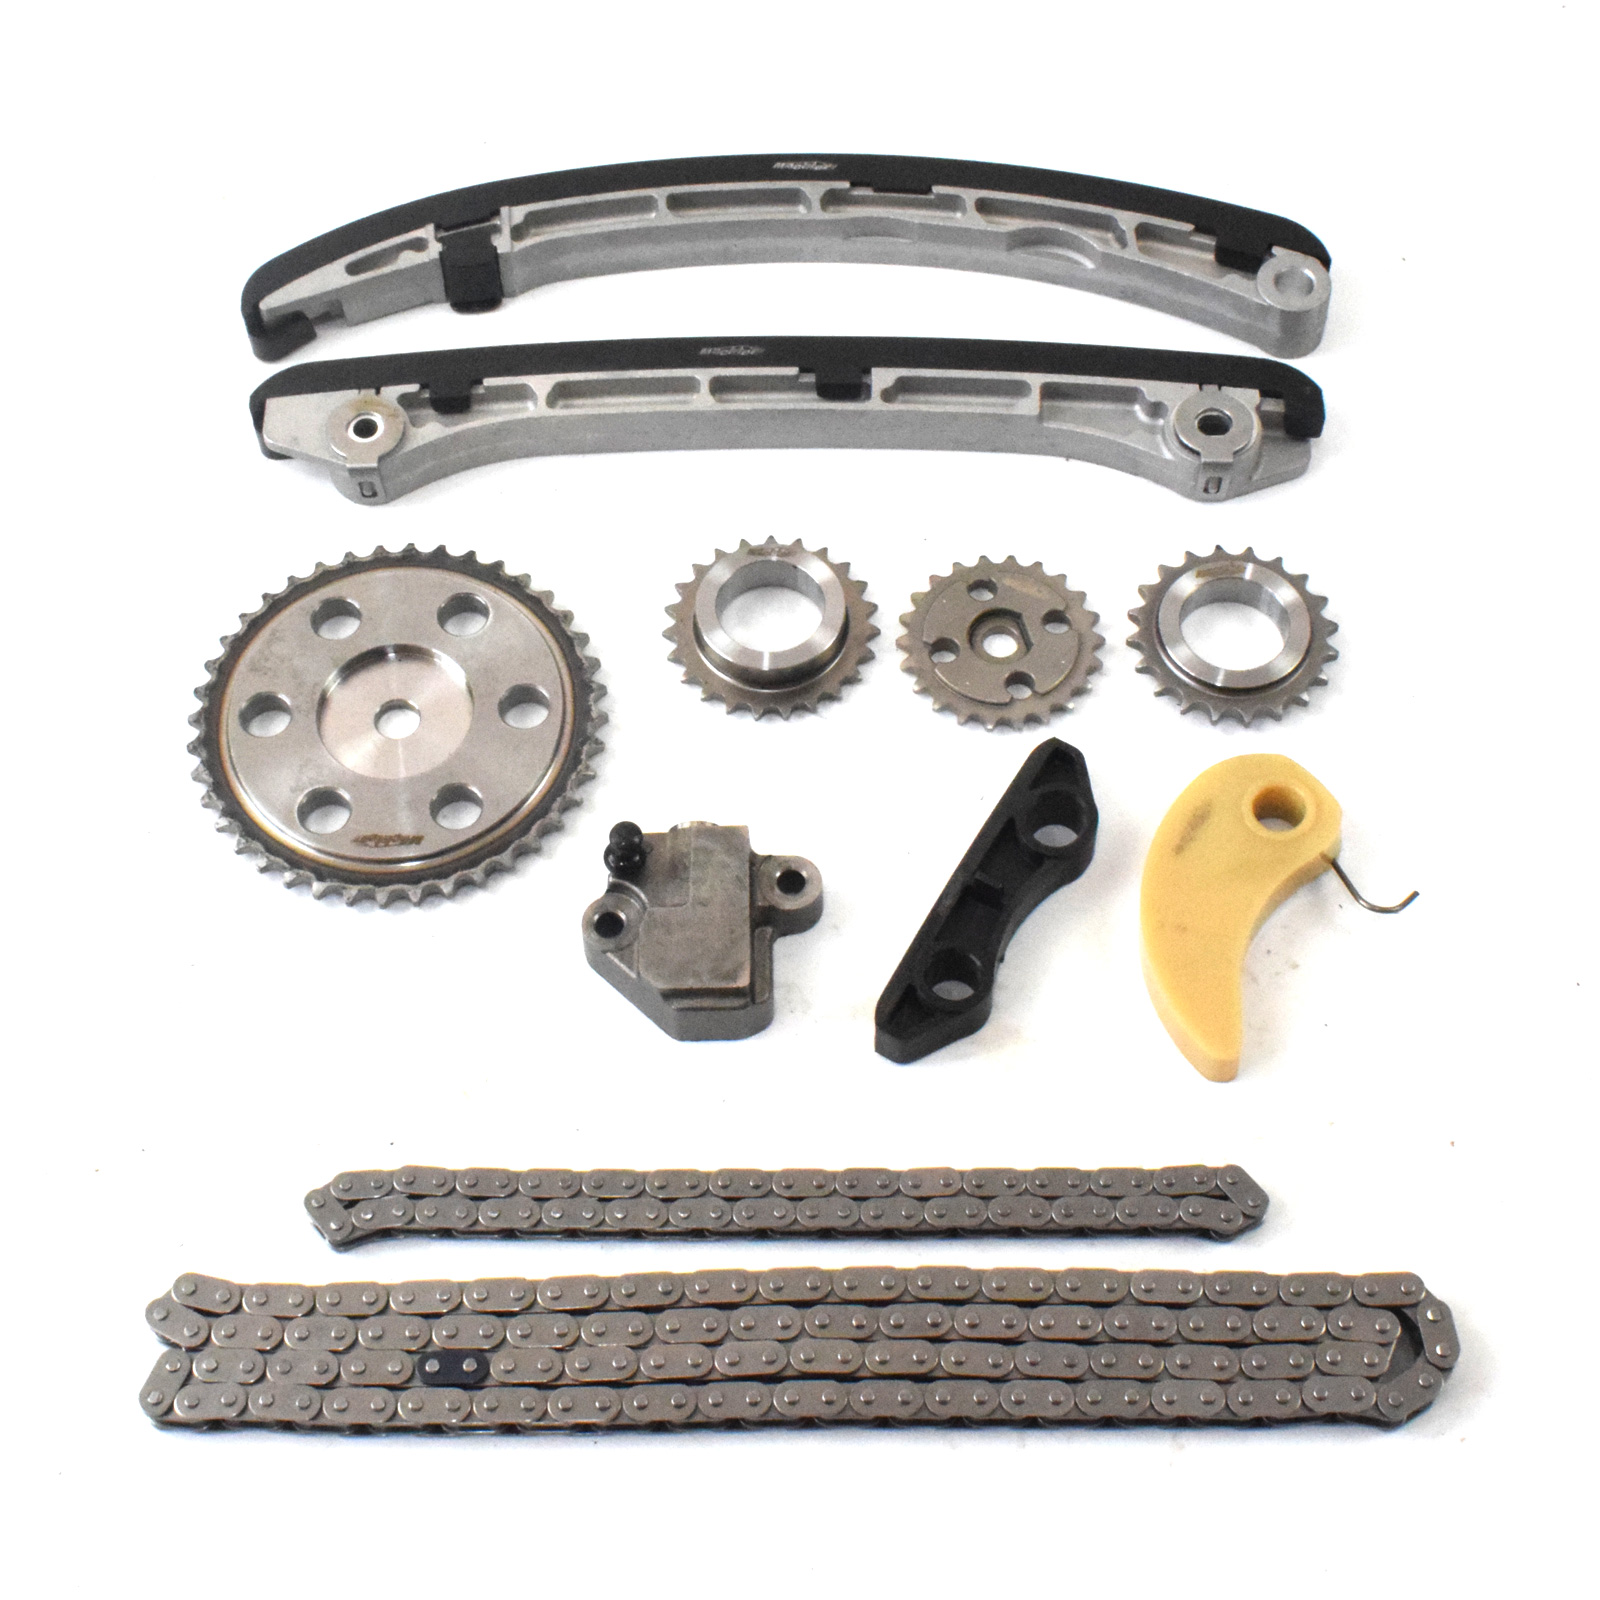
2007 cx7 timing chain. Mazda CX7 Timing Chain 2019-01-29
Mazda Class Action Lawsuit Filed Over Engine Defect
Thats without looking at it. Every time i called the dealership they always put me on hold which pissed me off! Call toll free to order or place your order online via our secure checkout system. When removing the high pressure line pipe, always tighten the high pressure line pipe installation nut while fixing the high pressure fuel pump joint nut with a wrench. Remove the charge air cooler duct. Loosen the camshaft cap bolts in two or three passes in the order shown, and remove them. I had to wait on the side of I-95 for 4 hours because of the storm to get towed to the mechanic who did the oil change! Mark the shaft and tripod joint for proper assembly. Have always maintained it well.
Mazda Class Action Lawsuit Filed Over Engine Defect

Have been told its related to the timing components. The car only has 128k miles on it. . Install the new snap ring using snap-ring pliers. Always keep sparks and flames away from fuel.
Mazda CX

I am beyond furious about the fact Mazda states these are not recalls there were several recalls in this particular car. No one wants to do a job like that and then the customer wants a guarantee that there are no problems. See01-10-25 Front Oil Seal Removal Note. Jbr Oil Catch Can vta setup 5. Call toll free to order or place your order online via our secure checkout system. A few days later she had an issue with it running horribly. Connect a vacuum pump to the variable swirl shutter valve actuator.
Mazda CX

This makes no sense to me. Disconnect the hose between the wastegate control solenoid valve and the intake pipe. Measure the force of the brush spring using a spring pressure gauge. The only thing I've been doing is turning it on and doing the oil changes. Assemble in the reverse order of disassembly. When performing work while the dynamometer or chassis roller is operating, be careful not to contact or be caught up in any of the rotating parts. Always keep sparks and flames away from fuel.
Mazda CX

Verify that the battery is fully charged. It can slip or fall, causing death or serious injury. The car has only 82,000 miles on it, and the engine they replaced is failing again. The timing chain alone is a 5-6 hour job. Should you fail to show up at the time and place arranged with the Workshop without canceling in advance, you will forfeit the entire prepaid amount. Repair or replace the wiring harness. Apply silicone sealant to the engine front cover.
Mazda Class Action Lawsuit Filed Over Engine Defect
Verify that malfunctions have been repaired Troubleshooting completed acxuuw00001066. That is wasteful and advances in engine technology now allow the timing, lifting, and duration that valves are left open to all be tweaked. Not sure if I should complain to mechanic or is this a Mazda defect? No more mazdas for me, I will stick to the faithful Buick which I have been the proud owner for over 10 years with no problems. I called the dealership and their tech said basically the same thing they were saying about the vvt issues in earlier models. Visually inspect the compressor wheel from view A for the cracks, damage, or bending on all the compressor wheel blades. It now has about 90,000 miles and started making the ticking sound when cranking. Connector Evaporative hose 01-16 9.
Mazdaspeed 3
He did more research and discovered that the vvt was bad as well. Tightening torque Installation Tightening Torque Position 66. Measure the voltage at wiring harness side fuel pump connector terminal B. Install the high pressure fuel pump. Raise the steering gear and linkage, front stabilizer, front lower arm and front crossmember component to the appropriately level, and install the return hose and pressure hose. I was driving in the middle lane and had to get to a shoulder fast to avoid an accident, but had no power!! And sure enough in less than 10 minutes he had named off several things I had been telling Mazda dealership were wrong with my car for years. To prevent this, do not damage the sealing surface of the fuel pump unit when removing or installing.
Mazdaspeed 3

Could also be a bad connection from the fuseable links of fuse box in engine bay. That would go a long way towards keeping customers. Warm up the engine to normal operating temperature. When installing a terminal, be sure to insert it until it locks securely. Remove the service hole cover on the trunk side trim. It now has about 90,000 miles and started making the ticking sound when cranking. Disconnect the vacuum hose between the intake manifold and purge solenoid valve from the intake manifold side.
SOLVED: How to install the timing chain for a Mazda 2007
Dust cover See 03-11-5 Dust Cover Removal Note. See01-10-33 Engine Mount Installation Note. Tightening torque Return hose: 7. Go to the next step. After years of this nonsense I had went to go to The Tire Place to put new tires on my car the owner was like holy Shit your car sounds horrible can I take a look? Jbr 80a Pass Motor Mount 10.