2006 volvo s80 head gasket replacement. Volvo S80 (1999 2019-01-24
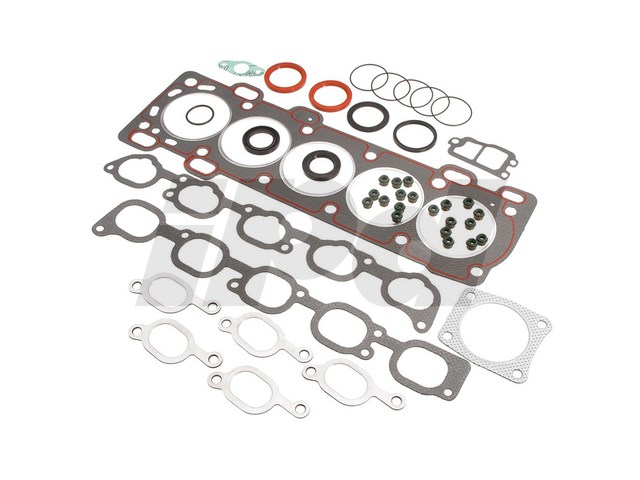
Volvo Head Gasket
The one with a clamp on it is the brake servo vacuum hose the hose running from underneath air filter housing area. When properly placed, it locked between two flywheel teeth and the bell housing, preventing the crankshaft from rotating clockwise. This takes training and skill which the average shade tree mechanic does not have. After running the car for a few minutes to circulate it, shut it off, let it cool a while, then refill with 1 gallon of pure coolant to get the ratio right and top it off with distilled water using the same fill procedure. Contact our customer service team if you have questions on product fitment. Then I center it where it is to be installed over whatever shaft it goes around and slide it gently into place before pressing it in. In this section you will find the gaskets that seal the intake manifold to the cylinder head.
Cylinder head installation, head gasket, lifters, cam cover, etc. Volvo 850, S70, V70, etc.
I do this to give myself the best possible outcome. There are no dowels between the lower head and the block like there were between the upper and lower head sections, but there are two of the bolt holes circled in red that have short little protrusions for alignment and securing of the head gasket and head. This is a major service and should be done by an experienced technician. If not, rotate the crank 1 more revolution and recheck. With this in mind, we will indicate what type of product you are looking at within the following guidelines.
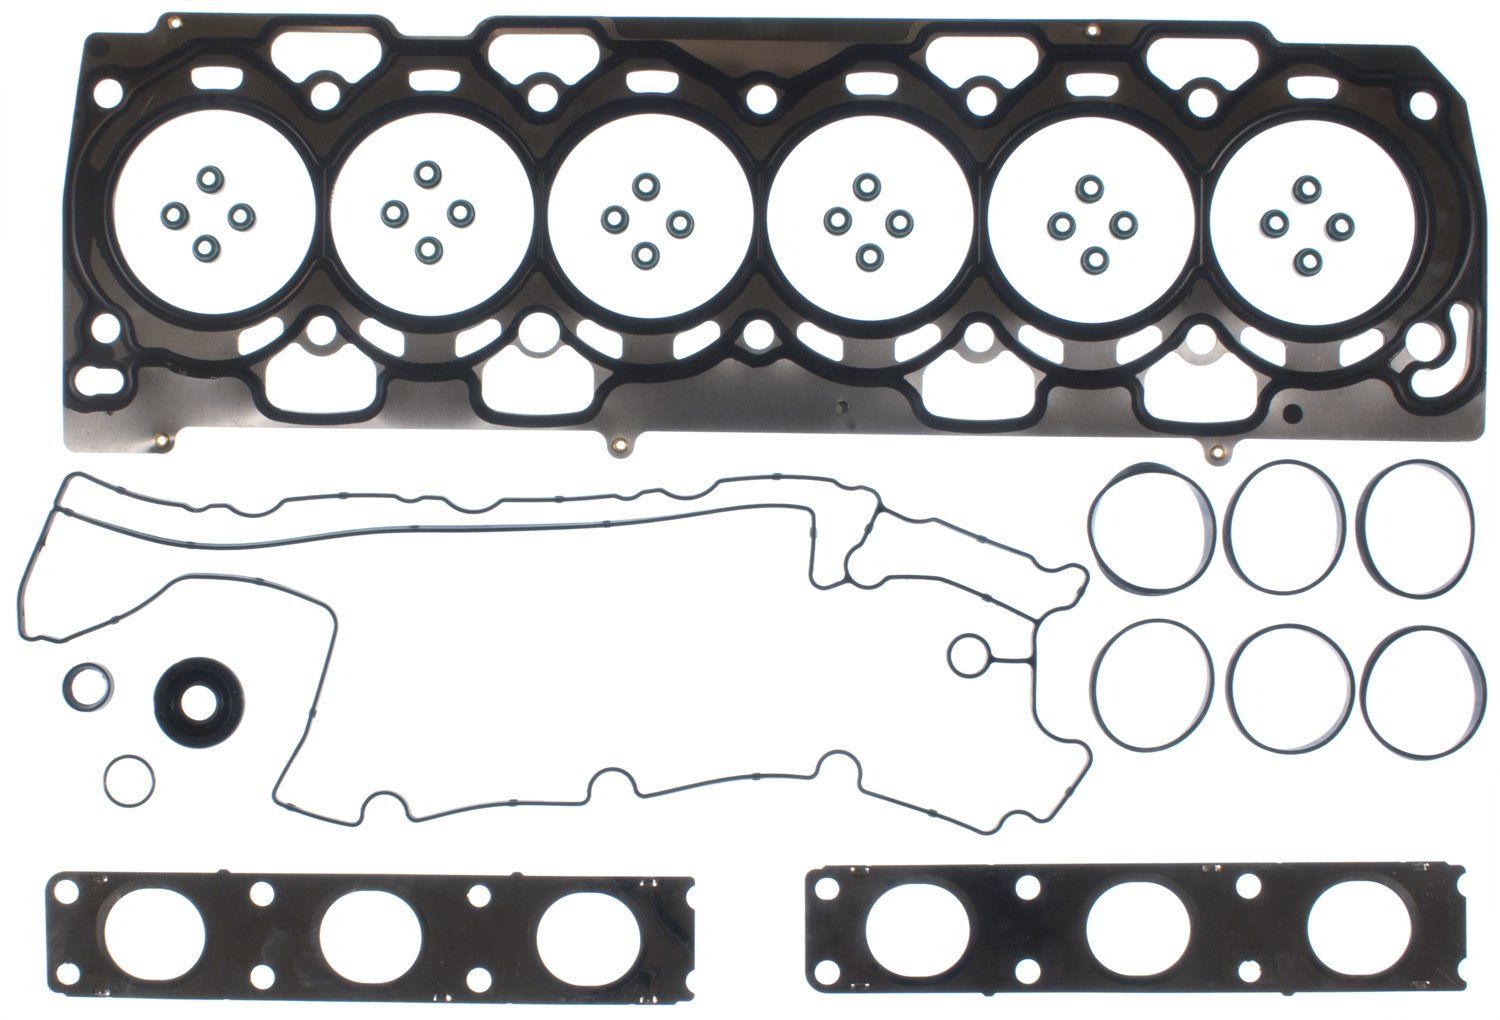
Volvo Intake Manifold Gasket 9458534
A horrible cunt to do as a first head gasket, lots to fuck up, and lots of money to unfuck. Volvos are known as the safest car on the planet. After having done a thorough job of cleaning the surfaces of any gasket material, it is time to put the new head gasket on. The item must be new and in its original manufacturer packaging to be eligible for a cash refund. Keeping any of it from getting into or onto your sealant, put a little dab of moly grease like multi-application axle grease in a cardboard tub on each of the journals where the camshafts will contact the upper head.
Volvo Head Gasket
Mahle is one of the largest manufacturer of filtration products in the world. Could you please assist as to where we should look for the problem? Cylinder Head Removal It is now time to remove the top portion of the head. The acetone will dissolve and clean away any oils, residues, etc. The blue circles show where the bolts to secure this will go. This is down behind the passenger side of the timing belt cover. It is supposed to seal dry gaskets and make them impervious to water, oil, etc so they will last longer.
Engine Gaskets & Seals for 2006 Volvo S80 for sale

I accidentally bought ones that had too large of an opening on the big end to fit the vacuum tree nipples. If you decide to do this yourself ensure you either rent all the tools or purchase them. Drivers who pick a Volvo know that quality and comfort are well worth every penny; excellent accessories will keep your car going strong. A lot more information is needed. Then replace the wiring bracket that is connected to the transmission dipstick tube. This is located at the back side of the engine near the firewall and can be found by tracing the fuel lines leading from the fuel rail. Replace the top timing belt cover 10mm that fits over the top of the cam pulleys and has the timing marks on it.
06 2006 Volvo S80 Head Gasket
The injectors are held in the rail and the manifold by snug O-rings, with no fasteners to remove. If you've never done it before it is going to take several days. We checked that the timing is still correct, witch it is, but to no avail. This is tight to do with the harmonic balancer on, but if the bottom portion is fed into where it goes first, the upper portion will fit with patience and just a small amount of manipulation. Although I am showing and describing the step of applying the sealant in the next picture, I would encourage you to look through the next couple steps before applying the sealant. The wedge should have a wire attached to it which will hang over the edge of the timing cover so that it can be pulled easily; you can use nylon ties instead to hold each side of the chain up. Older American made V8 engines will usually require the removal of the intake manifold, exhaust manifolds,ignition distributor and associated wiring harnesses.
Volvo S80 (1999
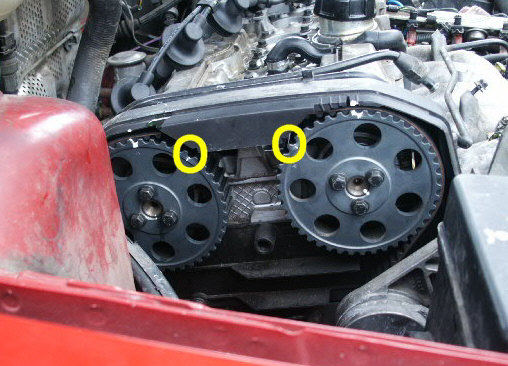
I also applied a very light film to the ports of the fuel rail before inserting the injectors. Use a round plastic bristled brush to clean out the head bolt holes in the engine block and blow them out with compressed air. The bottom nipple connects to the front middle nipple of the vacuum tree on the intake both in next picture. Also note that on the front of the engine the timing belt end , the intake camshaft has two holes on top, while the exhaust camshaft has one hole on top. Make sure the crank is lined up. I got mine on eBay years ago and it looks like this one.
2006 Volvo S80 Car Parts
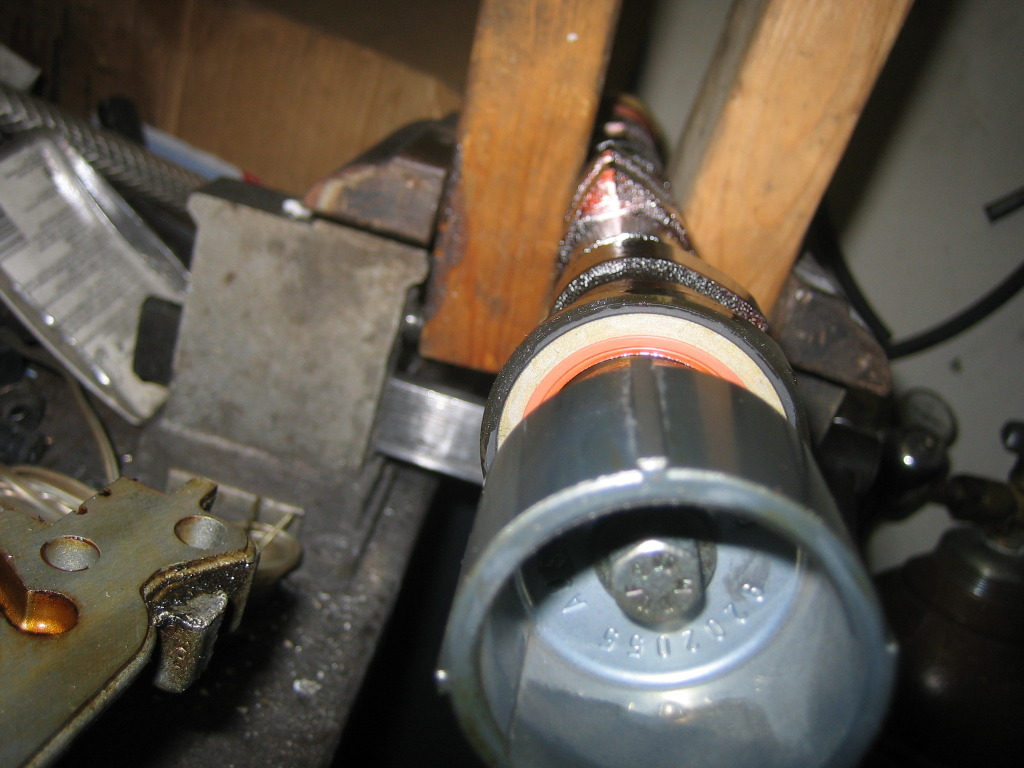
Head Installation: 4 to 6 Hours. Now is the time to use it. The bolts and cam pulleys can now be removed. After the head is reassembled you will need to reset the base timing to specs. I cleaned mine good, inside and out, and inspected the internal components for signs of excessive wear or scoring especially the crescent portion between the inner and outer gears. While this is optional, I found that it gave me a little extra room. Notice how it is a little clean around the edges of the piston on cylinder 5.