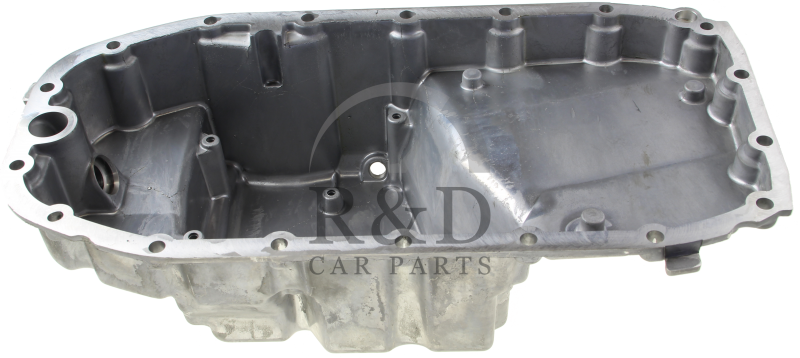
2005 saab 9-3 oil pan. 93 Oil Pan Removal and Pickup Cleaning at orgmode.com 2019-04-28
SAAB Engine Oil Pan 55559827

Any damage sustained to the engine oil pan can result in total loss of oil pressure and subsequent engine damage. Remove the cover plate and the oil sump screws. Remove the turbo bypass pipe and the heat shield over the exhaust manifold. Remove the turbo bypass pipe and the heat shield on the exhaust manifold. Now comes the most difficult part. If you would use a different sealant, the extra sealant would harden and potentially clog up the filter, oil lines and strainer.
Saab Oil Pan

Finish by tightening the screws in the reinforcements. I was thinking of checking under the rocker cover with my current car. Probably about 2 hours for an experienced Saab mechanic with car lift. Loosen the upper two nuts on the exhaust pipe. The nut will come of the bolt or the entire bolt will come out.
Saab Oil Pan

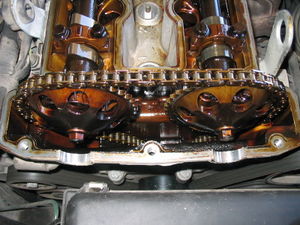
Complete shipping and return policy information can be found in our. There is no major rush to get the sump back on the sealant will remain fluid because it is in contact with the air. Start the car and let it warm up. They will be listed here and on site once available. I also owned a 2005 9-5 Aero and was very curious to find out if the sludge problem was still as bad as the earlier models. If you have a B204 engine you shouldn't need to worry about having to do this job.
SAAB Engine Oil Pan 55559827

Carefully prise open with a crowbar according to the illustration in order to remove the oil sump. Remove all old sealant and lean and degrease the underside of the engine and oil sump so the sealant can do its job. I prefer the car ramps because you'll have a bit more room and I never completely trust the jack stands. Check that the pipe to the oil adapter is firmly attached and that it is directed straight into the oil sump. Our large network of salvage yards ensures that you'll be able to find used Saab 9-3 oil pans quickly, all from the comfort and convenience of your home or office.
Saab Oil Pan
We'll do our best to help you find top-quality oil pans at the best prices possible. Look inside the engine to check if there are not any signs of severe sludge forming. Put all the other stuff back on the engine. Tighten the other exhaust pipe nuts. Remove the heated oxygen sensor cables.
Saab Oil Pan
Slide out the little red part with a screw driver and unplug. Without a car lift, your basically spending a lot of time laying on your back with your face close to the the engine. About Engine Oil Pans The engine oil pan is a metal container located on the underside of the vehicle beneath the engine crankcase that collects falling oil during engine operation to be used again. Connect the heated oxygen sensor cables. Be careful not to damage anything. Raise the car and remove the lower engine cover. Some oil from the engine probably dripped on the exhaust so don't be alarmed when you see smoke coming from the engine when it starts to warm up.
SAAB Engine Oil Pan 55558814

Note how close it is to the oil drain plug in the upper right-hand corner. Clean the inside very well to remove all debris and other stuff. Patience and an eye for details are required because you don't want to rush this job. Undo the two upper nuts on the exhaust pipe. Raise the car and remove the lower engine cover. About Engine Oil Pans The engine oil pan is a metal container located on the underside of the vehicle beneath the engine crankcase that collects falling oil during engine operation to be used again. Connect the crankcase breather hose.
How to drop oil pan on 98
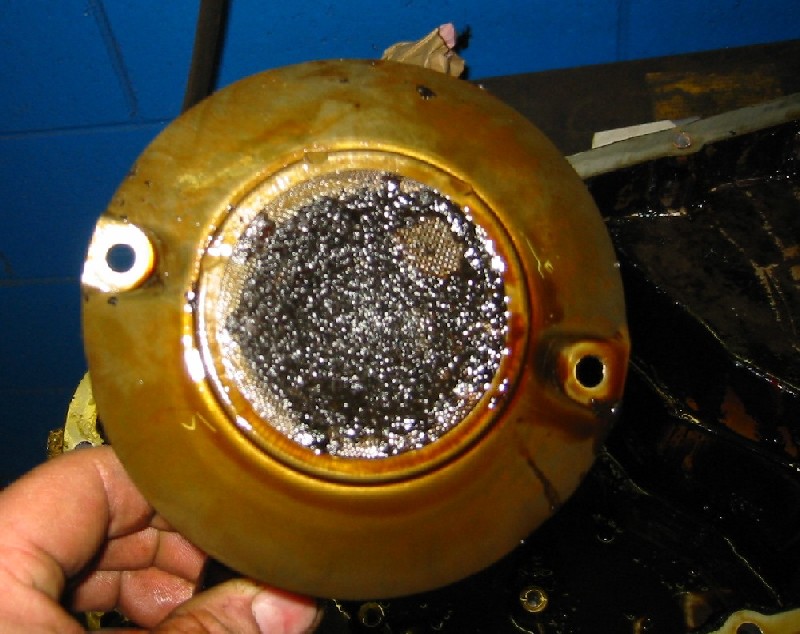
There was a lot of debris accumulated right under the oil pickup strainer. Also like SaabScott said I always replace the valve cover gasket so that I don't have to take it off again because I was being cheap. This can be done by one person but it helps to have an extra pair of hands. Unscrew all bolts securing the sump 13mm. Put a jack under the transmission and slowly jack it up a little bit. Two can be accessed from the top and one from underneath the car. Tap out the holes in the new sump with a ball hammer.