2004 toyota sienna fuse box. Fuse Box Diagram, 2004 Toyota Sienna 2019-02-14
Toyota Sienna (XL20; 2004
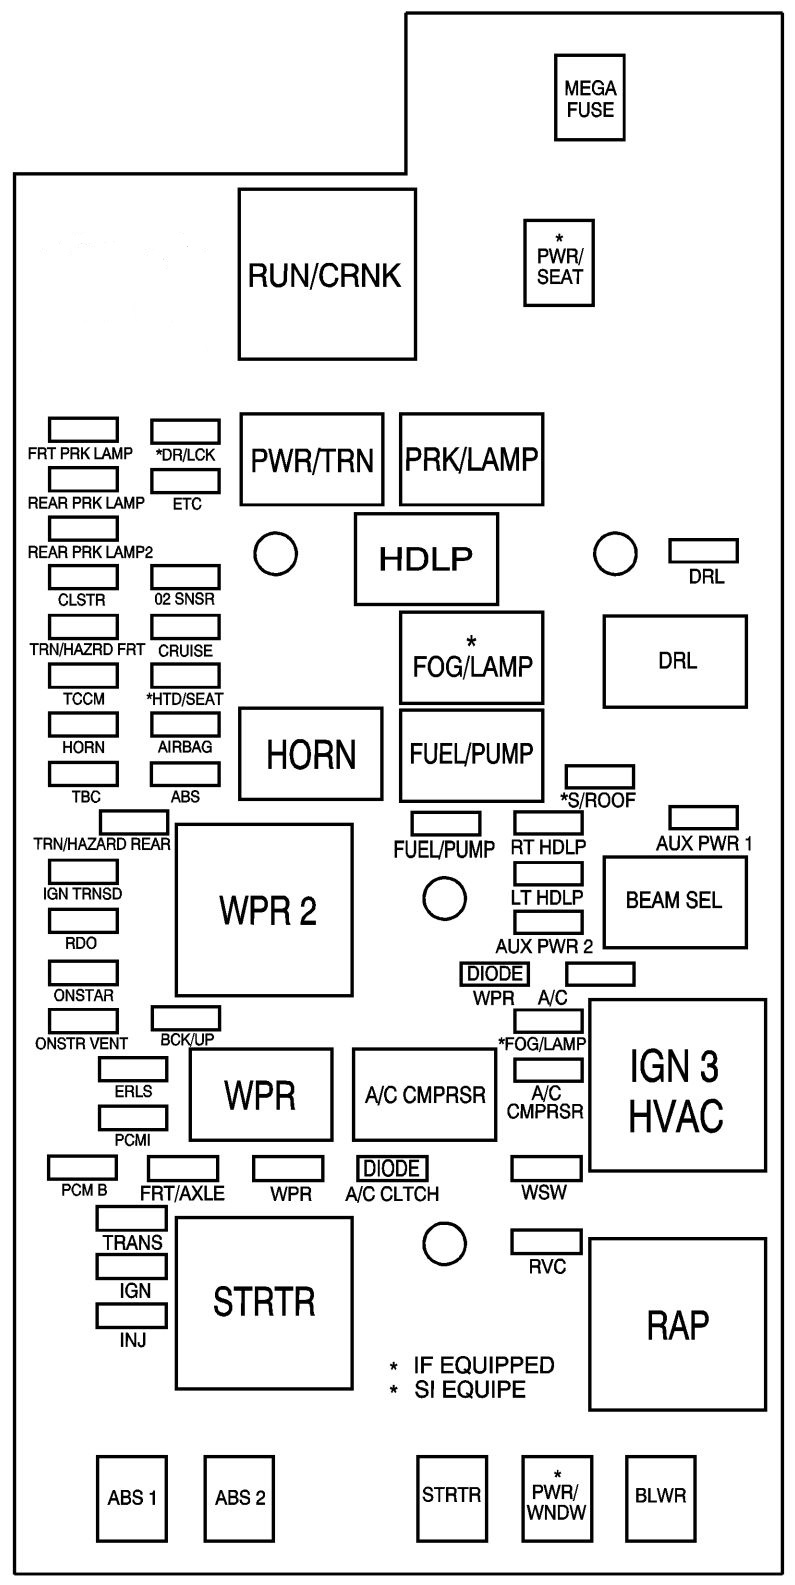
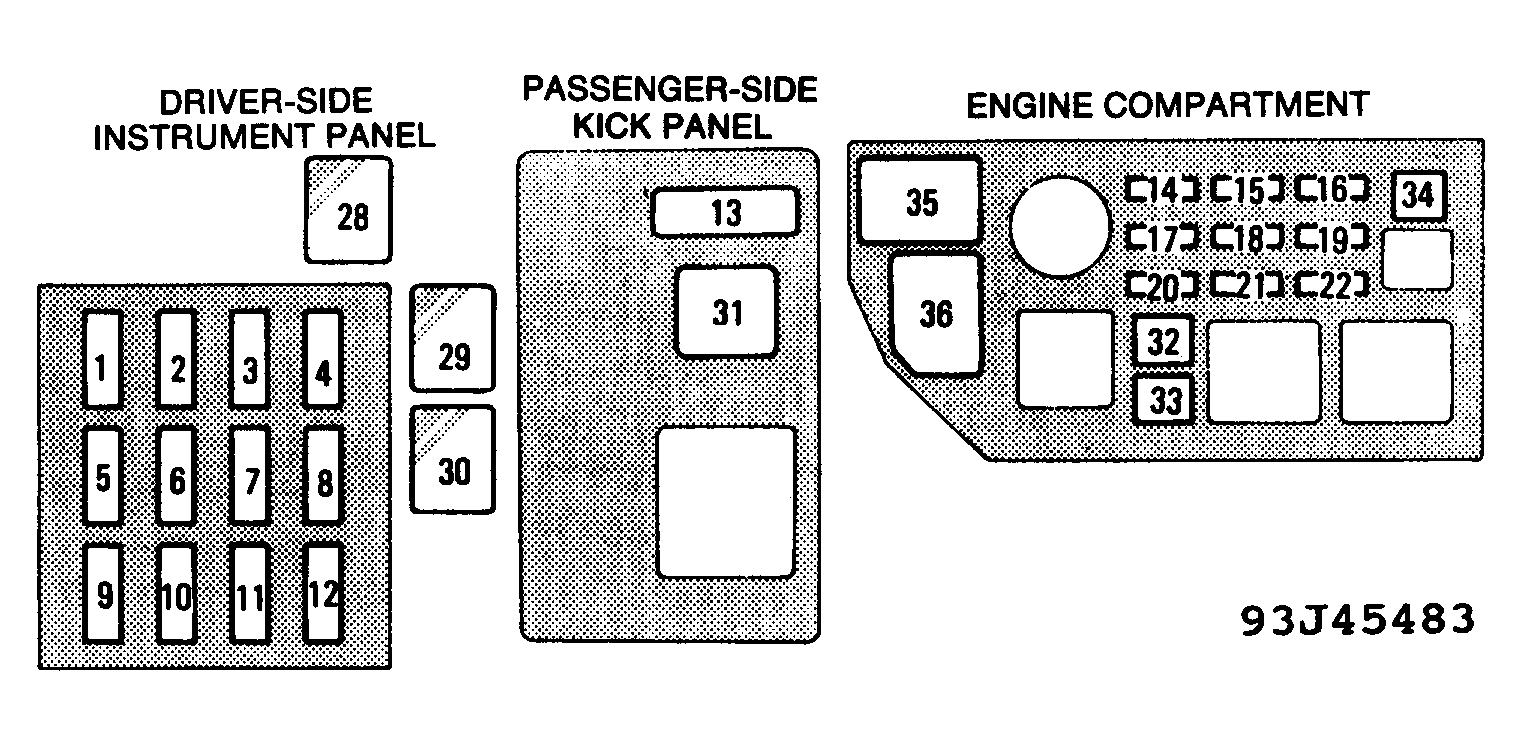
This is a location diagram and the inside of the box. Disconnect the tail light wires at this connector, being careful not to break it. This warning goes for anything that has a fuse. The starting circuit cut-off relay prevents the starter motor from operating when neither of these conditions has been met. We thank you for your visit to our website.
✅ Download 2004 Toyota Sienna Fuse Diagram

Before I took the car in for service, I had put 3 separate new batteries in the fob, for testing, and nothing worked. Seats — Remove both seats starting with the passenger pillion, if applicable. I guess its the harsh price to pay for being double-jointed ;- Its in a very convienient place. Need to know which ones go to the brakelights and driver's side headlight. Therefore bank 2 sensor 2 would be aft of the catalytic converter attached to the exhaust manifold closest to the passenger compartment.
Toyota Sienna Questions
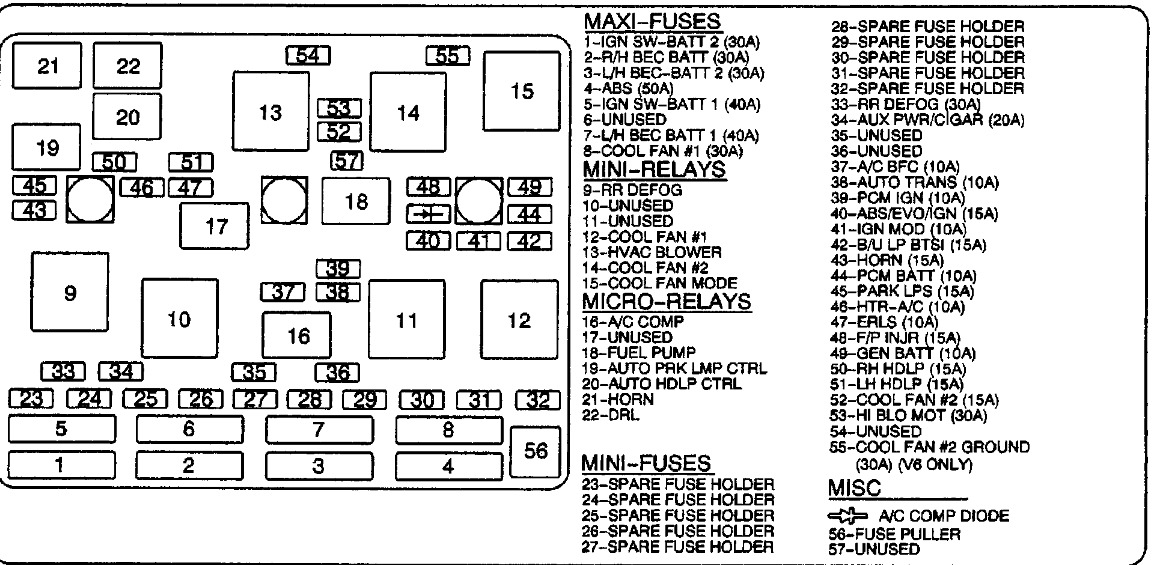
In which case you can unscrew the end and there will be a round glass fuse. If a fuse is blown, replace it as follows. But I see that both are listed on 38 and 39 along with other seemingly important systems, so I am reluctant to remove those. You can also find other images like toyota wiring diagram, toyota parts diagram, toyota replacement parts, toyota electrical diagram, toyota repair manuals, toyota engine diagram, toyota engine scheme diagram, toyota wiring harness diagram, toyota fuse box diagram, toyota vacuum diagram, toyota timing belt diagram, toyota timing chain diagram, toyota brakes diagram, toyota transmission diagram, and toyota engine problems. The diagram is on the back of the little coin compartment door. The fuse box contains three s … pare fuses. .
Toyota Sienna Fuse Locations
Can you first describe the issue you are having and then we can troubleshoot to narrow down the root cause? Using a screwdriver, disengage the panel from the electrical caddy. Peel one half of the liner from the adhesive backing of the left-side gasket. Assemble the tether over the lock threads with the tab A on the inboard side of the lock, same as the retaining hole in the door frame. Spare fuel injection system fuse 1. There are several parts that must be removed in order to get the air-box out of the bike in one piece. Open the fuse box by lifting off the cover.
Toyota Sienna Fuse Locations

Like I mentioned in the previous paragraph, the fact that the fuse is blowing is a nice and controlled warning that something is wrong. When at least one of the above conditions has been met the starting circuit cut-off relay is closed and the engine can be started by pressing the starter switch. And put a tag on it for future owners. The minor fuses are located in the car. Once all the bolts are removed gently pull the springs out off of the studs. Same for the seat heaters. Wait 30 sec T1 and ensure the audio alarm sounds for ½ second T2.
✅ Download 2004 Toyota Sienna Fuse Diagram

If you are searching for any unique idea for your fuse box then the 2004 toyota sienna bank 2 sensor 1 location graphic should be on the top of guide or else you may use it for an optional idea. Illuminate solidly for 1 second. I think the only reason you would blow one of these is if you have placed a higher amp fuse than prescribed in multiple locations, allowing an overload of one circuit branch, or you have some majorly malfunctioning hardware with a short-circuit. The answer above is perfectly correct. To prevent this condition, the Steering Angle Sensor has been changed.
Toyota Sienna Second Generation mk2 (XL20; 2003

Underneath the side cover there are three rubber grommets 1 on the frame tab, and two on the air-box that support the side cover. This is all just a rough estimate of what is required. I just changed the fuse on my 2004 Toyota Sienna. And we also believe it can be the most well -known vote in google vote or event in facebook share. Keywords for 2004 Toyota Sienna Bank 2 Sensor 1 Location :. Aug 27, 2012 Hello Edelways.
✅ Download 2004 Toyota Sienna Fuse Diagram
Interpret it thru the owner … 's manual. When you see the amp rating on a fuse, it is how much current can pass through that fuse before the material of the fuse overheats and then melts, opening the circuit of the fuse. The gasket liner on the large gasket is split to aid alignment. Sorry about the size of the diagrams. If your talking about the vertical alignment, there are setting screws on the back of the headlight assy. Find the latch on the door, stick your finger in the hole, lift up and pull the door handle at the same time, the inside latch mechanism should go up, then try the door again.
2004 toyota sienna fuse diagram
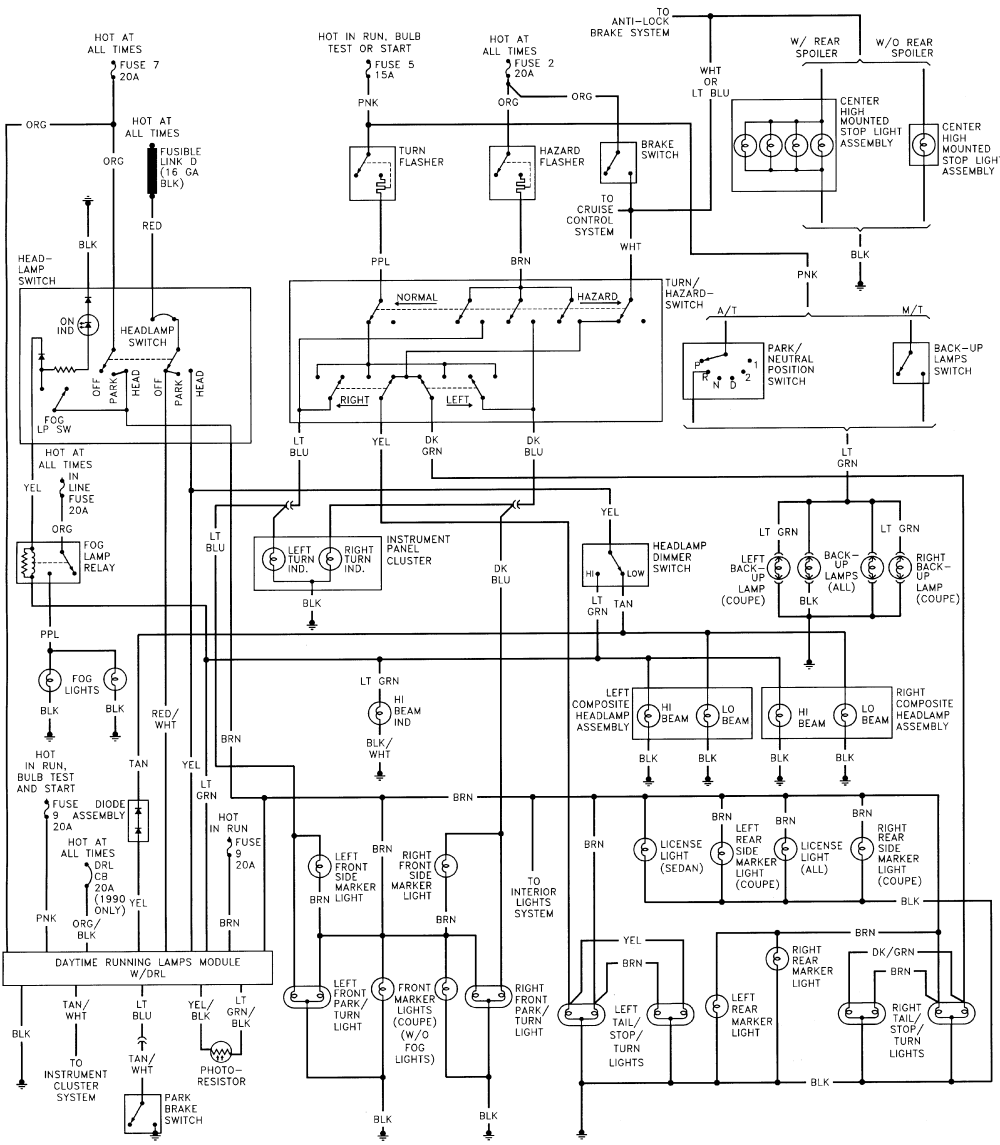
The main fuse box is also located under panel D, beside the battery. That way, if anything abnormal happens, if there is a short-circuit, or if a component fails and causes that circuit to draw more amps than safe, the fuse blows and protects the wiring and other components in the circuit. We have been hunting for this image throughout web and it came from reliable source. Hope this worked for you. Storing a discharged battery can cause permanent battery damage. Figure 1- Wiring Diagram Cot a Oil Pressure Switch Ignition Switch Audio Alert Relay 2 1 3 load Horn + + — Caution: Make sure all connections are insulated away from potential grounds.
Toyota Sienna Fuse Locations
Obtain the left-side gasket 6 and a hinge gasket 7 from the kit. That sensor went bad and replacing it took care of the problem. Remove the electrical caddy fasteners 3 total. Hope you can get 'cool' air conditioning again. Connect the pocket tester Ω 1 and battery 12 V to the starting circuit cut-off relay terminals as shown. Insert a small screwdriver into the slot under each fuse and relay panel.