2000 nissan maxima front axle replacement. Nissan Maxima Axle 2019-04-11
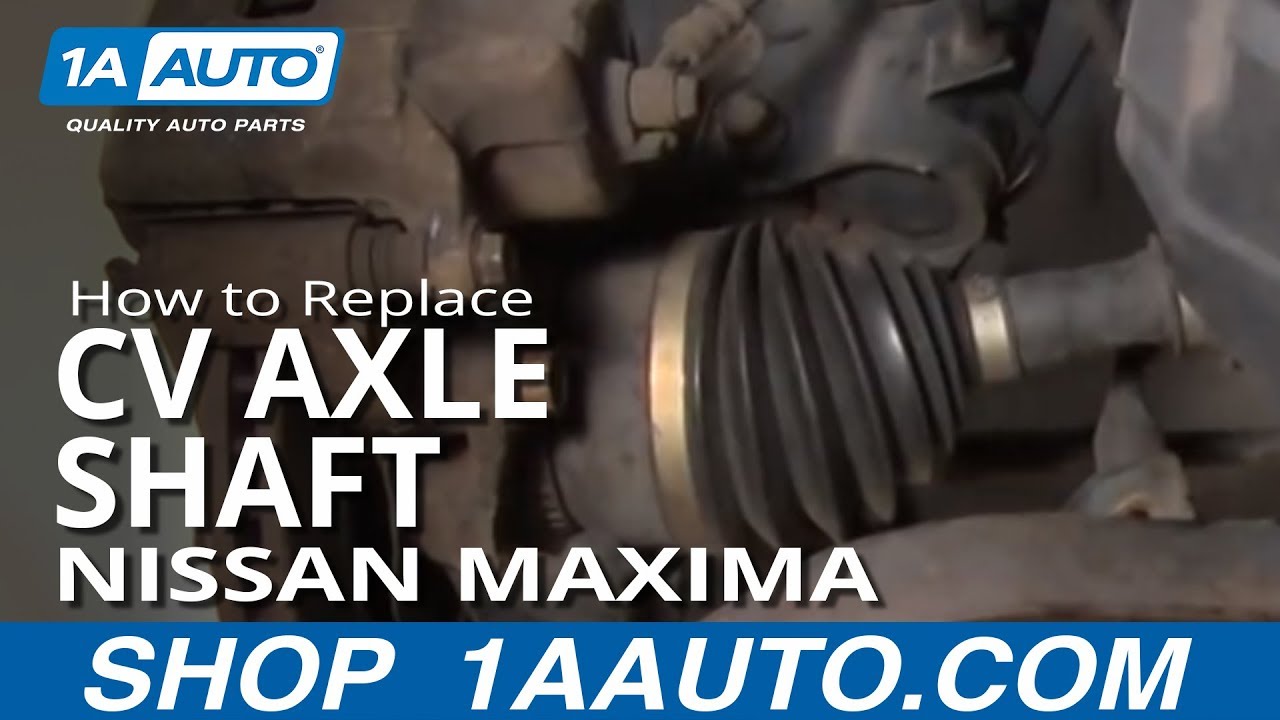
How to Replace Driverside CV Shaft on a Nissan Maxima?

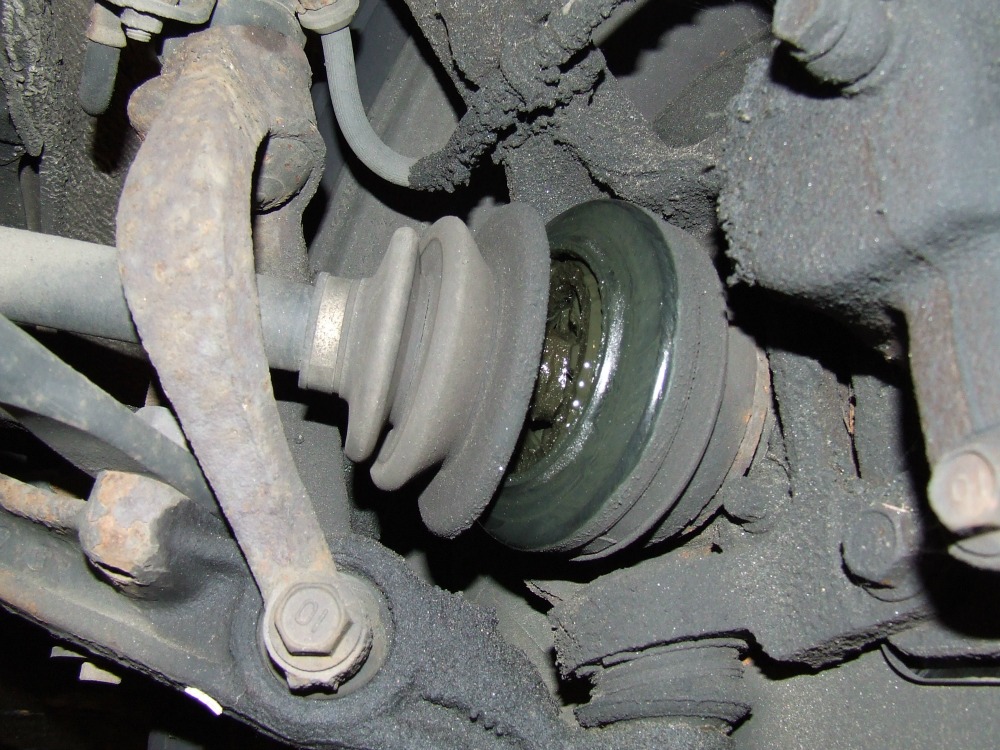
First of all I didn't know that Nissan boots come as an assembly with the axle. Place the rotor back on. It's very simple to do. Slide the new pads into the metal clips. Disconnect the engine splash shields and use a drain pan to catch any fluids residing in them, such as oil or coolant. I recall from my days at an Inf … initi store that the techs used a big vice and a heavy hammer to beat the joint off the end of the shaft. Needed socket on other side.
How to Replace Driverside CV Shaft on a Nissan Maxima?
With that special electronic device, the codes can be read. For generations Nissan has offered sturdy and reliable vehicles that car and truck buyers can count on to do the job. Disconnect the negative battery cable. Then you'll see the flasher. They say it's a non-servicable item.
SOLVED: 2000 Nissan Maxima rear axle bearings are humming,

Hang it from the shock. Pull the steering knuckle out of the way so that it can be removed from the drive axle. Its purpose is to seal the important connection of the driveshaft to the transmission of your vehicle. Inspect the rotor surface for any signs of cracking or unevenness. What you want is to bring your own steak to a restuarant, Just not done. I used a socket drive bar against the end of the bolt and hit the other end of the bar with the hammer. Use needle-nose pliers to bend the ends and secure the pin.
2000 Nissan Maxima Problem with Breaks After Cv Joint Axles

Then remove the fuel pump fuse beneath the dash where the fuses are located. Dealership said that both axles were broken and required replacement. A puller or other method is used to remove it and install it. Your Nissan Maxima Axle moves power from your transmission to the tires to generate forward speed. I have a friend who runs and Advance Auto, however if I purchase the part at my friend's discount price and have it sent over to the dealership they won't warranty the job. What is the quality of there work, are they honest? Use a c-clamp to compress the brake caliper piston. After the cover is removed spin the rear axle the one with the tire off to locate the pin in the very center of the differential.
Nissan Maxima Axle

We're here to help you find that perfect Axle Assembly for your Nissan Maxima. There is a single wire connector. Then screw on the lug nuts using a lug wrench. Be aware that as you remove that last screw, the pump housing beneath is spring loaded and will pop up slightly. If the shaft hasn't rusted in place, this will be easy. Remove them both and the starter will come out. Basically, the top of the housing unit slides off.
How much does it cost to replace a cv joint on a 2000 Nissan maxima and can you do it yourself

It's a 15 amp fuse. Next, turn the steering wheel fully to the left, and while pulling the front of the disc outwards as well, tap the drive shaft inwards with a soft copper or nylon hammer. Remove the nut from the lower ball joint, Use a hammer and hit the lower control arm the get the ball joint to release from the arm. And the Brake bracket that hold the rotor on are 19mm. Again, this takes a lot of force and you need to use a socket or wrench on one side to hold the bolt while you use a socket 19mm and 17mm to take off the nut and bolt. The alternator will … need to be taken out from the bottom. Then, make … sure your fuel tank is as empty as possible.
2000 Nissan Maxima Axle Replacement: Took Car to Dealership for ...
We love when auto parts experts come to our site and we love when car parts newbies come to our site. One of them is pretty big. Then remove the bolt holding the spider gear cross shaft in place. The front left sensor is the forward most sensor, on the left bank of the engine. Can someone tell me the proper nut size? Remove the 6-7 screws and remove the metal ring. Lower the car until the tire touches the ground and finish tightening the lug nuts using a crisscross pattern. I have a friend who runs and Advance Auto, however if I purchase the part at my friend's discount price and have it sent over to the dealership they won't warranty the job.
SOLVED: How to change cv axles on 2000 nissan maxima 3.0

Now would be a good time to remove the clip retaining the hydraulic brake line to the strut to avoid stretching the brake line. There is a metal shield on the back side of the hub with a small cutout. The only time a brand new part is available today, is on a new car. Our lower operating costs translate into large savings to you. They said that both axle assemblies would have to be replaced. Remove the snapring, stick the foot of rebar or an 8-inch extension for your ratchet if you have one of those on the end of the axle and give it a good sound whack.
How do you install a right front axle on a 2000 Nissan Maxima

Take the splash guard off via 2 bolts and 2 rivits. Using the sliding weight, thrust it outward quickly while holding the transaxle. There's a rubber piece inside of the top portion of the filter where the top of the fuel pump enters the pump. Scribe a line along the steering knuckle, along the mating edge of the lower strut mount. For an auto, you may have to, but see what it looks like under there, and you'll soon know. Do this job outside due to the gas fumes, or have a fan near by.