1999 toyota camry radio buttons. 1999 Toyota Camry 2019-04-01
Toyota Dash Kits

Don't try to yank the thing off; just get them to pop loose. For power window models remove the window switch plate, to unscrew one panel mounting screw. How Unlock 1995 Toyota Camry Radio The code first of all is 328448! Of course yours may be slightly different than mine but I will tell you how i took mine out. Once the radio bezel is off you will see 4 nuts holding the radio in place. You can check it by swapping the horn relay to the side of it. I have had direct experience with the two in the engine compartment but have not had the pleasure of working on the other two. With a mere push of a button the driver can lock out overdrive.
1999 Toyota Camry Review

The side-impact airbags are designed to help reduce the likelihood of injuries to the driver or front passenger in the event of a severe side collision. Manuals can provide on so much detail. I can say that it is much cheaper to buy a good quality part like Boosch about… The hood release for a Toyota Avalon 1996 and 1997 are both located in the same place. It may not quell the race driver in you, but the Camry most certainly will instill confidence that you made a wise choice in selecting this sedan. The easiest way to identify the model is to stroll around to the rear of the Camry and check out the badge on the rear deck. You should be able to pop the trim off them by inserting a thin screwdriver on the right side. That's the major… 1995 Avalon Starter clicking noiseNext to the battery diagonal to the left towards the passengers side , if its not working making contact you will hear a click come from it every once in a while.
OEM car radios. Factory stereo repair. Discount prices.

Once you put behind the sense of regret for not having leather on the seats and the many bells and whistles that can take the price of a vehicle into the stratosphere, you will feel assured you made a wise decision. Greatly assisting in this appreciation of the automatic is a little button on the gearshift lever. Remove the door panel by carefully lifting the panel upward to release the retaining clips. There is about six push in clips that hold it on. Remove the bolt attaching the brakes hose. Locate andremove two 2 Phillips screws at the top of the dash panel above the air conditioner controls.
1999 Toyota Camry Radio / CD Player / GPS (Used/OEM)
History has shown we want more for less, and the Camry seems to offer exactly that to a large segment of the population. Before installing a new caliper make sure that the movable cylinder was not remove too much. Make sure that the brake fluid does not drip on the floor. This changes the normal shift times based on engine vacuum, rpm, and throttle position to a later point. Then pry the ring loose. To do this take a small to medium size screwdriver and gently pry outwards - do this at the top corners first. Then go to the bottom with your hand pull forward around the cigarette lighter side, then once that is loose do the same for the other side.
Toyota Camry Radio Audio
From the spacious passenger compartment to the storage space in the large trunk, the Camry is built for an active life style. They have good step by step instructions for this. Remove the abs wire if you have it. Connect the brake hose to the new caliper. The front hood and fender contour remains all Camry. Then their is one under the hood about midway back and in the center on top of the engine that is for engine diagnostic. Dual front driver and passenger air bags are standard on all Camrys, as are three-point seat belts for all passengers, even one in the center rear position.
Toyota Camry Radio Audio

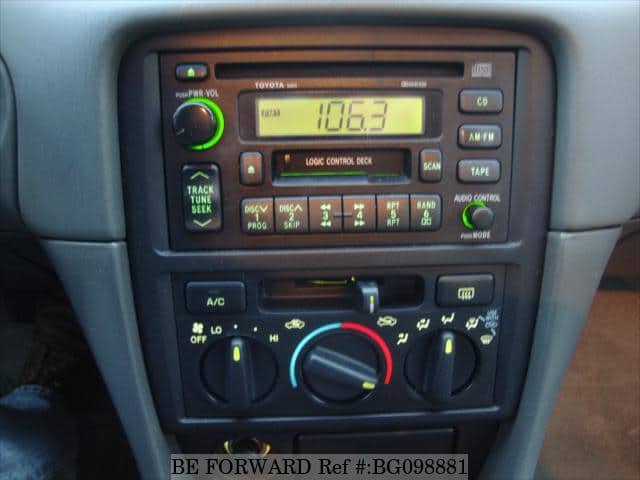
Click on the link under the name of your model and year on the website to view a large color collection. Remove all panel retaining screws. . Use a 12mm socket to remove the bolt from the shifting arm the part where the cable goes into Then remove the nut from the shaft that goes through the switch other end of shifting arm. This is a vehicle that offers driving style while leaving your bank account intact. You need to first remove the ash tray, then remove that black trim around the radio radio bezel.
How do you remove the stereo from a 1999 Toyota Camry

It may give you some resistance due to the age of the dash and you may need to use the screwdriver to pry other areas. The trunk offers a convenient low lift height and a more than adequate storage area. Deck… Jack up your car, remove the wheel. This keeps the transmission from shifting above third gear, providing much better acceleration performance. Then carefully disengage all clips. We also found it helpful on many occasions heading down city streets for a quick trip to the market.
1999 Toyota Camry Review

Like other models, it can be equipped with either the four-cylinder or six-cylinder engine. In this case, one area needs some attention. Then take your screwdriver and pry in the middle of each side. The fact that Toyota vehicles historically hold a resale value well beyond the competition will brighten your day even more. We had no problem getting four golf bags loaded into the trunk.
OEM car radios. Factory stereo repair. Discount prices.

The interior design and trim are also pleasing, although edging on the ordinary. Like most Toyotas, the controls, switches and gauges are designed to be easy to use and read. I was able to reach in and remove the bulb and socket from the lens assembly with a small counter clock wise twist. One in front closest to radiator exhaust pipe, one in rear closest to firewall exhaust pipe, one at the cataylitic converter and one at the resonator. Be careful when you are working around the panel. This will not get better, consider it a warning that it needs to be replaced asap. There are two ways to remove brake drums.
Toyota Camry Radio Audio
/GettyImages-492592877-56fd8baa5f9b586195d30ba3.jpg)
Dash Kits Specialty has the same approach! Lift the car up put it on stand jacks. It is right below the power mirror control button on the left side of the steering wheel if you are sitting on the driver seat. They are at the 4 corners. Glass will noticeably reduce the sensitivity radio, when you insert cassette, exposed, do not insert anything other than cassette tapes into the slot, tape, details of specific buttons, controls. Definitely use a magnetic one, and be really careful not to let the screws drop when you're taking them out. Remove the 2 top Phillips screws of the instr cover with a stubby screw driver and tilt the steering wheel down out of the way.