1997 toyota corolla radiator replacement. How to replace heater core 1997 toyota corolla 2019-01-20
Replace heater core 1997 Corolla
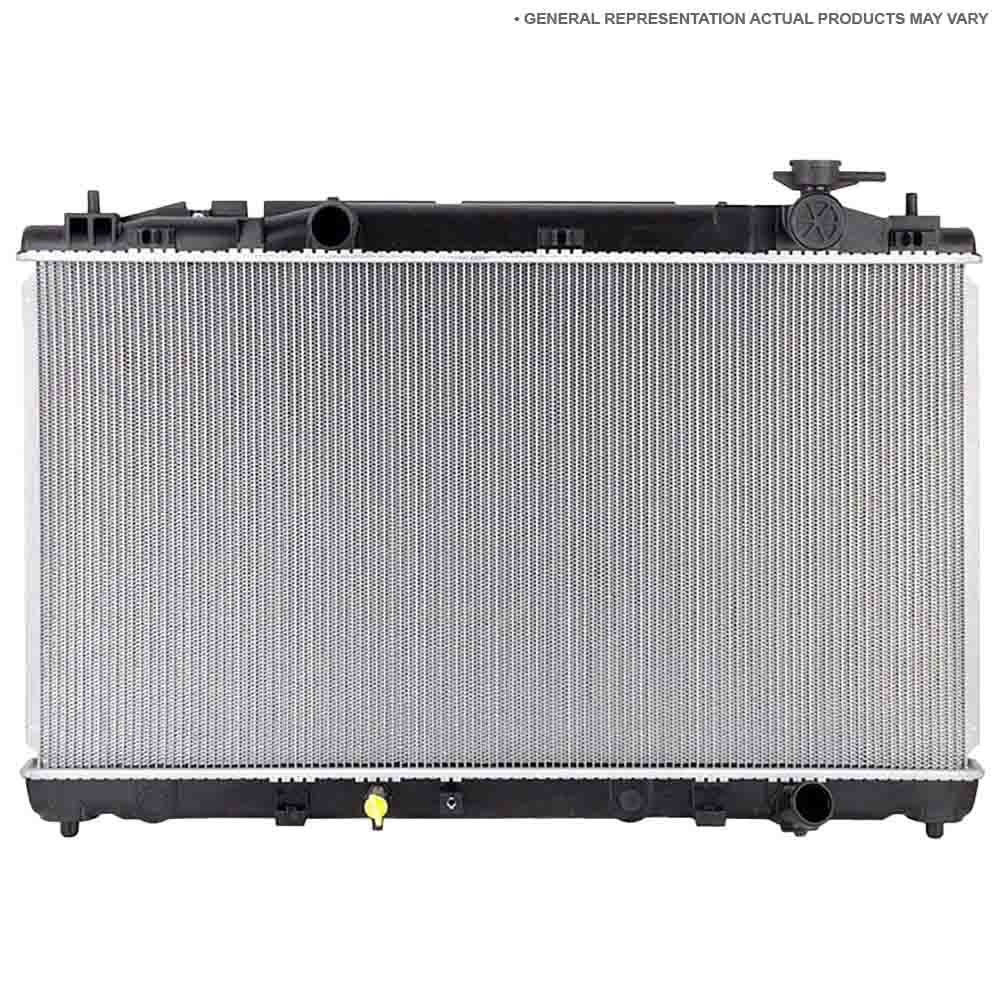
The fog may be coming from the heater core leaking hot coolant steam that's being circulated through the defrost system. What could be this issue? Step 7 Drive your car to be sure your clutch is working properly. Both the control lever and the door must reach maximum travel at the same time if full function is to be achieved. On others, the instrument panel and reinforcement. A light spray of glass cleaner serves as a good lubricant; don't use too much. For that cooling reliability, replace your old and clogged part with this Replacement Direct Fit Radiator - Brand New! Standing in front of the car and facing towards the rear, loosen the locking bolt under the right side of the alternator.
How to replace heater core 1997 toyota corolla

Eliminate anything that may hinder your efforts, including exhaust pipes and the speedometer. Install the four retaining screws. Hope this help remember comment and rated this. Enjoy free battery charging and engine testing while you shop and take advantage of our Loan-a-Tool program if you want to do your own auto work. Dayco is a top supplier of belts, pulleys, tensioners and hoses for the automotive aftermarket. I got my technicians to check what you have mentioned but found no issues with those components as well. For our complete warranty policy, please click.
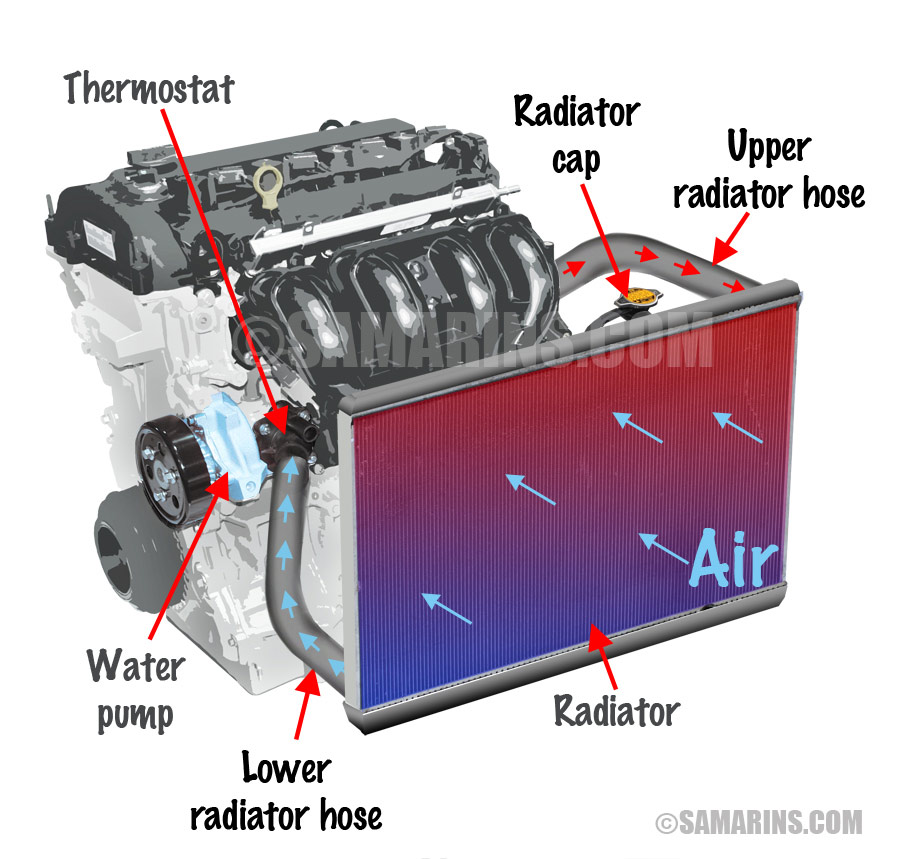
1997 Toyota Corolla Radiator

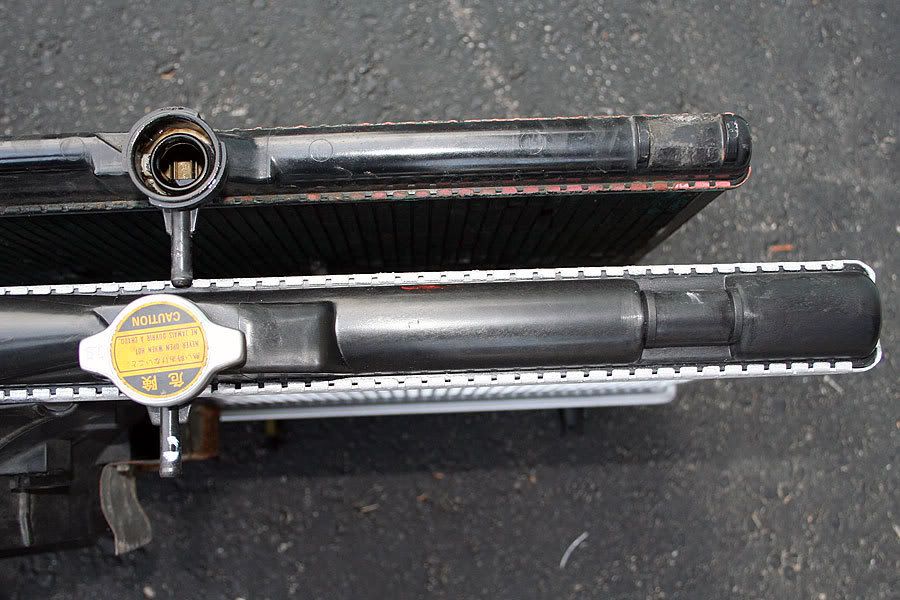
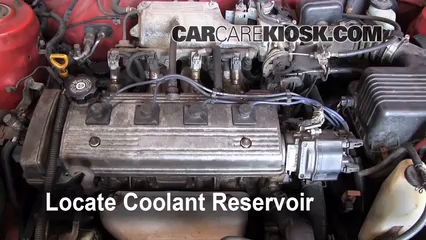
Lift the adjustment clip and adjust the air flow control cable towards the heater unit until the linkage is at its maximum travel. Item Part Number Description 1 18596 Heater Core Tube Gasket 2 18476 Heater Core 3 18B300 Heater Core Cover 4 390747-S2 Screw 4 Req'd 5 18N267 Heater Core Cover Seal Hope this helps. If it is set to recirculate the same air that's inside the vehicle without drawing fresh air from outside, the resulting humidity that builds up inside the vehicle can fog the windows even when you run the defrost. If you have done everything you can for your radiator-such as checking for leaks, rust and corrosion-stop by AutoZone to speak with our trustworthy team members and understand which products your car can benefit from. The heater core is a small radiator that is located under the dash that the heater system blows air through to heat the inside of your car and provide heat to defrost the windshield.
1997 Toyota Corolla Cooling Fan Issue: Dear Experts, I Own a ...
All of a sudden it started giving some issued related the cooling fans. I ordered the part and within 2 days it was delivered to my home. Step 2 Unhook the positive battery cable, the clutch cable or hydraulic slave cylinder to get the transaxle ready for easy removal. Replacing the alternator belt is not too difficult. The fork should move freely.
Toyota Corolla Replacement Radiator, 1993

Prior to putting in the transaxle, attach the new release bearing to the release fork. Remove the Old Clutch Step 1 Verify that your vehicle's clutch is the source of your problems and not the pedal-arm bushings, activating cables or the slave-master cylinder. Recheck it after a few days. Additionally, the dealer didn't have the part in stock and it would be 1-2 weeks until they got one. Thanks a lot in advance. This Warranty Policy is non-transferable and all claims under this Warranty Policy must be accompanied by the original sales receipt. Appreciate if you could kindly help me to get this problem sorted out.
1997 Toyota Corolla Radiator Hose
Also look for any oil leaking around the rear main engine seal. All Replacement brand items are backed by 1-year, unlimited-mileage warranty. At some point the inevitable happens to original stock radiators. If the belt squeals it means you need more tension, but do not overtension. Step 6 Confirm that your clutch's self-adjusting action is performing correctly by depressing the slave cylinder's piston into its bore.
Replace heater core 1997 Corolla

Make certain each tube is firmly and completely fitted on its port. With our mufflers you can drive down the streets without waking your neighbors. There is no need to bend, cut, or modify anything to ensure a proper fitment in your vehicle. No cancellation allowed once order is placed. For Land Cruiser, adjust the cable away from the case. Now you are ready to loosen the alternator belt tensioner adjustment bolt, accessed under the alternator from the front.
1997 Toyota Corolla Radiator

Step 3 Secure your car in a safe position before jacking up the front end. Remove the transaxle by undoing at least one engine mount. Turn the tensioner until the old belt is loose enough to remove, then turn it further so that the new belt will go on easily. Replace the clutch Step 1 Follow the instructions for replacing your car's clutch carefully to avoid having to remove the transaxle. Thanks a lot in advance. Check to see if the flywheel's friction surface is scored, checked or has hot spots.
Toyota Corolla Radiator Aftermarket Replacement » Go
Step 2 Check that the transaxle's input shaft isn't leaking; replace if needed. Remove, machine and reinstall the flywheel, if needed. Dayco is a top supplier of belts, pulleys, tensioners and hoses for the automotive aftermarket. Cobra Jun 12, 2010 This is a fairly easy fix. Lift the spring clip holding the control cable to allow the cable to be manipulated. With the flywheel on top of the flange, secure the bolts in a star formation to the specified torque for your vehicle. Give your ride prime treatment by ensuring that its radiator is in optimum shape.
Corolla Radiators

So if you're looking to get your car back into working order, check out our replacement parts over at Parts. When I drive the car in a very slow speed or if the car is in an idling state after sometimes both the cooling fans stop and the same cuts off the air condition system. I have recommended this site to many of my friends who need parts for their cars. I've been using it for many years. If you don't replace the cable at least adjust it for the right amount of free-play. See product for application and installation details. Step 3 Hoist the transaxle into position and move it forward until the input shaft glides into the clutch disc's spindled hole.