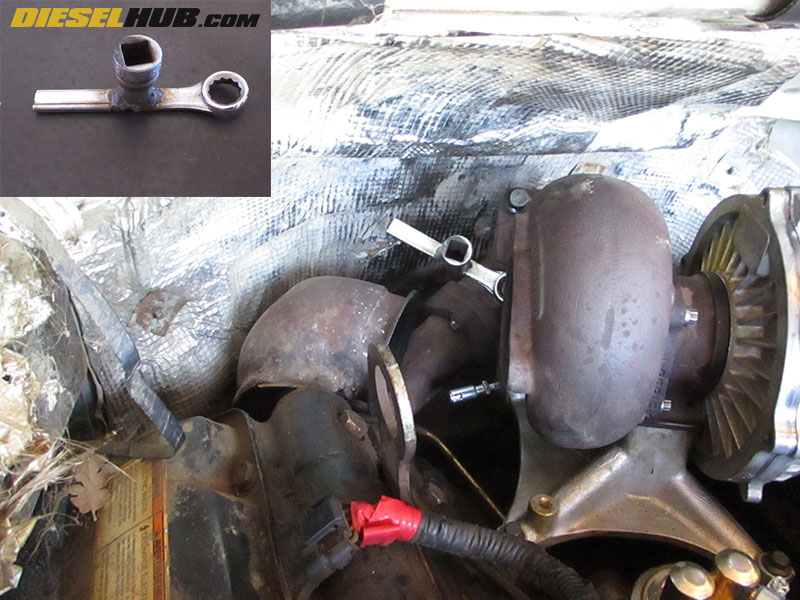
1996 7.3 turbo removal. 1994 2019-02-22
Welcome to Pocket's International UP
Be careful the plugs can strip out easly. The stainless steel gasket can be assembled facing either direction. Install the fuel pump tappet in the base of the fuel pump. And if you happen to forget the tricks and tips you taught yourself the first time, the procedures below will walk you through it. The problem is that there is no oil pan gasket, only sealer. Step-5: Remove Battery Hold-Downs Use an 8-mm socket to remove the battery hold-down bolts. To make it easier remove the under valve cover harness.
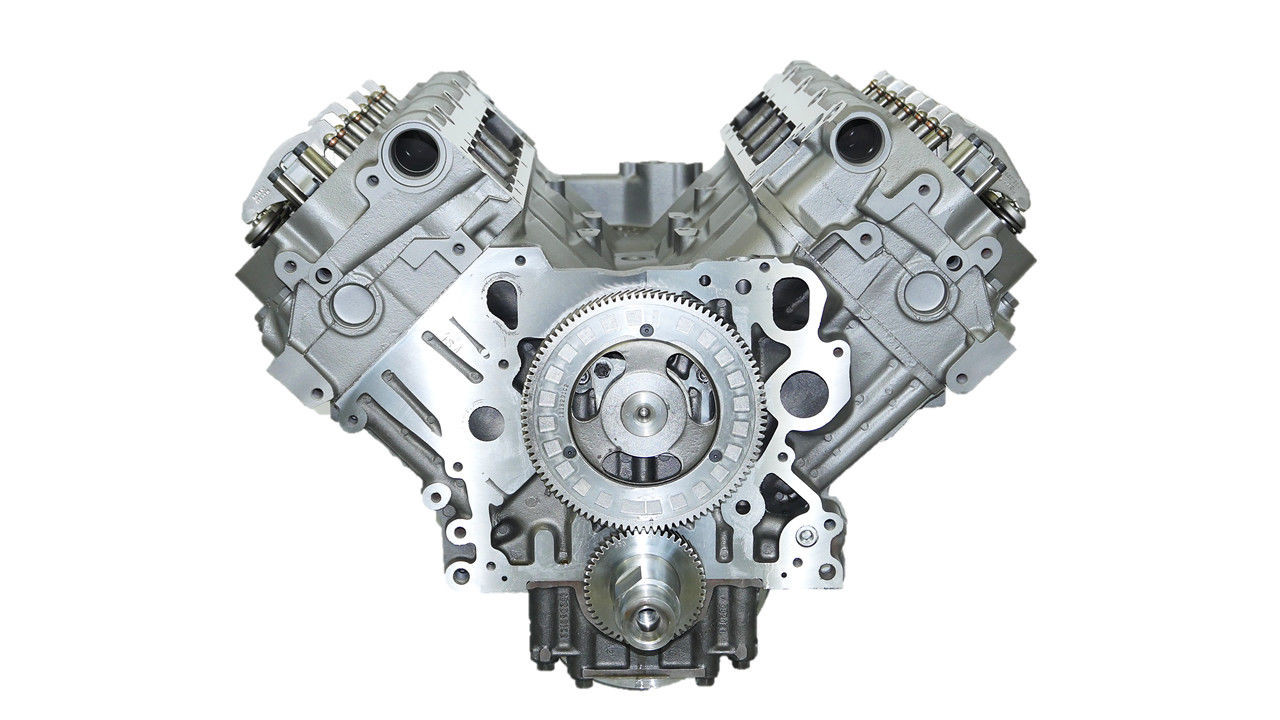
Ford Power Stroke 7.3L Engine Removal and Disassembly

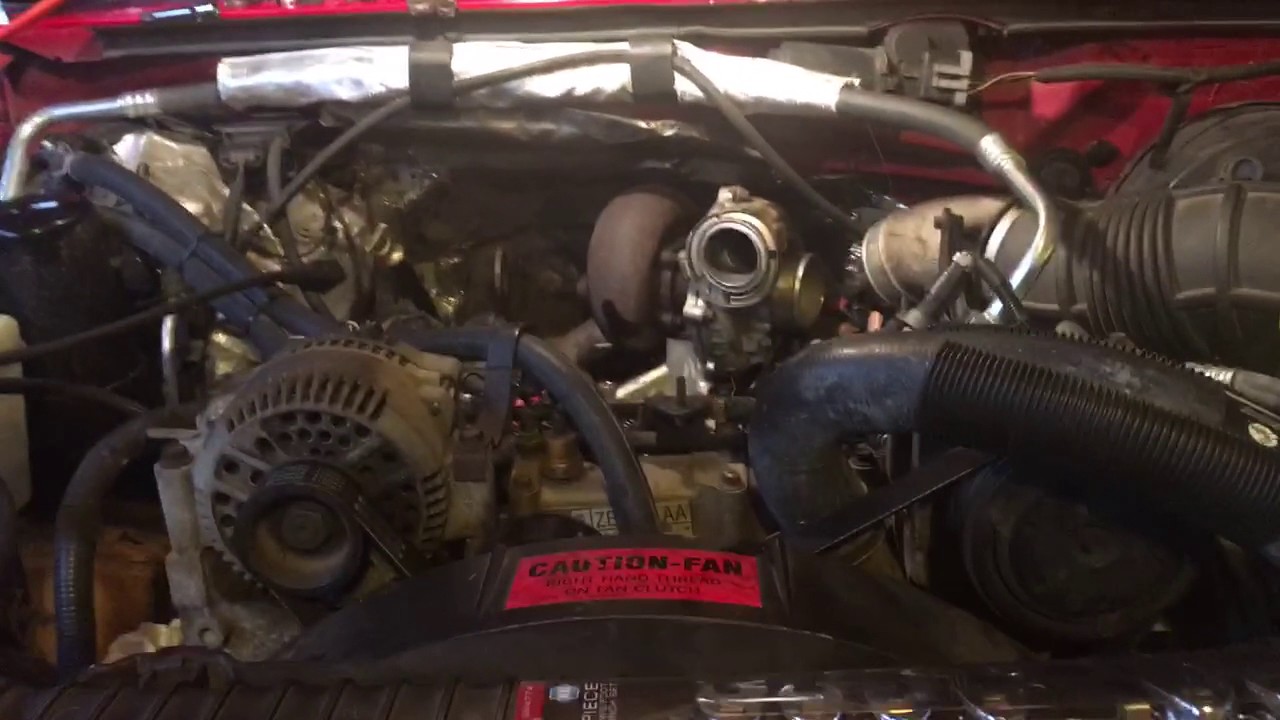
Begin Disassembly Step-1: Remove Lower Pipe Plugs Once the engine is removed and still on the engine hoist, remove the pipe plugs in the lower portion of the block to drain the antifreeze. If this is the case, you will need to purchase a new Ford style cap if you intend on installing a genuine Ford fuel filter. Step-9: Disconnect and Remove Alternator With the radiator removed, more engine components are exposed. Step-18: Remove Bracket Bolts Use a 13-mm socket to remove the bolts that hold the driver-side engine bracket to the engine. Only the 49-state fuel pump is shown. Use a set of machinist stamps and stamp the rod and cap as it faces the oil pan rail of that cylinder. Step-2: Remove Return Pipe Remove the heater core coolant return pipe from the top of the water pump.
EBPV Delete Kit

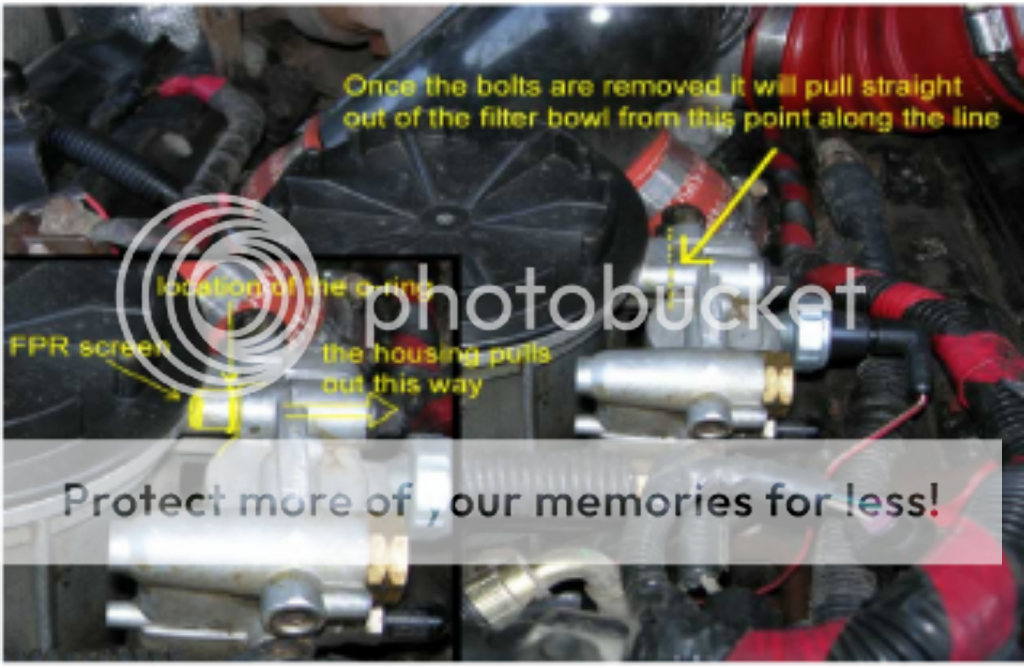
Step-6: Remove Rubber Hose Remove the rubber hose at the bottom of the fuel filter basket that connects the water separation drain to the metal tube. Using a 15-mm socket, turn the bolt in the pulley as though you were tightening it. Internal or external fuel leaks. Now this is a very very important step!!!! Note that the truck featured herein is a 1994. Step-4: Remove Exhaust Manifold Using an impact gun and a 13-mm socket, remove the exhaust manifold from the passenger-side cylinder head. Refer to the image for bolt locations. Written by Bob McDonald and Republished with Permission of CarTech Inc.
Welcome to Pocket's International UP
Disconnect the fuel line fittings at the rear of the cylinder heads. Don't forget to use the stainless steel gasket here. I have a 2001 F-250, 7. Do yourself a favor and set aside plenty of time to finish the job. The easiest is to removed it completely with this kit and never have the problem again. Step-10: Remove Intake Manifold At this time, you can remove the intake manifold from the driver-side cylinder head. Step-2: Place Engine on Stand Save Money These engines weigh approximately 1,000 pounds.
PAIN
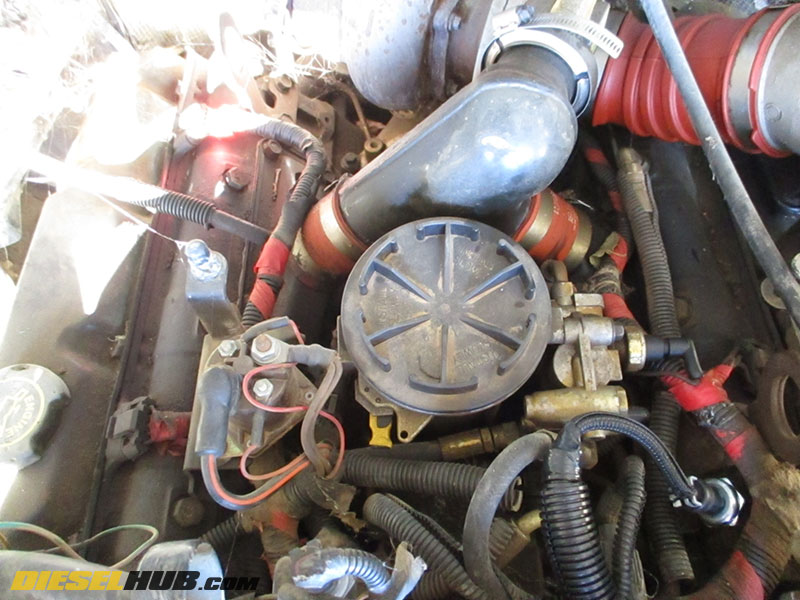
No need to overtighten, you can generally install it hand tight then give it a slight snug with a screwdriver to secure it. Step-7: Inspect Exhaust and Intake Valves Important! Step-10: Remove Crankcase Breather Take a Phillips screwdriver and remove the screws that attach the engine crankcase breather to the valve cover. Unplug the wire off the old sensor. Step-5: Remove Fuel Supply Hoses Loosen the clamps of the rubber fuel supply hose at the fuel pump and rubber fuel return hose at the regulator attached to the fuel filter basket and remove the hoses. You'll see on several pictures where I was very liberal with the penetrating lube, even on exhaust bolts I didn't need to remove. Start engine and thoroughly check for fuel leaks. I just replaced mine in my 96 350.
1994

Step-6: Remove Cylinder Head Bolts Using a 15-mm socket and an impact gun, remove the cylinder head bolts. Be careful not to hit the piston oilers that are placed in the bottom of the bores. The threaded tip of the bolt must be above the bottom of the pedestal or they will catch during installation. If desired, lightly coat them with high temperature anti-seize so that they will be less difficult remove in the future. Locate the Schrader valve along the fuel line.
1994
Step-3: Loosen Belt This is a view from the top of the radiator with the rachet and socket in position to loosen the belt. It is a tight squeeze on some trucks. He performs a classic 7. It is in the center of the throttle body. Install a new fuel filter and gasket coat gasket in clean engine oil before installation. Any shade-tree mechanic can do this, but it does require patience.
1994
If you don't all the oil and fuel in the head will go into the cyl bore when the injector is removed causing a hydro-lock condition. The only major issue in the engine removal of these year models is the radiator support. Note the bolts have not been tightened. Once the bracket is off you can pull the stud and remove the ground cable. The cyl head has oil and fuel in them. Tighten down all hose clamps.
Welcome to Pocket's International UP
And this boosted the 7. Step-4: Drain Antifreeze Professional Mechanic Tip Drain the antifreeze. Install the fuel line banjo fitting at the fuel pump. But little did Ford engineers know that hidden in the details of the horsepower, torque, and displacement numbers, they'd created the heart of a legendary beast of a motor. These bolts are very easy to strip.
How Do You Remove Mechanical Fuel Pump From a 7.3 L Turbo Diesel ...
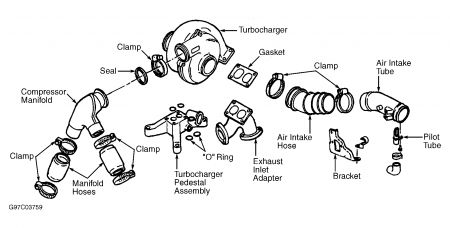
It is a complicated procedure and should only be performed by trained proffesionals. For additional information, refer to Turbocharger Intake Tube in this section. Another option is to simply cut the bolts. The following procedures are applicable to 1994. Remove the sensor using a 10-mm socket.